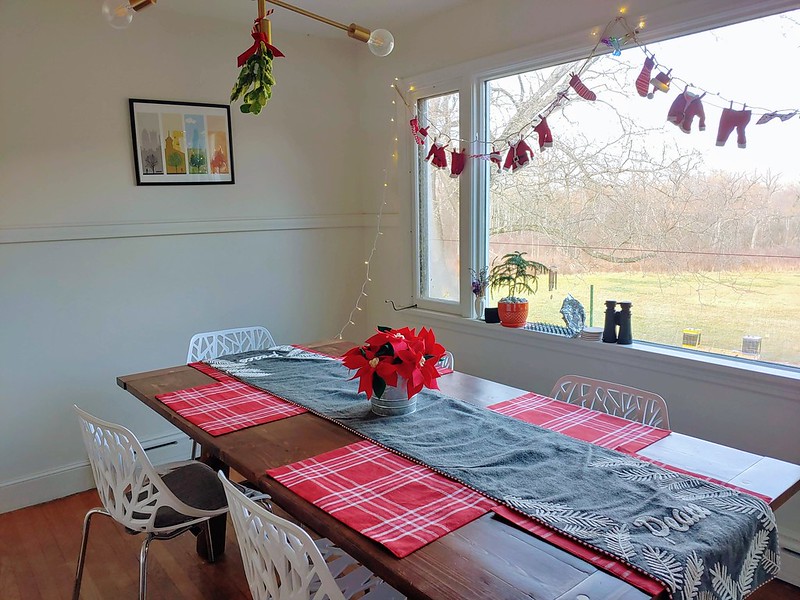
After viewing
these pretty pink felt poinsettias from Lia Griffith, I decided I'd try my hand at a few to make a centerpiece for the dining table. After maaany experiments, I have a whole bucket of poisettias, and the art of poinsettia-making down to a science. I've made about 15 in the past week, in varying shades of white, red, and pink to adorn dog collars, gifts, and holiday trees. This is the best technique I've found.

I've
made felt flowers on the blog before, who knows why I attempted a hot glue version. It just never comes out as well as hand-sewn, at least not for felt!
- Supplies include three colors of felt (petals + leaves + pistil), a bit of ~18 gauge craft wire, scissors, a marker, and needle & thread. And the pieces pattern, too.


- Trace and cut the required number of pieces, according to the pattern. I try to reduce tracing by only outlining the tips and a dot for each side.
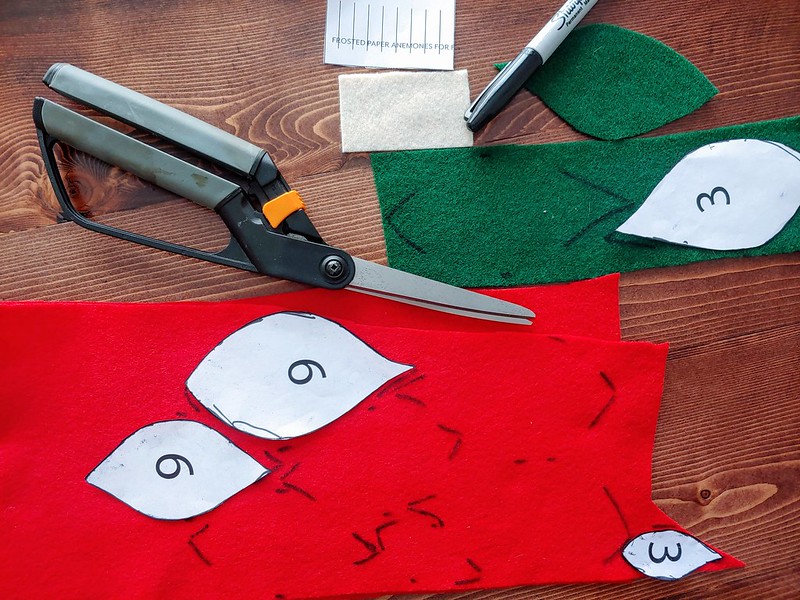

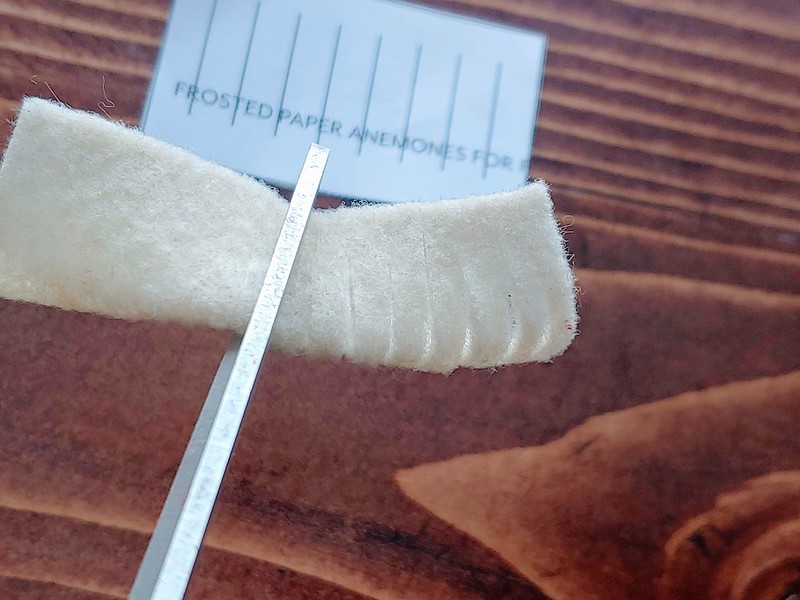
- To make the pistil, fold the pistil rectangle in half, and make many cuts along the fold, as in the photo:
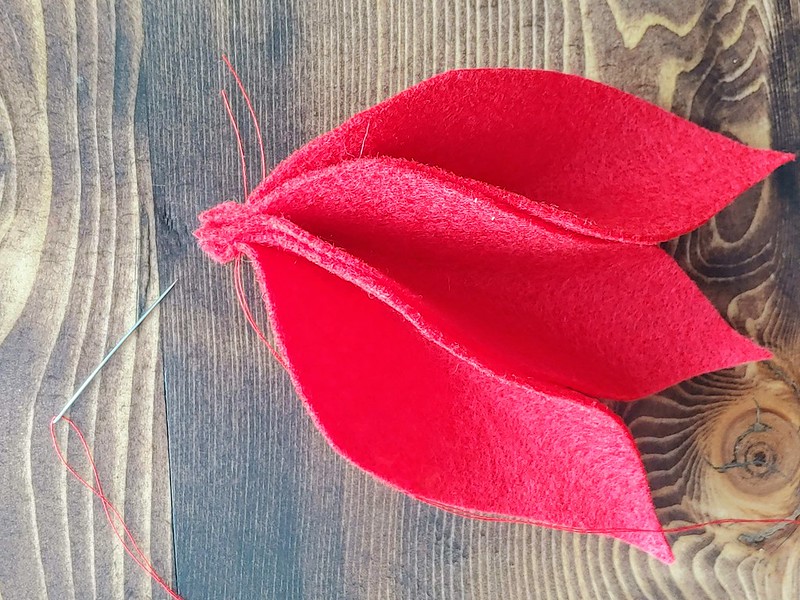
- Select three large petal pieces.

- Fold them in half length-wise, aligning by the least-pointy points.

- Stitch through least pointy points 3 times, to secure the folded shape.
- Repeat steps 4-6 for the remaining 3 large petals, having least pointy-points facing inwards. Do not cut thread in-between.


- Sew in a circle around the center of the flower to help the petals spread out a little more. Secure thread with a double-locking stitch.
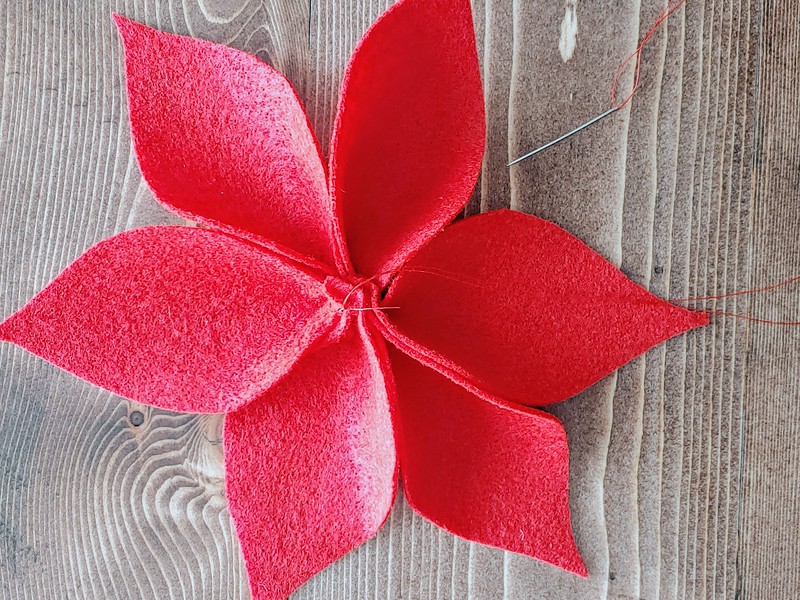
- Repeat steps 4-8 for the 6 medium-sized petal pieces, do not cut thread in-between!


You could consider skipping the 3 small petals, and just adding the pistil at this stage!
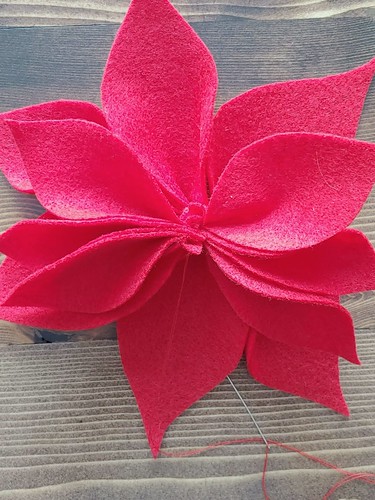
- The 3 small petals are attached in a similar manner as the previous two rounds, but as there's only 3, we arrange them slightly differently, with two in one direction, and one in the opposite direction.

- Repeat steps 6-8 for these newly-arranged small petals. Secure with a double-locking stitch (perhaps even going through the center of the flower to secure all layers together). Do NOT trim thread!

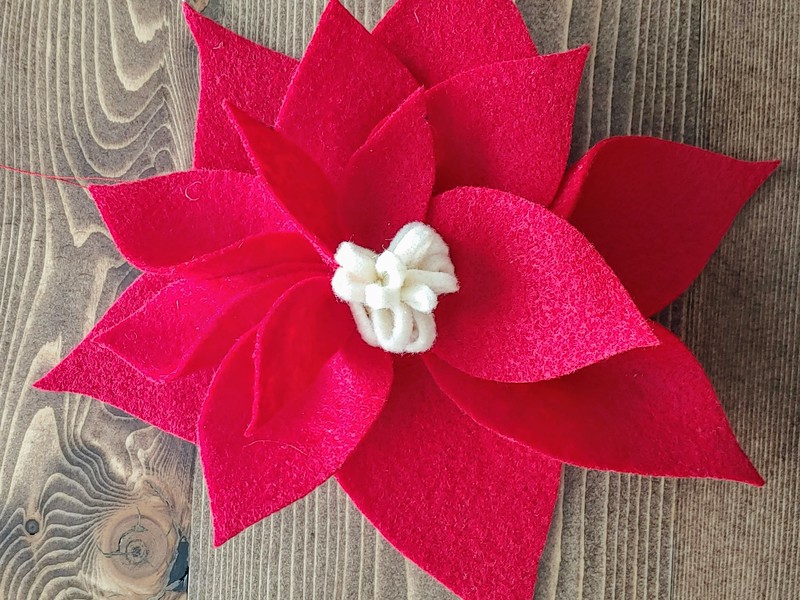
- The pistil is made by folding in half length-wise, and then rolling, keeping the un-folded edges aligned.


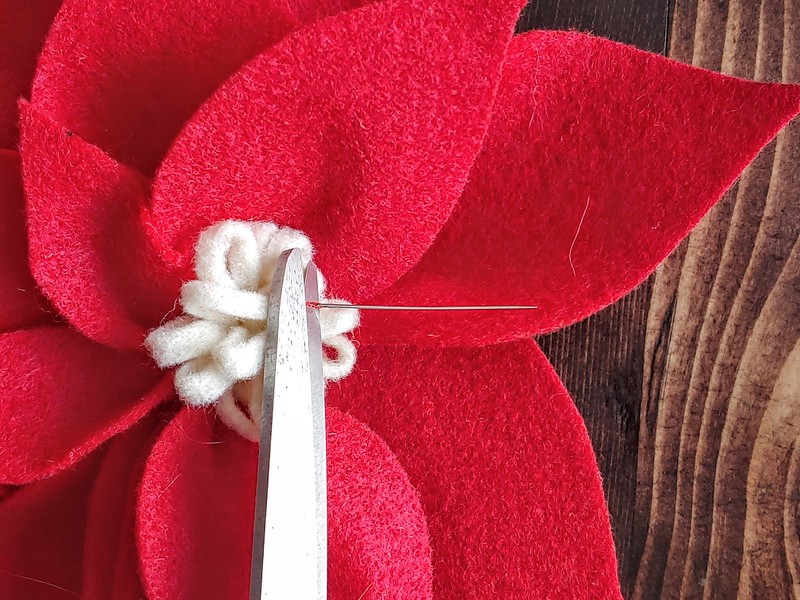
- Stitch through from one side of pistil to the other several times and then secure to center of the flower. Stitch through top to bottom layers, ensure that all edges of the pistil are secured to the flower. Secure with a locking stitch, do NOT trim the thread.
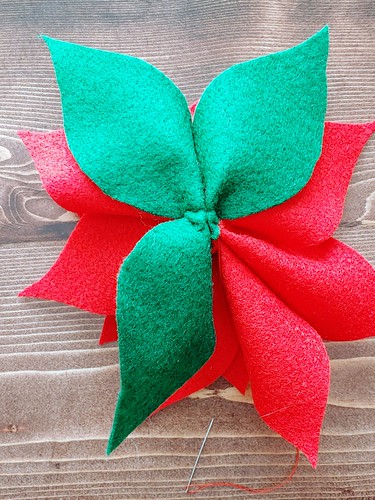
- Leaves are arranged similarly to the small petals layer, but attached to the bottom of the flower, rather than the top. Some additional stitches are necessary to secure the leaves to the flower.

- At this stage, we need to prepare the wire fastener: either a stem with a loop at the end, or just a loop/circle/ring to fasten to objects. Shown is the stem. (It's a good idea to bend the pointy ends so no one gets hurt!).

- Thread two of the leaves through the loop. Secure wire loop with several stitches.


- Sew through center of flower, top to bottom several times. Secure thread with a few double-locking stitches. Finally, push needle up through flower center and cut the thread.
- Poinsettia with stem completed!


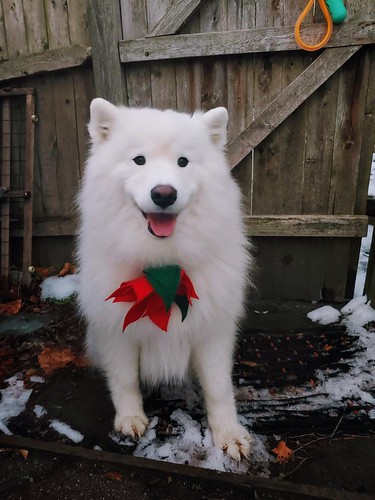
- I use the non-stem version with just a single ring to fasten the flower to dog collars (ignore dog fur all over this!). Can be secured to the collar with a paperclip, or a bit of prepared wire.

Dogs will generally tolerate the flower on their collar, so long as it's fastened closely and doesn't droop too much. Smaller dogs require smaller flowers!


I've made smaller versions of these flowers that come out well for smaller fur-beasts, dropping the larger layer of petals and adding an additional 3 small petals. I reduce the number of leaves to 2, and cut them using the medium-petal pattern. Everything else is pretty much the same.


0 comments:
Post a Comment