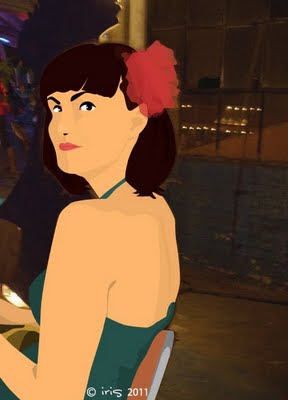
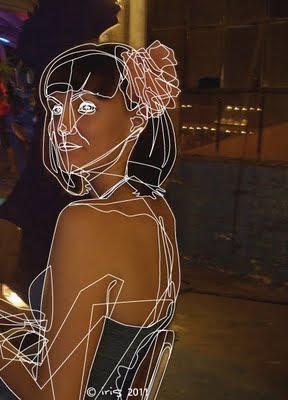
Here's the continuation of the previous photo tracing tutorial with Adobe Illustrator! But now we're making illustrations of people! 'Finally getting to the good stuff. Alternatively, you could follow the tutorial that I learned with years ago, here. My first attempt at this took 6 hours. Now, it takes about one hour per face. So, if you're frustrated in the beginning, that's totally normal!
Before following this tutorial, you really need to be familiar with the concepts in my previous tutorial on tracing objects. The specific skills this tutorial assumes you have are: raster vs vector graphics, the concept of layers, creating new documents, locking layers, creating new layers, hiding layers, using the pen tool, choosing fill colors, and adjusting fill transparency. If this tutorial doesn't explain something well enough, please check the object tracing tutorial first! Otherwise, I'm more than happy to answer questions :)
As usual, I'll be using an ancient copy of Adobe Illustrator 10 (circa 2003) in order to do this. Basically, any copy of Illustrator should be able to handle this approach.
Tutorial for Tracing Photos of Objects with Adobe Illustrator
Step 1: Open up Adobe Illustrator and create a new document (Ctrl+N) approximately 15x15 inchesStep 2: Assure you have the following 'Windows' open: Color, Layers, Swatches, Tools, and Transparency
On the menu bar, make sure you have these handy 'Windows' open: Color, Layers, Swatches, Tools, and Transparency. As you do more intricate work, you may need other windows like Stroke, Appearance, Transform, and Align.
Step 3: Select an image to trace
Since we're doing faces in this tutorial, select a photo with a person in it. It needs to be a decent enough resolution so that you're able to trace over all the facial features.
Step 4: Copy/Paste image to Illustrator document
Copy and paste the image to the Illustrator document you created previously.
Step 5: Lock the image layer
In the 'Layers' toolbox, click the empty checkbox to the right of the eye-icon. A lock should appear. This means that the photo layer has been locked in place, and will not move until you unlock it.
Step 6: Create a new layer on top
Again, in the 'Layers' window, create a new, blank layer. You should click the little page-icon on the bottom of the Layers window. This is the layer you will draw on.
Your Illustrator space should look a little like the image below, where I've also pointed out some useful tools/windows we'll be using (click the image to see it larger):
Step 7: Trace the foundational 'large' parts of the face, using the pen tool
On the face, I like to start with the "background" parts first. This includes: the 'background' hair, the neck, the chin's shadow on the neck, the face, the half-shaded face, 'foreground' hair (bangs, etc), and eyebrows. Usually, in that order, otherwise, you'll need to get accustomed to rearranging the shapes you draw, like layers (see Object > Arrange > Bring Forward/Backward on the menu at the top). Our image will look something like this:
Step 8: Trace details of the 'large' parts you just drew
Using the pen tool, trace details of the face and hair that you just drew. This is usually just streaks in the hair, ear crevices, etc. You should have something like this:
Step 9: Trace the nose using the pen tool
Note: If at any time it gets difficult to see the photo detail, feel free to hide the busy layer, create a new layer, and work on that one. You'll just have to integrate all your layers as you go along, to make sure they are arranged in the correct order.
Now it's time to trace the nose. The nose usually extends up into the forehead, and has to be hidden by some foreground hair or bangs. The nose also [often] includes two nostrils (can go under or over the nose), philtrum (under the nose), and a bit of transparent white shine on the tip of the nose. Here's a close-up of our multi-piece nose:
Step 10: Trace the lips using the pen tool
A closed mouth smile, such as the one in our example photo usually requires the following parts: lip foundation (i.e., trace the outer lines of the mouth), lip half-shading, and lip line.
Our example photo isn't showing any teeth. If it were, you would need the following parts: lip foundation, lip half-shading, mouth interior, lower teeth, lower gums (if showing), upper teeth, and and upper gums (if showing).
The closed mouth smile tracing should look something like this:
Step 11: Trace the eyes using the pen tool
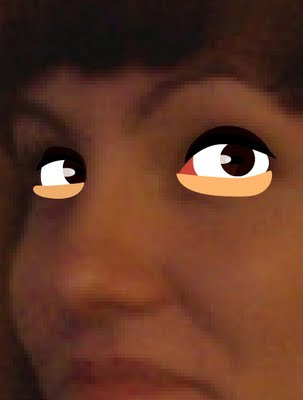
This is the most complicated and my least favorite part of tracing faces! But here we go, a list of the parts involved in the eye: (1) the pink corner of the eye, (2) the white cornea, (3) colored background of the person, (4) transparent foreground of the person, (5) black pupil, (6) semi-transparent white shine of the pupil, (7) lower and upper eyelids, and (8) upper eyelashes. It usually ends up looking something like this:
Step 12: Fill in the colors for objects
Now is time for the fun stuff! Using the 'Color' window, adjust the stroke and fill color of each object you drew. Set the 'Stroke' (the square on the lower right of the Color window) to 'Transparent' (the white box with red slanted line) and set the 'Fill Color' (the square on the upper leftof the Color window) to be whatever might closely match the actual shading of the photo you traced. I always start with the eyes first. They're the easiest to mess up!
If you find you need to adjust a shape you drew, the 'Direct Selection Tool' (the white arrow on the Toolbar) is the best tool for adjusting points. The black arrow ('Selection Tool') is for moving the location of the entire shape.
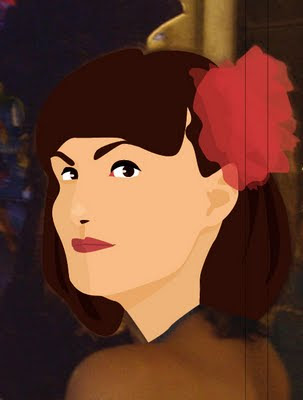
Step 13: Determine if your face is missing anything, and trace those pieces, adding color
Note: This step can really be done at any time.
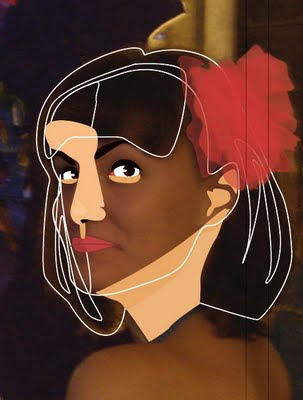
I almost always forget to draw in some additional shadowing behind the eyes and nose. This would be a good time to add that.
Since you've obstructed your view of the photo making it difficult/impossible to trace, set the busy layer to be 'hidden', create a new layer, and work on that one. Integrate that layer with the busy one (via copy/paste) when you've finished tracing and adjusting the fill color. Make sure the new object is in the correct position of the stack of layers (this can be adjusted with Object > Arrange > Bring Forward/Backward).
Here's the finished face with some new shadowing around the eye socket, and a smile crease:
Step 14: Trace and color the rest of the photo as desired
Once the face is done, you've gotten through the tough part. Now you just have to trace (using the pen tool) and adjust fill colors of other objects in the photo, until you're satisfied.
Step 15: Set the photo layer to 'Hidden'
Hide the layer that contains the photo you traced, and you're done!
Done!
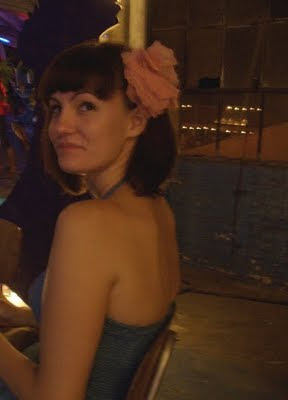
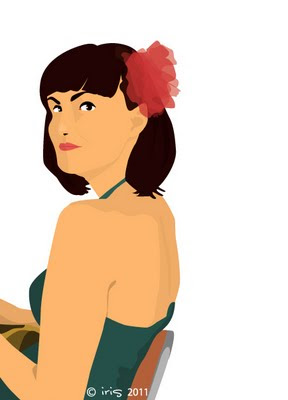


that is so nifty!
ReplyDeleteThis is so cute! I can totally see this up on a wall somewhere. Ok, I have to give it a try. Thanks so much for a well thought out tutorial! I will have to let you know how the results are :)
ReplyDeleteOo thats cooo !! ^^
ReplyDeleteI LOVE computer illustrations! It looks so difficult though! Maybe someday I'll be brave and try it.
ReplyDeleteSo cool! Definitely going to try this sometime. Thanks for the tips!
ReplyDeletethis is such an awesome tutorial. i'm saving this for future projects. thank you.
ReplyDeleteCheers! I'm now following you on google!
Reese
http://rambleswithreese.etsy.com
http://rambleswithreese.blogspot.com
Found this tutorial on Pinterest. I'm excited to try it out! Thanks for sharing.
ReplyDelete