Quilt spam.
Greetings! I hope this email finds you well. I am Sgt. Nancy Mayor on Active Duty in Yemen and I have a quilt proposal which I think will be beneficial to you, moreover it is safe. If quilts interest you, I would be pleased to give you more briefings on the issue. My identification will be sent in due course. Thank you. Regards, Sgt. Nancy Mayor |
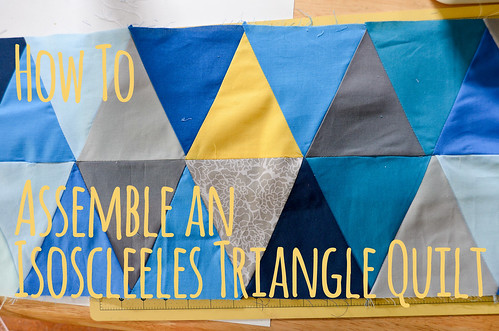
Alright. If you missed Step One, we're making a low fuss isosceles triangle quilt to complement the mother of all hexagon quilts. I generally followed the directions from Happy Together Creates (for cutting) and Mommy By Day Crafter By Night (for assembly).
This is the second half of Step 1:: Assembling an Isosceles Triangle Quilt Top: Sewing Together the Quilt Top.
Step 1:
You'll need: Pins, a sewing machine, thread, and cut fabric isosceles triangles.
The previous step describes a little better just how many triangles you'll need, according to your desired quilt size, but here's an overview:
| # Triangles | Final Size |
| 187 | 60" l X 42" w |
| 646 | 101" l X 94" w |
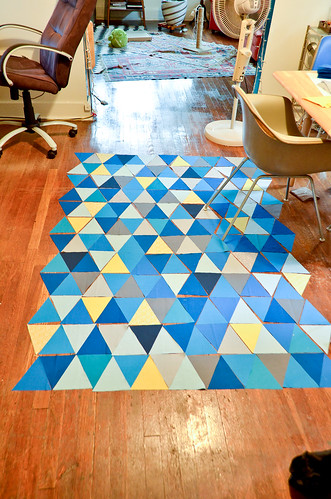
Step 2: Arrange Triangles Aesthetically
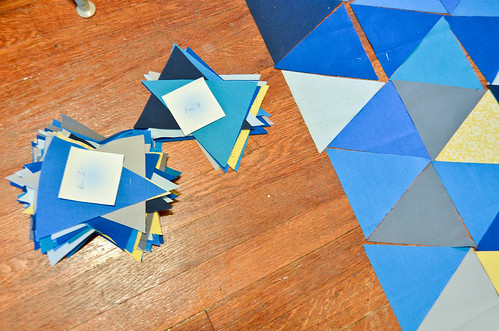
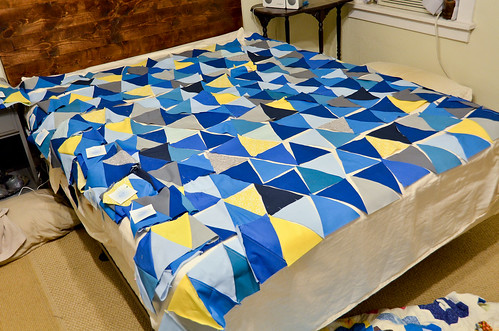
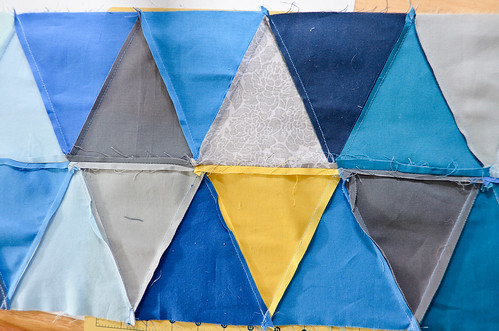
Arrange the triangles in a way that is pleasing. No real technique here.
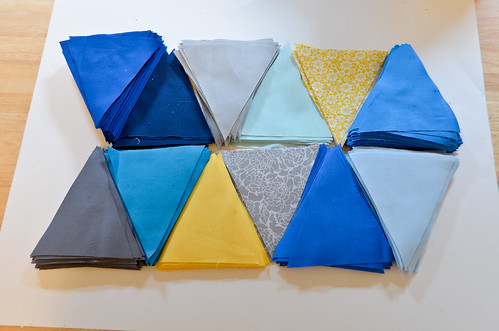
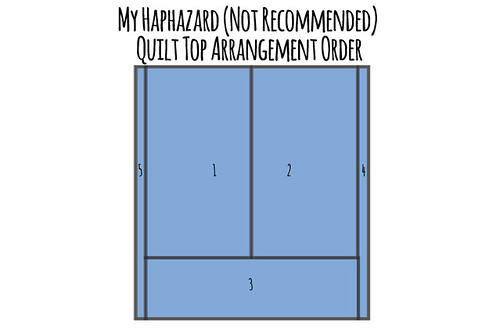
This photo shows about 1/4 of all the triangles I cut. There were so many, I arranged my quilt about 1/4 at a time. In order to get an even color distribution, I counted how many of each color triangle I had, then used a quarter of each color I had when doing my arrangements. I'd assemble this quarter of the quilt, and then place the loose rows back on the floor, and arrange more loose triangles around the sewn bits. I did it sort of haphazardly, which you don't have to do, but it seems to have worked out alright.
Note: It is far easier to add rows to the quilt after sewing the rows together, than to add triangles on the sides. So, be sure your quilt rows are exactly as wide as you want them, before sewing rows together!
Step 3: Collect Triangles Row By Row
Pick up each triangle row-by-row. Label each row pile with a post-it so you can keep it all in order.
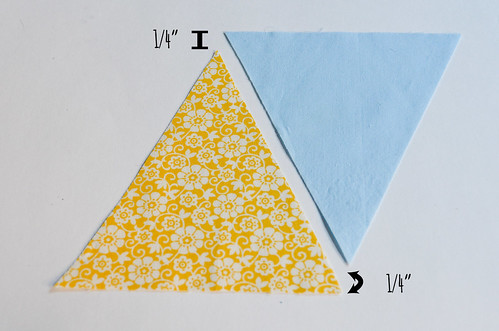
Step 4: Pick Up First 2 Triangles
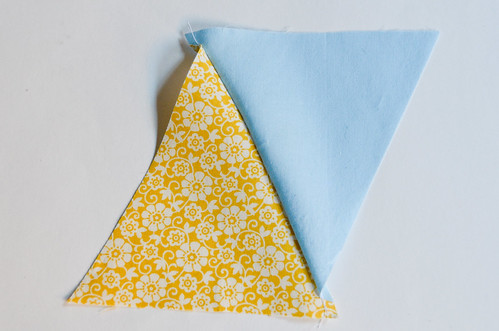
Pick up your first two triangles (my actual first one is the yellow one) and orient them in this way, or whatever way is necessary for your first row. Notice how we've offset them a scant 1/4" so that the triangle points are overlapped by the bases.
We need this offset so that when we sew the rows together, we're not chopping the points off the triangles with our seams.
Step 5: Place Triangles Right Sides Together
Place the two triangles right sides together, with the long edge touching and slightly offset, as shown.
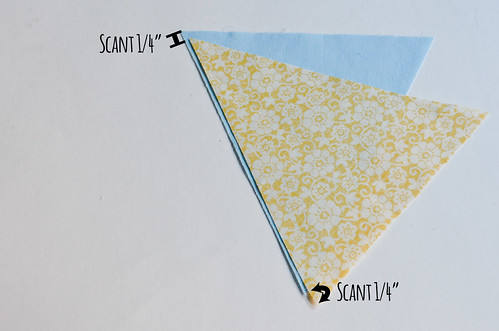
This image and the previous one are the reason why I redid this entire tutorial. I could not find a clear photo of what people were talking about when mentioning "offsetting the triangles by 1/4in". To the best of my knowledge, this is what they intended.
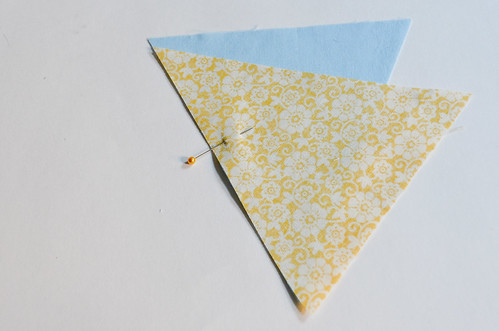
Step 6: Use a Pin to Hold Triangles Together
Use a pin or two to hold the triangles together along the edge you're going to sew. If you don't, they'll shift while you sew and you'll end up with some ever-so-slightly wonky rows.
Step 7: Sew the Long, Pinned Edge
Step 8: Iron Newly Sewn Triangles
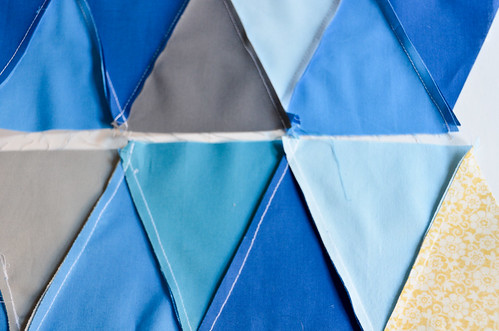
I like to iron newly attached triangles as I go. Th seams on each row should be ironed in the same direction. But each row should be ironed in the opposite direction as the row before it, as shown.
Step 9: Keep Attaching Triangles
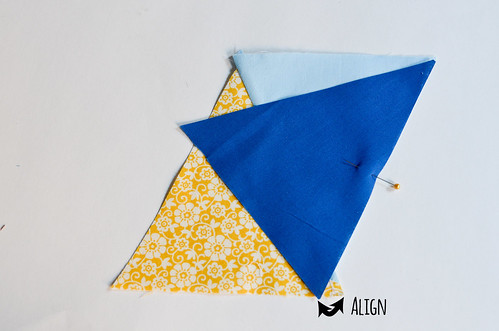
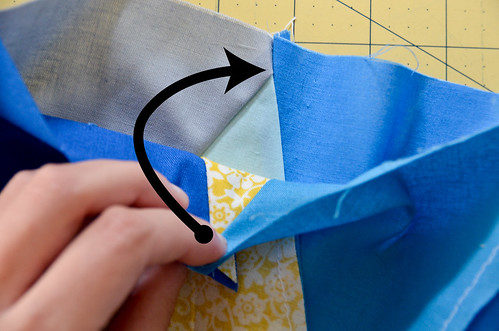
Pick up the next triangle off of your pile and repeat Steps 4-8 to attach it to the previous triangle.
Try to align the base corners as shown in the above photo. (Note that the light blue "point" is offset short, while the yellow and dark blue base corners are aligned).
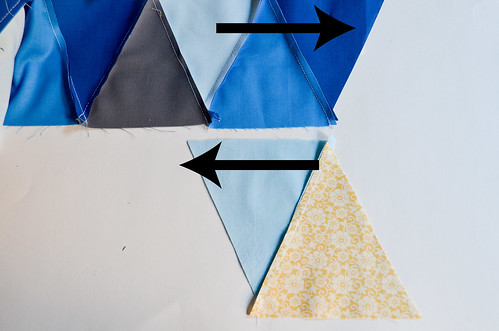
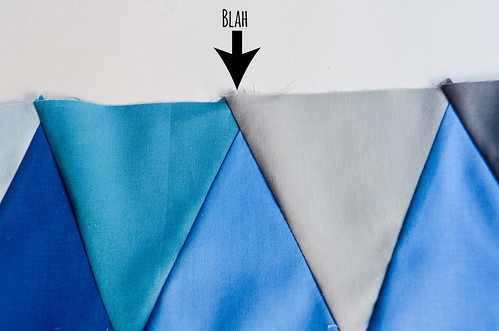
Step 10: Check the Point Offsets
As you attach triangles to each other, you should be checking the offset of the triangle points. You want it to be about 1/4". The photo is pointing to a triangle with a much larger offset.
This is easy enough to fix, you just get out your seam ripper, realign the triangles, and sew again. Sometimes, you need to do this twice, on either side of the offending triangle.
Step 11: Repeat for All Rows
Repeat Steps 4-10 for all rows.
Step 12: Layout Some More Triangles
If you're making a larger quilt, now is the time to check the width of your rows, and to layout some additional triangles for each row until it's wide enough.
It's much easier to add triangles to the width now, than later.
You're basically just following Steps 2-11 over again.
Step 13: Lay Your First & Second Row Right Sides Facing
Lay your first and second rows on top of each other, right sides facing. Make sure that each point lines up with the point on the previous row.
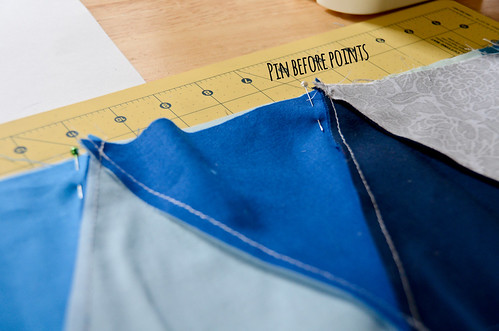
Step 14: Pin Rows Together Right Before Points
Before every triangle point, I like to place a pin so that the rows don't shift where it matters most. This ensures that the points stay as lined up as possible.
Step 15: Iron Row Seams
If you have a neater, more accurate quilt, you can iron the row seams open as in the photo below.
However, I was a bit sloppy and for the rest of the quilt just ironed the row seams upwards.
Step 16: Keep Attaching Rows To Each Other
Repeat Steps 13-15 to attach all the rows together.

Step 17: Completed [Imperfect] Isosceles Triangle Quilt Top
There's some gathers in this quilt to keep the triangles somewhat starting/stopping at the same points. Some triangles aren't aligned. Some points are cut off. Most points don't touch the rows.
BUT. It's not really noticeable when you look at it as a whole.
![Step 17: Completed [Imperfect] Isosceles Triangle Quilt Top](http://farm3.staticflickr.com/2834/10092795795_d84914cec7.jpg)
How To: Cut Isosceles Triangles Without Templates10/13/2013- How To: Assemble an Isosceles Triangle Quilt Top 10/16/2013
- Step 1: Isosceles Triangle Quilt Top Completed 10/18/13
- TARDIS Applique 10/27/13
- Coordinating Pillowcases for the Isosceles Triangle Quilt 11/6/13
- Step 2: Isosceles Triangle Quilt Backing Assembly 3/18/15
- Step 3: Isosceles Triangle Quilt Sandwich-ing 4/1/15
- Attaching the TARDIS Applique 4/8/15
- Step 4: Machine Quilting the Isosceles Triangle Quilt 4/15/15
- How To: Continuous Double Bias Binding Strips 4/22/15
- Step 5: Binding the Isosceles Triangle Quilt 4/29/15
- A Review of the Isosceles Triangle Quilt 5/6/15
Thanks so much for this tutorial. It is definitely the one that has made the most sense to me! I am trying my first quilt and of course decided to do a tricky isosceles triangular one. Thanks to your tute I should make it through!! :D
ReplyDeleteI am working on my first triangle quilt and so far this one makes the most sense! Do you ever trim the rows before sewing them together? Some of my offsets are pretty bad *sigh* and I wonder if I would be better off trimming before I sew the rows together?
ReplyDeleteThank you for your excellent explanation of the offset! I am a quarter if the way through my first triangle quilt and have been struggling to get the points to match up. I finally decided to do some web research on the matter and am very grateful to you for this post! You have saved my quilt.
ReplyDelete