Monday, August 11, 2008

I had difficulty finding a tutorial for making pillows with welt cording, so when I made mine I snapped a few photos. This project is probably best for advanced beginner sewers and beyond.
What is Welting?
Welting is a sort of cord that is sewn into upholstered couches. In this tutorial I use a premade cord-welting that I got at JoAnn Fabrics, but you can also make your own (google 'how to make welt cording').

Step 0: Materials
- Enough decorative fabric to cover the front of your pillow form
- Enough decorative fabric to cover the back of your pillow in width, plus extra for the length (approximately 1.5 times as long). See Step 1.
- Enough welt cording to cover the perimeter of your pillow, plus a few inches extra
- Thread, sewing machine, pins, scissors, etc.
I used Urban Outfitter's Matryoshka Tapestry for the decorative fabric and black kona cotton from JoAnn Fabrics for the backing.
Step 1: Cut the fabric for your pillow

I am making a pillow cover for a pillow form that is 16"x16". My welt-cording has a 1/2" ribbon for attaching, therefore I assume a 1/2" turning-corner-allowance as well as seams/hems. If your welt cording has a different size flat ribbon, then your hem allowances may need to be adjusted. So, I need a front (decorative) square with 1/2" seam allowances on all sides and two back panel pieces (to form a simple flap closure). The back panel pieces need an additional 1/2" hem allowance where they will overlap.

Step 2: Sew the doubled-over half inch hem on a wide edge of each of the backing fabrics.

Step 3: Layer and pin fabric, welt cording, and backing

You want to layer the three layers like the above, making sure that the decorative fabric and the backing fabric have right sides facing together. The rope-welt should be facing inwards into the center of the pillow, allowing the flat edge of the welt cording to line up with the edges of the backing and front. Do not start at the corner of the pillow with the cording!!

Pinning small sections at a time are a good idea. Additionally, when approaching a corner, remember to cut a line in the cord welting *fabric* (not the rope!), a half an inch before the corner, as shown below.


Step 4: Continue pinning the layers around the three outer edges of the backing fabric.

Step 5: Sew through three layers (first backing flap)

Sew the three sides of the backing fabric (as pinned), starting right after the cord. You need to sew as close to the welting cord as possible, to do this, I remove the foot on my sewing machine, like below.

Step 6: Layer second backing piece at opposite end

Layer the welt cording and second backing piece onto the decorative front, right sides facing, just like the first backing piece. Where the second backing piece overlaps the first, ensure that the welt cording is under both layers of backing, like below.

Step 7: Finish Pinning the Second Backing and Welt Cording

Continue pinning the two layers of fabric with right sides facing and welt cording in the middle. When you approach the beginning of the cord, cross your working end over the beginning end, making a sort of 2 inch "X" outside of the fabric, like below:

Step 8: Sew the three sides of the second backing flap, as pinned
Be sure to sew over the first backing flap, as necessary. When you reach where the two cords cross over each other, skip it (or stop, depending on how you started your welt cording).
Step 9: Cut off corners

Cut off the fabric at the four corners of the pillow at an approximately 45 degree angle. This ensures a cleaner corner.
Step 10: Cut off and Secure Welt Cording

Cut off the remaining welt cording, leaving a 2 or 3 inch remainder. Be sure to secure the crossing of the welt cordings by hand-sewing.

Step 11: Turn Right Side Out and Fill With Pillow

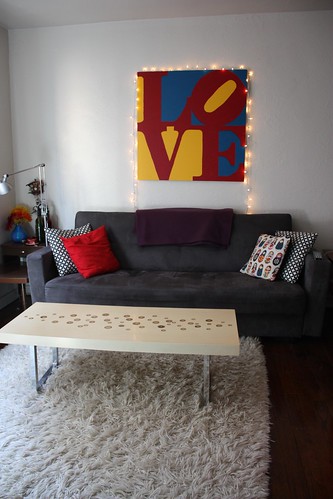
With a little finagling, you can get your pillow form into the flap closure, and place it on a couch.


4 comments:
Thanks so much for the clear directions and pictures. I am making a bumper pad for a crib & my daughter wanted welting on it. I had an idea, but needed some guidance. Yours was great.
Awesome! I'm glad my tutorial could be of some help! (I just wish I took my photos during daylight hours, hahaha)
Thank you so much, your explanation was just what I needed!! Kitty , the Netherlands
Pillows affect spine health by supporting pillow cushion proper alignment of the neck and back, reducing pressure points, preventing stiffness, and promoting restful, pain-free sleep.
Post a Comment