Showing posts with label howto. Show all posts

Reproducing Bergman's "Mur D'Or" Painting

Sunday, February 22, 2026

Oil painting by Isabelle Merlet on the left, an amateur reproduction of of Anna Eva Bergman's "Mur D'Or" on the right "Mur D'Or" by Anna Eva Bergman

Saw this lovely painting (on the right), Mur D'Or by Anna Eva Bergman while on a bit of a soul-finding trip in Antibes, France. Decided to make a 2-dollar reproduction when I returned home. Next time, I think I'd use some household cleaners as solvents to actually tarnish the immitation gold leaf, prior to applying the gloss sealant to prevent tarnishing.

Paint canvas, apply gold leaf glue, allow to dry according to insructions, apply gold leaf

Re-creating a "Mur D'Or":  Paint canvas, and add gold leaf glue Re-creating a "Mur D'Or": Attach gold leaf to glue (after dried a bit)

Seal with gloss sealer to prevent tarnishing, paint on faux-tarnish

Re-creating a "Mur D'Or": Gloss sealant to prevent imitation gold leaf from tarnishing Re-creating a "Mur D'Or": Add in fake tarnish

Spend the next week fiddling incenssantly with the shades of cream and thickness of the blue line

Re-creating a "Mur D'Or": Paint the top

How To: Enclose All Raw Edges on a Double-Yoked Top

Sunday, February 25, 2024

The lastest Sew Liberated Nocturne pajama pattern kick typically references using the "burrito method" to enclose all seams. However, the instructions for this aren't readily available anywhere, I figured it out by adapting another set of instructions. The Sew Liberated Nocturne Top is a double-yoked top that typically has sleeves (although can be adapted to sleeveless with bias binding). If yopu combine this burrito method with French seams and [typical] folded hems, you can enclose all the raw edges of the top. This is great for fabrics that easily fray, increasing sturdiness of garments, and just generally looking nice.

Enlosing all the seams has the side effect, for this top, of making it difficult to tell which way is right side out! The photos of the three tops in this post are all the shirt inside out. It's a very clean finish for a handmade garment.

How To: Enclose all the seams in a double-faced, double-yoked top

Step 0: Cut out the two front yoke pieces, two back yoke pieces, and front and back

Step 0: The pieces

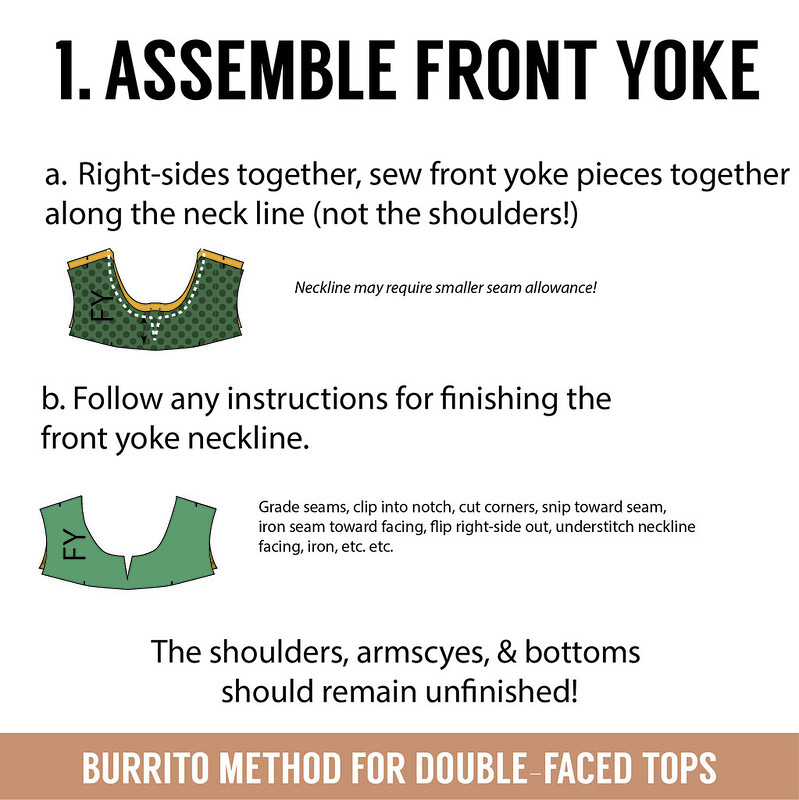
Step 1: Assemble Front Yoke

Step 1: Assemble the front yoke.

Right-sides together, sew front yoke pieces together along the neck line (not the shoulders!). Neckline may require smaller seam allowance than the shoulders.

Follow any instructions for finishing the front yoke neckline. (Grade seams, clip into notch, cut corners, snip toward seam, iron seam toward facing, flip right-side out, understitch neckline facing, iron, etc. etc. )

Step 2: Attach back to yoke pieces

Step 2: Assemble the back + back yoke

Follow any instructions for fitting the Back to the Back-yoke pieces. (Two sets of basting/gathering stitches along the top, between the notches. Pull threads until top of Back is same width as bottoms of Back-Yoke pieces, distribute gathers, etc. etc.)

Right-sides of Back-Yoke pieces facing either side of the Back (upside down), align notches & sew.

Grade seams & iron both Back-Yoke pieces upward, so they align at top.

Step 3: Baste the yoke shoulders

Step 3: Baste at the back & front yokes' shoulders

Letting the Back Yoke Facing fall down/away, place right-side of Front Yoke onto right-side of Back Yoke, aligning the shoulder edges.

Baste the shoulder seams at a seam allowance just under the final seam allowance amount.

Step 4: Make the burrito

Step 4: Burrito Method

With the Back-Yoke-Facing still down/out of the way, roll the Back piece up from the bottom into a tight “burrito.” Near the top, roll up the Front-Yoke as well.

Keep rolling the burrito until the shoulders of the Back-Yoke- Facing are accessible.

Wrap the Back-Yoke-Facing around the burrito, aligning its shoulder edges with the previously basted shoulder edges.

Step 5: Sew shoulders, neck

Step 5: Sew the shoulders and neck

Pin the shoulder edges together through all 4 layers of facing fabric, aligning notches as needed. Ensure no burrito gets in the way! Repeat for the neckline.

Sew, the shoulders and neckline, ensuring you’re catching only the 4 layers of facing fabric, not burrito! Pivot as you transition from shoulder<->neckline. Neckline may require smaller seam allowance than the shoulders!

Grade the inseams, snip around the neckline, and pull the burrito out through one of the armscye. Iron.

Step 6: Decide front style

Step 6: Decide which front styling to go with

We’re going to attach the Front, sandwiched between the Front-Yokes. We need to decide if we want to stitch-in-the-ditch on the visible side (attach Front to Front-Yoke-Facing first) or have a visible top-stitch across the front (attach Front to Front-Yoke first).

Let’s go with a visible top-stitch.
Follow pattern instructions for any gather stitches, pulling to get the Front piece the right width for the Front Yoke pieces.

Step 7: Assemble the front

Step 7: Assemble the front to front yoke faci ng

Fold & press the bottom 1/4” of the Front-Yoke, toward the wrong-side. Move the Front-Yoke out of the way.

Pin & sew the right-side of the Front-Yoke-Facing to the wrong-side of the Front. Iron.

Step 8: Attach front yoke

Step 8: Attach front yoke to front

Flip the Front-Yoke over that most recent seam, aligning its folded edge 1/8” past the seam.

Sew and iron into place.

Step 9: Finish side seams, hem, sleeves, etc.

Step 9: Finish the side seams, hem, sleeves, etc.

Finish side seams and hem as desired/pattern instructs. Add sleeves, etc. etc.

Done!

Making Crokinole Boards

Sunday, February 27, 2022

4 of the 5 completed Crokinole boards

J and his cousins grew up playing on his grandpa & grandma's handmade crokinole board. The game is a sort of circular curling/shuffleboard on wood, with discs landing in certain regions worth varying points, and lots of knocking opponents' discs off the board, from Canada. When grandpa passed, the two family crokinole boards were given to two of J's aunts, and with social distancing, those boards are rarely seen. With these 5 new boards, J has made one for each of the grandchildren's families to have a board to play at home. They're built to tournament standards, and with some purchased discs, they whizz across the surface even faster than grandpa's boards.

J says he mostly consulted Crokinole World's "Making a Crokinole Board" combined with WoodGears' "Crokinole board plans", while consulting other sites for design and color ideas. He saved himself some effort by purchasing pre-made bumpers and discs (his grandpa's were made from a broom handle!). The boards were cut from sheet plywood and the rails were planed from large lumber. 'Gotta use those woodworking tools for something!

  1. Cutting pieces from finish-grade plywood.
    Cutting pieces from finish-grade plywood
  2. Carving the lines into the plywood.
    Carving the games lines into the plywood
  3. Staining the boards & bases.
    Staining the boards & bases
  4. In some cases, carving out the lines post-staining, for a contrasted look.
    Staining the boards & bases
  5. Planing rails from thicker lumber, then staining and polyurethaning the rails to match or contrast the boards.
    Staining the rails to match or contrast!
  6. Polyurethane the boards & bases a few times, attach together with wood glue.
    Attaching boards to their bases
  7. Caribou Wax and buff the boards for added disc-sliding.
    Board Caribou-waxed & buffed
  8. Staple the inner rail to the base.
    Using staples to attach inner rail to the base
  9. Wood glue the outer rail to the inner rail, and clamp like your life depends on it.
    Gluing outer rail to inner rail - need SO many clamps!
  10. Cut & stain a contrasting slice of dowel for the center, so discs are easier to remove when they land there.
    Contrasting dowel slice glued into the center so discs can be removed easily
  11. Drill 8 equidistant holes for the bumper screws.
    4 of the 5 completed Crokinole boards (this one just waiting on nickel bumpers)
  12. Screw in bumpers and it's completed!
    4 of the 5 completed Crokinole boards

4 of the 5 completed Crokinole boards 4 of the 5 completed Crokinole boards

At time of writing, J is stil working on our board as he wants to put an obscene number of layers of polyurethane on the playing surface. It'll have a blue-stained base, natural board to show off the patterns in the wood, and dark brown contrasting rails.

Final Board to Complete: Blue stain base, natural board, and dark rails (to be attached)

How To: Ruched Privacy Curtain

Friday, December 24, 2021

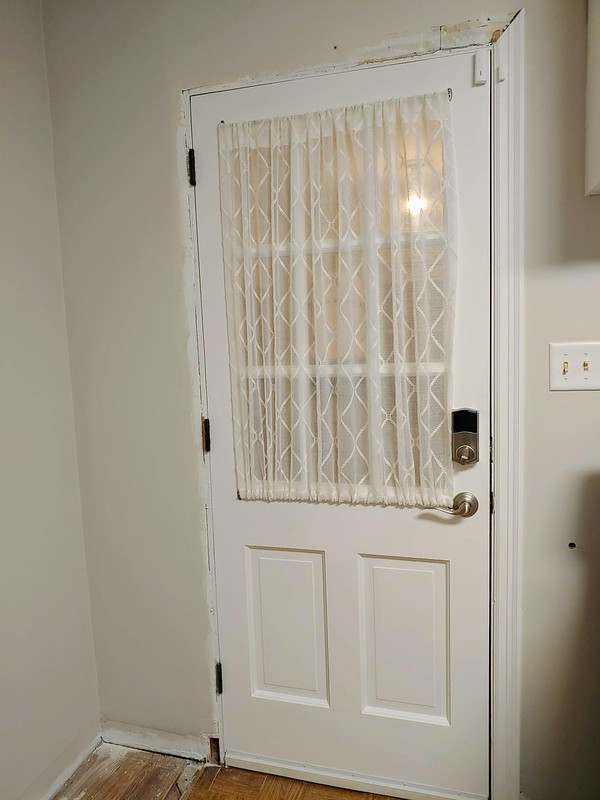
Pay no mind to the filthy door, the missing trim, mismatched light switches, hole in the floor, etc. My life is a constant construction zone at the moment. Just focus on that ruched front door curtain, that helps keep strangers [and the dog] from looking directly into the house. I'm no stranger to making curtains, in fact, it's probably my most frequent sewing project. I've been known to cut shower curtains for windows, split a bunch of curtain panels into mini-curtain panels, insert blackout panels, make them for under-counter coverage, combine multiple fabrics into one curtain, blockprint my own curtain fabric and add lace, etc. etc.

The process described below is a new curtain style for me, but is essentially just one curtain panel with both a top and bottom rod channel. Nothing too fancy.

DIY Ruched Curtain DIY Ruched Curtain

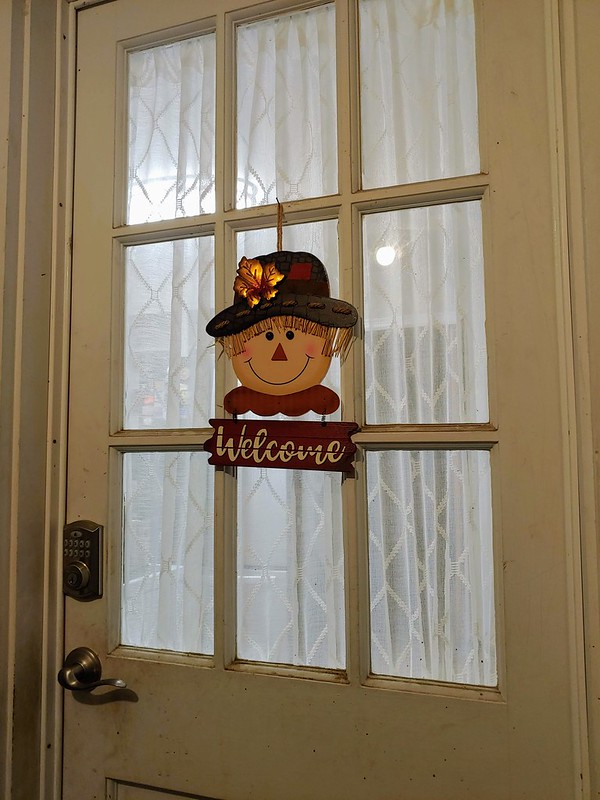
The front/side door curtain that came with the house started falling apart awhile back. And rather than repairing the dingy sheer curtain, I opted to upgrade later on when we began remodeling the kitchen. The top/bottom curtain rod idea will work in other contexts as well, Dans Le Lakehouse made a similar curtain for an awkwardly shaped guest bedroom window.

DIY Ruched Curtain DIY Ruched Curtain

  1. I started with a single Clarissa Diamond Sheer Curtain Panel from Target, and cut it to be the length of my window + 2" (42 + 2 = 44"). Starting with a curtain panel meant I already had one "channel" for the top curtain rod, I just had to make the second one. If I started with a piece of plain fabric instead, I'd likely cut the fabric to length-of-window+4 X width-of-window*2.
    Cut Fabric to Size
  2. If using sheer fabric that frays easily, it's a good idea to zigzag stitch over the edge of any cut edges to help prevent fraying. Zigzag stitch can be used to finish edges if you don't have a serger (c/o TillyAndTheButtons).
    Zigzag cut ends
  3. Fold over cut ends toward the wrong side of the fabric by 1/4" and iron. My fussy sheer fabric was easier to work with when I sewed this fold down, but that's optional.
    Fold & iron 1/4" cut ends
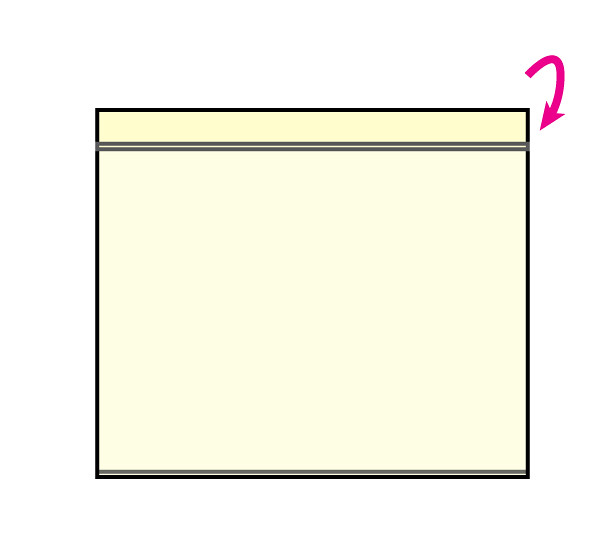
  4. [Skip this step if you started with a curtain panel, rather than plain fabric]. For the top curtain rod channel, fold the top of the fabric toward the wrong side of the fabric enough to cover the height of the curtain rod - you want the rod to be able to fit through this channel. 1-2" should be plenty, depending on how big your curtain rods are. Since the rods are being hidden entirely by the ruched panel, I think smaller rods make more sense here.
    Fold & iron ~2" for top curtain rod channel
  5. Pin the channel in place, and then sew.
    (If you were making a typical curtain, you'd hem the bottom of the fabric, and be done at this stage!)
    Sew
  6. Hang curtain from the top curtain rod where it will be, wrong side outward. Wrap the bottom of the curtain behind the lower curtain rod, and then up and over it (from back to front). You want the fabric to be pretty taut. Pin in place (I found doing this step at regularly intervals, to ensure I pinned the fabric straight worked well).
    Fold, pin, & iron around bottom curtain rod for bottom channel
  7. Remove the curtain and iron the fold that's going to form the lower rod channel. At this point, you might find it makes sense to fold over that 1/4" fold from a few steps back (or even to trim and re-iron a new 1/4" folded edge) to get the edge even/smaller.
  8. Sew that bottom channel in place.
    Sew
  9. Hang the curtain, fiddle with the scrunchiness of the ruching until it evens out, and you're done!
    Hang & Ruche

Kitchen Renovation: Stripping Paint, Varnish for Wood Window Trim

Friday, December 17, 2021

Window Trim After Citristrip Window Trim After Citristrip

The "before" for this now wood-clad window would be some dingy shade of off-white that is chipping in various places (the paint is always chipping around here). So, rather than just paint over it as most sane people would do, I decided to pursue the arduous process of removing all the layers of paint with Citristrip, a paint stripper. I generally followed instructions like these from SimplyRefinished, although with the addition of letting it sit overnight under plastic wrap, and following the process twice in order to get all the paint off. First, I would cover the painted trim with Citrstrip, and then wrap it in plastic wrap over night. The next day, I'd remove the plastic and use a plastic scraped to remove the first several layers of paint, and then repeat the process for a second time. The last day, I scrub the wood with Steel Wool dipped in Citristrip, and then scrub it all down with a rag dipped in mineral spirits. The Citristrip process looks a bit like this:

Citristrip to remove 70 year old paint layers Citristrip to remove 70 year old paint layers
Citristrip to remove 70 year old paint layers

Once the various colors of pink and beige paint came off, I was quite surprised to find this beautiful wood grain (also shown in top photos):

Window Trim After Citristrip

What was next up was sanding/scraping the remaining paint & Citristrip from the crevices, and then picking a stain color...

Done! | Nook Lower Cabinets | Window Staining | Staining Open Shelves | Countertops | Ceiling Light | Temporary Storage | Painting Cabinets | Window Stripping | Nook Demo | Nook Design | Details | Ideation | Inspiration