

Tuesday, August 20, 2013
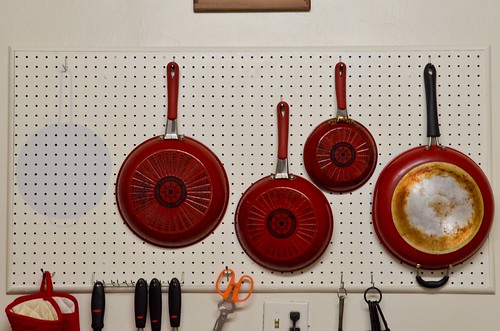
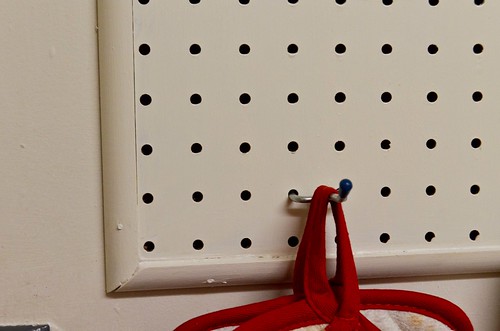
Maybe you can see the difference? Maybe looking at the last post will help? Crafters like their craftroom pegboards framed and looking pretty. I just wanted our kitchen pegboard to look slightly more finished.
Tutorials already exist for attaching the moulding frame directly to the pegboard (see here and here), but rather than attach the moulding to the pegboard, we attached it to the wall around the pegboard. This covered the gap between the wall and board and since our pegboard was already on the wall, it was pretty much the only way to do this.
Rather than use something that was super fancy and distracting, I got some quarter round moulding that was 11/16" thick, which was just barely tall enough to meet the pegboard as it hangs away from the wall. You could use fancier stuff for a more decorative effect. Nothing about our kitchen really screams 'art gallery' though, so we kept this frame simple.
Pretty much anyone can do this. It takes a $5 miter box, a hand saw, and some nails. And it looks way more polished.
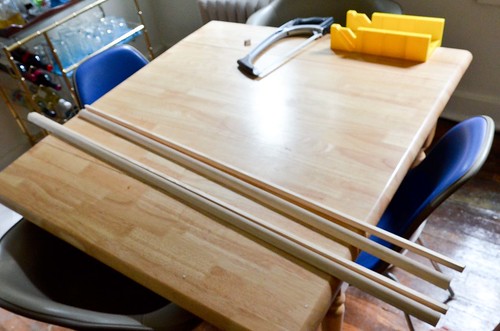
Materials: Saw, Miter Box, Moulding (cut 3"+ larger than needed - we got it cut by the guys at the big box store where it was purchased), Wood Filler or Spackle, Hammer & Finishing Nails....and a pegboard already mounted to the wall.
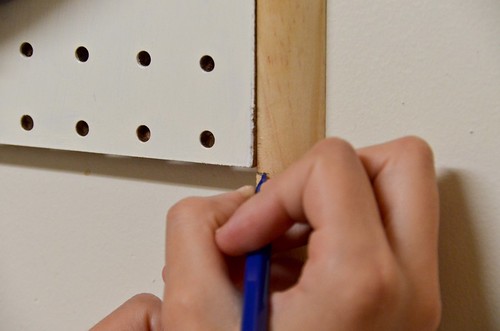
Hold the first piece of moulding up to the pegboard, line it up with the pegboard appropriately, and mark with a pencil where (and at what angle) to cut.
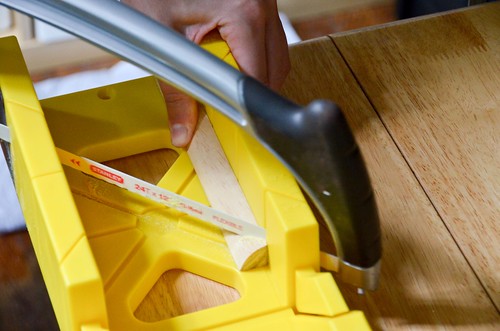
Using the miter box and saw, saw the moulding end where you marked with a pencil.
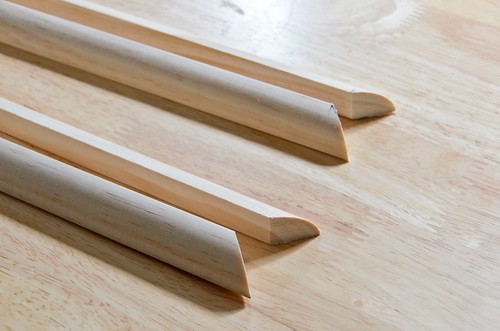
Repeat Steps 1 & 2 (mark & saw) for all 8 of the moulding tips.
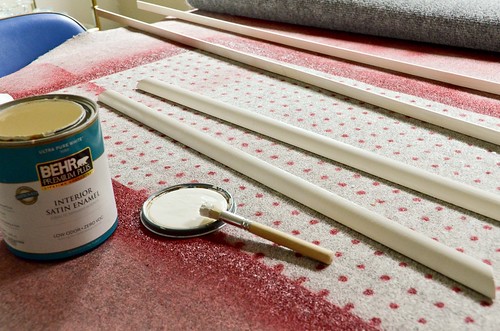
Sand with fine sandpaper, wiping off with a damp rag. Paint moulding in your desired color. You're going to have to do some touch ups after mounting to the wall, so don't get too attached.

Use hammer and finishing nails to attach moulding to the wall around the pegboard, carefully lining up at corners. We used 3 nails on the long (4 foot) pieces, and 2 on each of the short (2 foot) pieces.

Cuts never seem to be perfect. Fix your mistakes with some wood filler or spackle.
Paint over the finishing nails and any hammer marks or spackle with matching paint.


2 comments:
It completely finishes off the pegboard! I like the idea of mounting it to the wall for the same reason you mentioned.... It looks fantastic and what a cool way to display!!!
I am obsessed with your DIY projects! This is a great storage solution, and I love how you finished it. Love the red pans, too.
Post a Comment