

Wednesday, October 7, 2015

On her Gramercy Diamond Strings Quilt post, Maureen hints at how to construct the quilt: "This Diamond Strings quilt design is a quick & simple modified version of my Herringbone QAYG pattern, in rectangle blocks measuring 10" x 18" rather than long quilt as you go panels. After finishing the quilted quilt top I attached the backing by sewing about a 1/2" from each vertical and horizontal seem using a bold Aurifil 50wt in black, a first for me! "
...and that's pretty much it.
To make this harder on yourself, you can do as I did and save up all the scraps of batting from previous quilts, and then sew the scraps together into 11"X19" panels and trim to 10"X18" after strings are attached. Iron. Definitely iron. If you use the correct batting, the seams aren't terribly bulky at all. Less waste!
Have I been holding onto batting scraps for 3 years? Why, yes, I have.
What is quilt as you go? It's basically when you're sewing the fabric pieces directly to the batting. It's convenient in many ways, as the quilt sandwich is slightly easier to manage and you don't need to quilt the finished project as much as you would with a traditional quilt. Because of this, the quilting phase is extremely short.
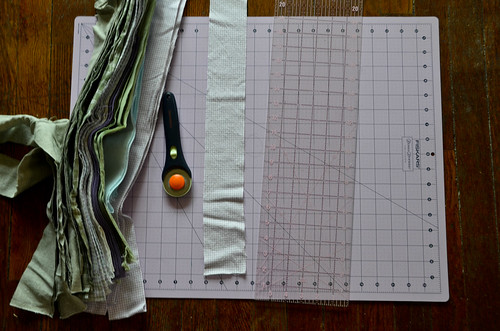
- Materials: low loft needle punched batting in 100% cotton, rotary cutter + mat, iron, sewing machine, fabric, thread made of materials to match your fabric (i.e., 100% cotton).
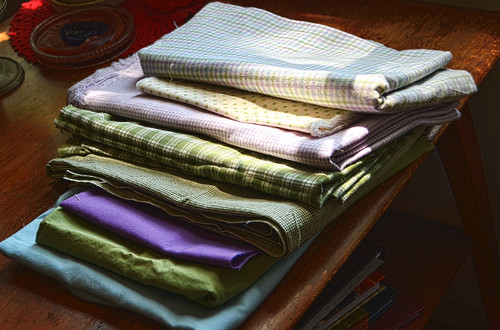
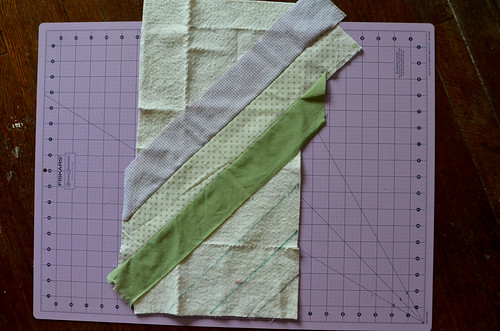
- Cut fabric to strips 2.5"X15.5". Scraps that are shorter than 15.5" can be used for the tiny corners of the panels. I cut a lot of strips, but ran out and then just cut as needed to finish off the quilt.
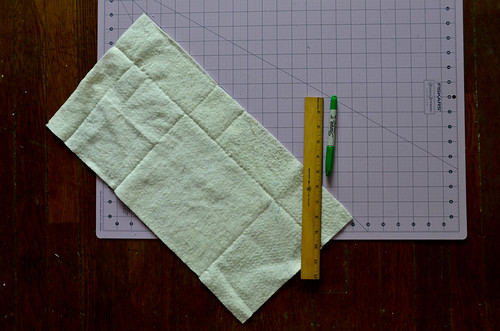
- Cut 24x 10"X18" batting panels.
- Follow Maureen's QAYG Herringbone Quilt Tutorial
- Draw 45 degree lines, 2" apart on a batting panel. I start at one corner and then work my way until I've done just over half of the panel. The initial attached fabric strips will ensure some amount of continuity over the blank parts of the panel.
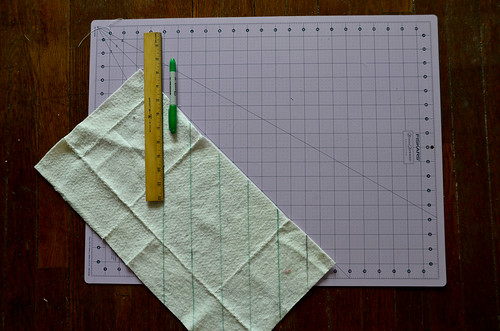
- Draw 45 degree lines on next batting panel, but switch directionality. Every two panels should be matched as the top/bottom of a diamond.
- Align a fabric strip right side up with a middle line on the batting panel. Lay a second strip on top of the first, right side down (i.e. right-sides together).
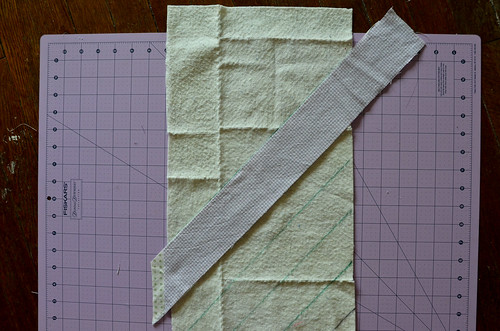
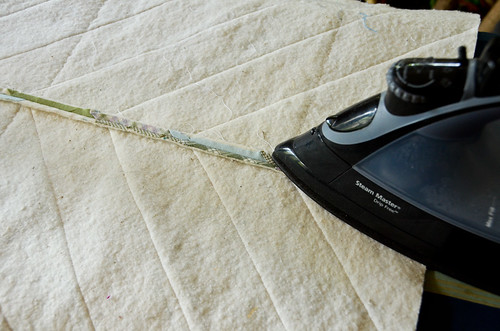
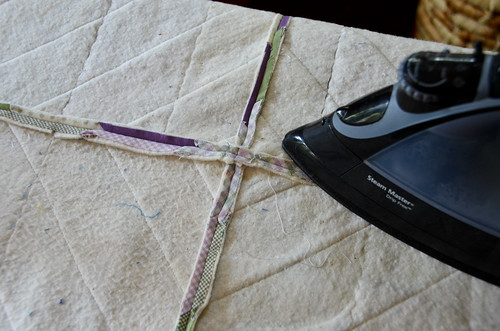
- Sew the fabric strips onto the batting panel, using a 1/4" seam allowance.
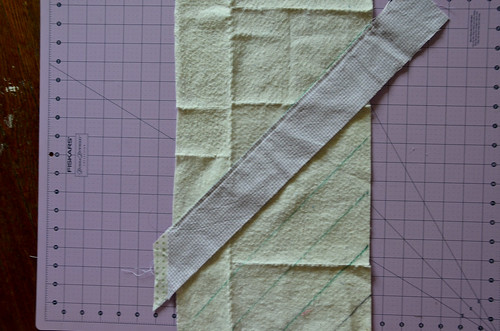
- Fold open the fabric strips so the right sides are up and either iron flat or smooth it flat with your hand.
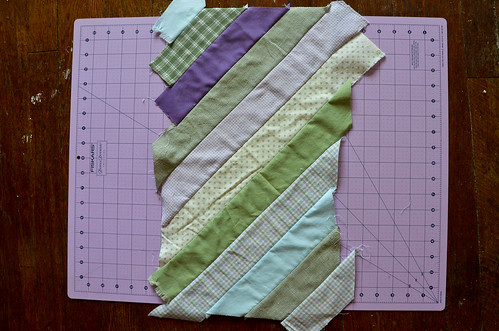
- Add another fabric strip and repeat previous steps: place each new fabric string on top of the previous (right sides facing), match up the raw edges with a drawn line, sew with 1/4" seam, fold over, and continue to press or smooth each new fabric. When attaching to the parts of the panel without lines predrawn, just line up the fabric strips based upon their edges.
Be careful to ensure that your strips are parallel to previous strips AND that you are sewing a 1/4" seam on all strips (especially the bottom one!)
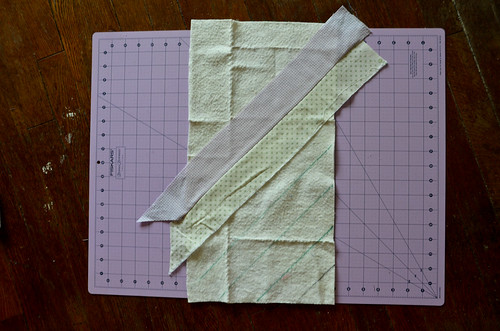
- Continue adding fabric strips as before, until panel is completely covered with fabric.
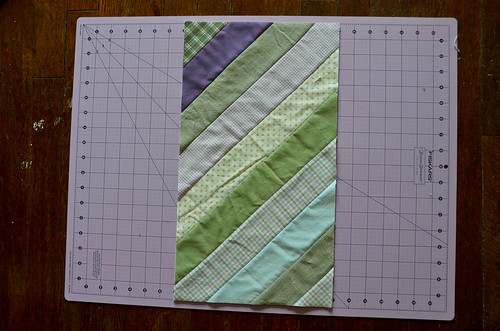
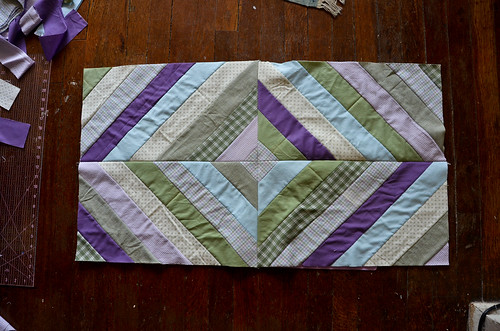
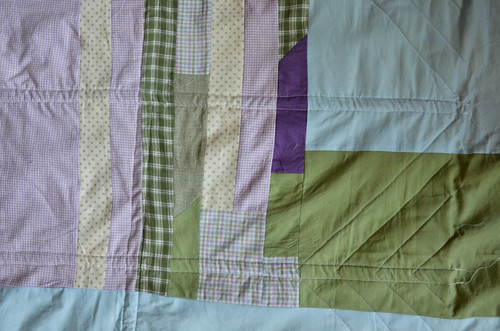
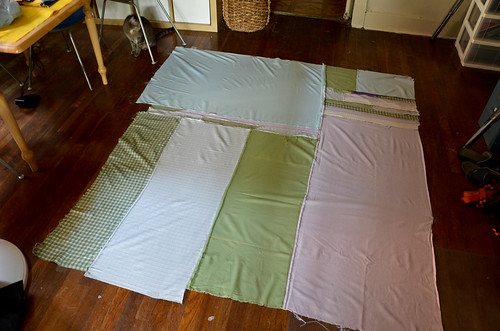
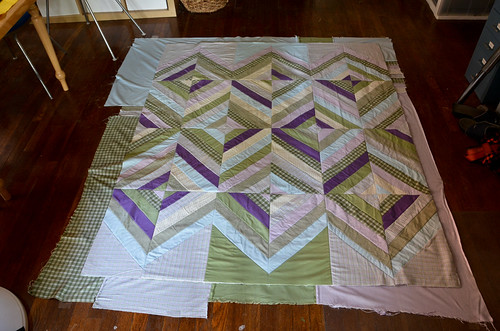
You'll notice in the images of the finished quilt top that the ends of my quilt are actually solid colors (one for two panels). I achieved this by a bit of pre-planning and using larger pieces of fabric that I ensured would cover the entire space required.
- Trim panel to size. In our case, that's 10" X 18".
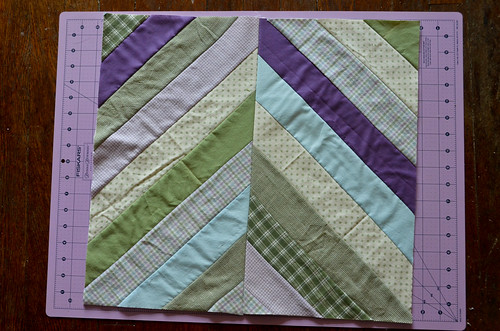
- When you've finished one panel, repeat previous steps and make another! If you're really cautious (or make the panels excessively large and then trim accurately afterwards), you can get the diamond strips to align, but I find it's not exactly worth the bother.

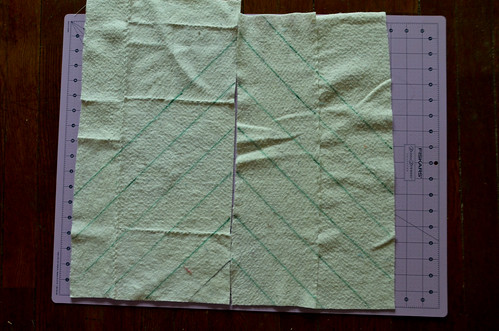
- Sew two panels of opposite directionality together.
- Iron seams open.
- Continue sewing panels of opposite directionality together.
- Always iron seams open.
- Continue sewing panels together and ironing seams open, until you're done. You have a completed quilt top!
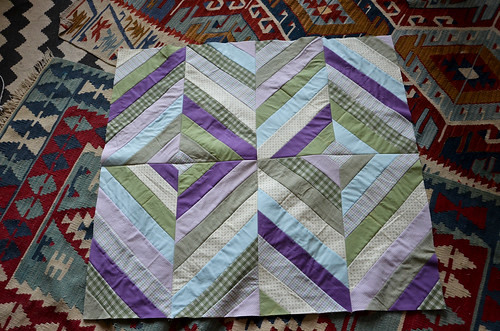
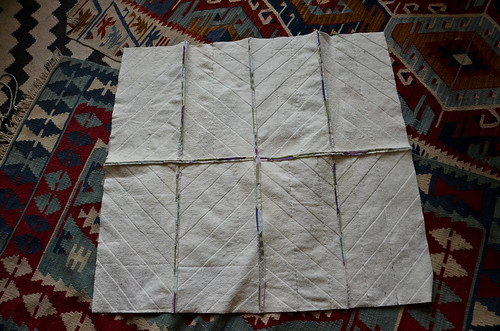
The quilt sandwich part of completing this quilt is fairly simple as you just lay this top on top of a backing and baste as usual. By some miracle, I had enough fabric left over to create a scrappy quilt back. I had to use up some of my leftover strips to do it, but it worked!
For the quilting, I just stitched 1/4" from either side of each of the seams keeping the panels together. This formed a double-lined rectangular grid. Then in some contrasting threads, I sewed seams 2" apart aligning with the fabric strips on the solid ends of the quilt top. Because the quilt top is already secured to the batting, you don't need to quilt through all three layers quite as much as with a traditional quilt.


0 comments:
Post a Comment