

Saturday, September 11, 2010
I have this tendency to start every other tutorial with a warning about how easy the skill is; and aside from the knitting/crochet patterns, the step to entry really is quite simple and anyone can do it. These hexagon quilt pieces are like the others- if you can sew by hand, you can do it!
Now, what you do with them is another matter. I like this hexagon decorated fabric box, and there's potholders and a tote bag, of course. Or "hex jeans". Or go wild and make a whole quilt of hexagons. The method I'm introducing below was created by combining the most common sense of several hexagon tutorials into the easiest possible steps.
Step 0: Gather Materials
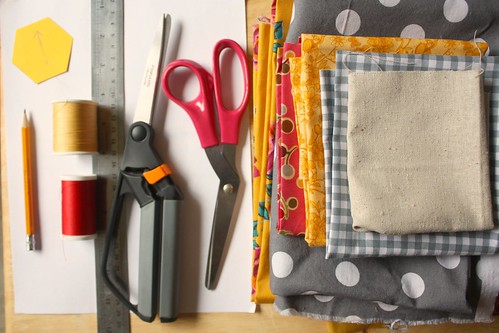
Materials: Assorted fabrics (I used calicos, osnaburg, and a linen mix), (Fabric+Paper) Scissors , (Contrasting+Matching) Thread, Needle, Pins, Pencil, Ruler, Scrap Printer Paper, and hexagon template on card stock (or plastic).
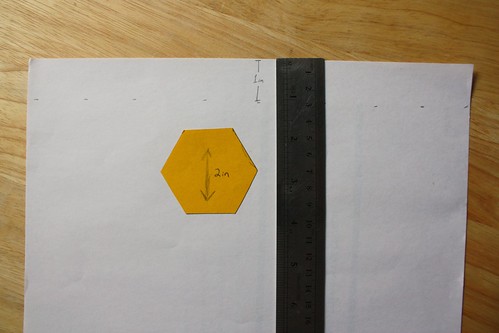
Step 1: Make Your 2-in Hexagon Template
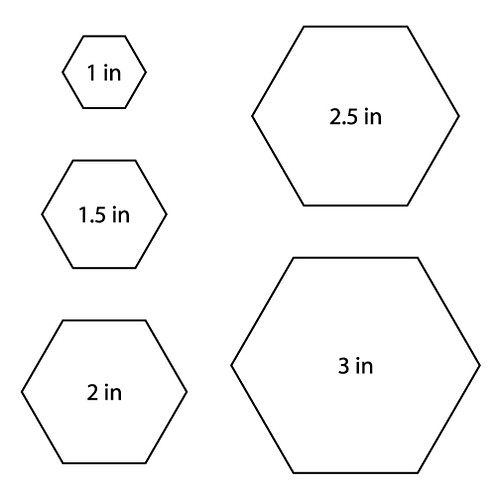
Make a hexagon template with an old plastic container, or some card stock (like I did). If you're just beginning, you should start with at least a 1.5 inch template, although I used a 2 inch hexagon for this tutorial.
Step 2: Mark a 1-in Fold Line on Paper
Mark a 1-inch fold line on the longside of the printer paper. If you're using a different size template, use half the height: I have a 2-inch template, so I used a 1-inch fold line. A 3-inch hexagon template requires a 1.5-inch fold line.
Step 3: Fold Paper and Trace Half Hexagon

Fold the paper and trace the bottom half of the hexagon template along the fold, as shown. Be sure the two side points line up with the fold.
Step 4: Cut Paper Hexagons

Cut the paper hexagons along the lines that you drew, as shown.
Step 5: Cut Little Diamond Cut-outs

Cut little diamonds out of the center of the paper hexagons. You'll need to place a pin through the holes, but don't make the diamonds too large.
Keep making more paper hexagons by following steps 2-5. You can always make more if you run out.
Step 6: Cut 3-in Squares of Fabric
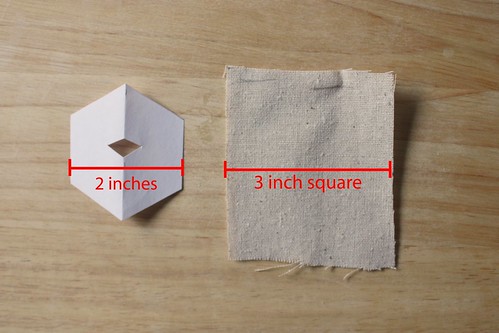
If you're using a 2-inch hexagon, you should cut ~3-inch squares of fabric. (If you're using a different size hexagon, just add an inch to the height, and cut that size of square fabric).
You could cut the fabric squares into hexagons at this point, but it's just easier to leave them as squares.
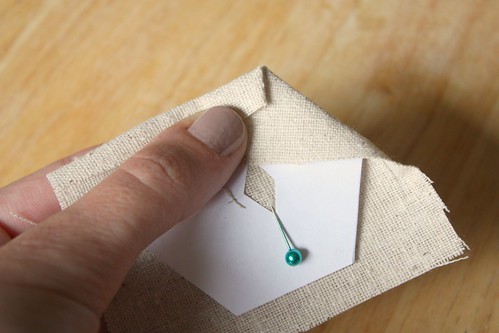
Step 7: Pin a Paper Hexagon to a Square of Fabric
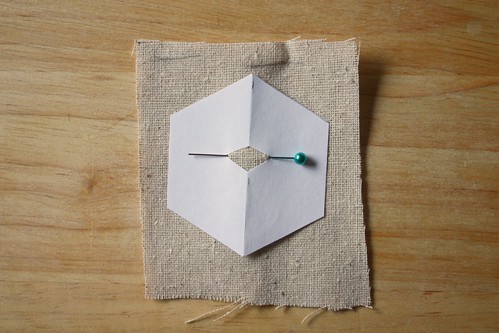
Using the diamond hole cut in the paper hexagon, pin it to the approximate center of the [wrongside of the] square of fabric. (Other methods use a glue stick here, but a pin is cleaner).
Step 8: Fold Fabric to One Edge of Hexagon
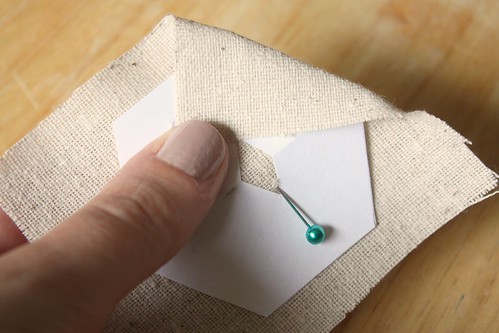
Fold the fabric along one edge of the paper hexagon. Be sure not to fold the paper.
Step 9: Fold Fabric to Meet at the Corner of the First Fold
Fold another side of the fabric along the next edge of the hexagon. This second fold should overlap with the first.
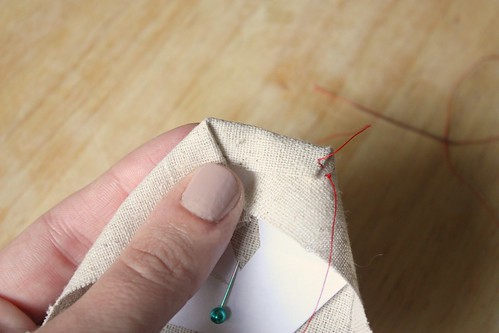
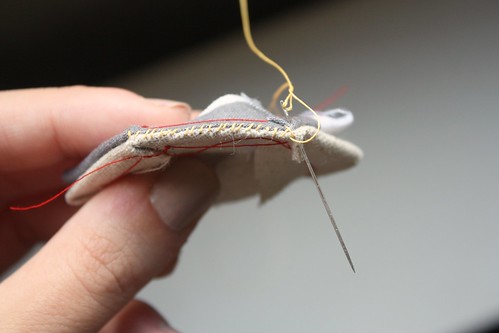
Step 10: Sew Through Overlap of Fabric

Using the contrasting thread and needle, sew through the overlap of the fabric. Do not sew through the paper. Do not sew through the "front" of the fabric.
By just sewing through the overlap at the corner, you won't have to worry about removing the contrasting thread later (a common problem with a lot of other methods).
Step 11: Fold Fabric Along the Next Edge of the Hexagon
Fold the fabric along the next edge of the hexagon, be careful not to bend the paper hexagon.
Step 12: Continue Folding and Sewing through Overlap
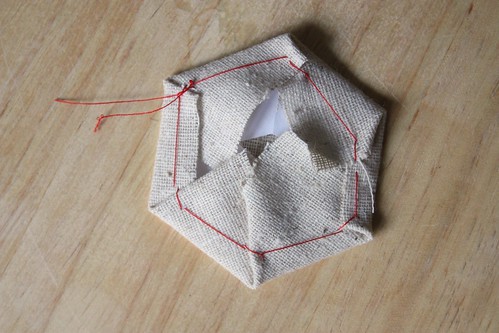
Continue repeating steps 9 & 10, until the hexagon is complete. You can remove the pin at this point, but not the paper!

Step 13: Repeat Steps 7-12 Making More Fabric Hexagons
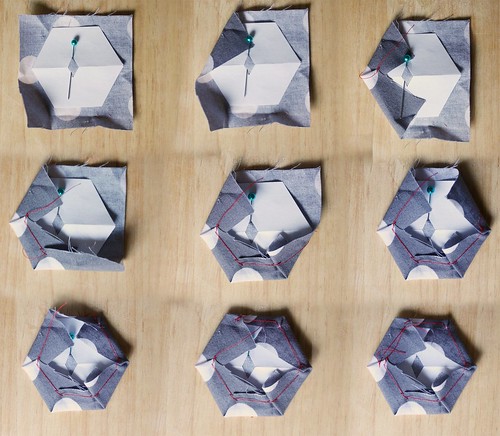
Repeat steps 7-12, making as many hexagons as you need for your project. Remember to remove the pins, but not the paper!
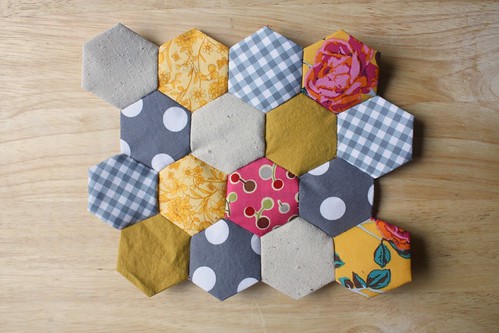
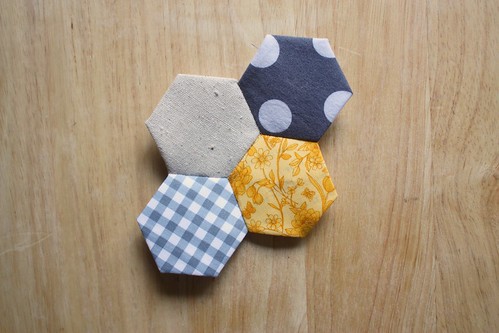
Step 14: Place Rightside of Two Hexagons Together

Once you decide how you'd like to lay out your fabric hexagons, place the right side of two neighboring hexagons together, with their edges matching.
Step 15: Sew Two Edges Together Closely
With the matching thread and needle, sew the edge of the two hexagons together. Be careful to only go through the fabric, and not the paper!
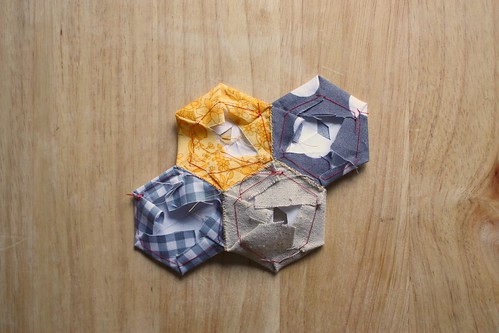
Step 15: Sew Two Edges Together Closely
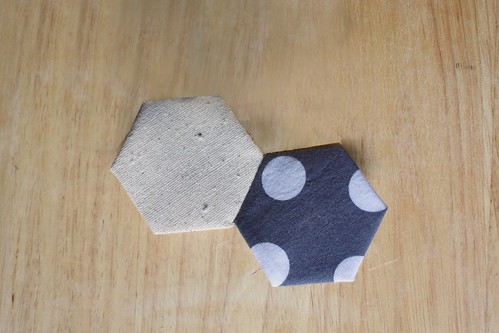
Two hexagons sewn together, right-sides.
(Sorry for the funky Photoshopping. I forgot to take a photo of just the two hexagons).
Step 16: Add Another Hexagon
Add another hexagon by repeating steps 14 & 15.
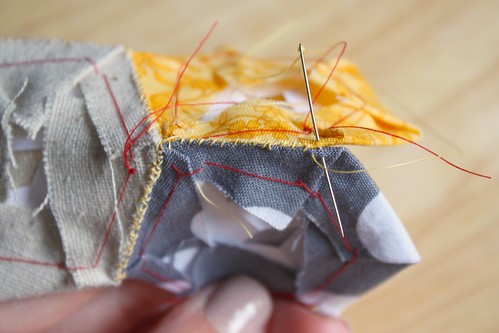
Step 16: Reinforce Corner!
Be sure to reinforce the corner where the 3 hexagons meet, by sewing a couple extra stitches through all three of the hexagons.
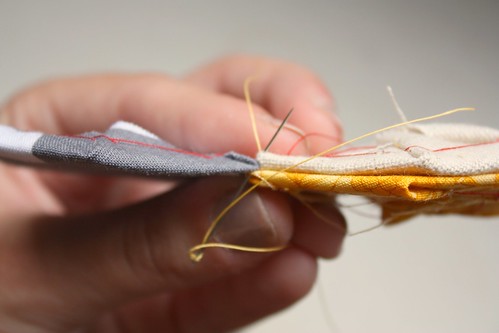
Step 17: Continue Adding Hexagons
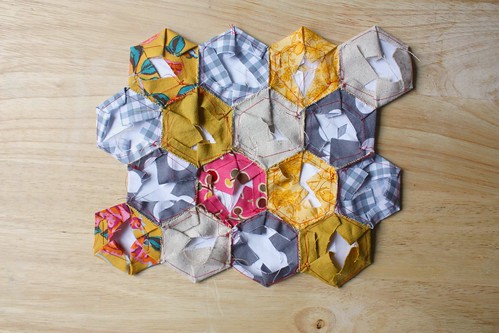
Continue adding hexagons by sewing an edge at a time. When you're done, make sure all the loose edges have been sewn/secured to another. When a hexagon is completely surrounded by 6 other hexagons, you may remove the paper from its center, and reuse it to make more!
Step 18: Remove Papers and You're Done!

Keep attaching more hexagons, removing pins, etc. until your piece is large enough for your project. Remove the paper hexagons when everything's finished.
Now you know how to hand-piece a hexagon quilt top, but what will you make with them? They're great for appliquéing onto other projects, making pillows, quilts, etc.
(My plans will be revealed later...)
[Edit 8/18/2013: I used this tutorial to make a hexagon quilt! See posts on my progress below.]
- How To: Hexagon Quilt Top Piecing 9/11/2010
- Progress Report 12/15/2010
- Progress Report 4/4/2012
- Progress Report 4/18/2012
- Progress Report 5/16/2012
- Step One: Hexagon Quilt Top Done 5/29/2012
- Step Two & Three: Backing & Quilt Sandwich 6/19/2013
- Step Four: Hand Quilting 8/28/2013
- Step Five: Non-Traditional Hexagon Quilt Binding Tutorial 9/18/13
- A Review of the Hexagon Quilt 10/2/13


13 comments:
very useful for me! thanks a lot!
I'm glad you found it so!
what a great tutorial! I've not made any hexagons before but I think I'll have to have a go now.
Love your tutorial, that is exactly how I am doing my hexie quilt, had to combine few ideas but I like you put it all together.
I've zoomed over from the Hex-a-long group on Flickr. Your tutorial is fabulous. It is exactly what I needed to get started....I'm a Hexi-virgin.....Not for much longer, though. :)
Reading your blog has inspired me, I am anxious to try my hand at this! Bought some fabric today, need to make a template so I can get started. Thanks for sharing the info!
Thank you thank you thank you. That just made it perfectly clear and being a new quilter. every little bit help.
thanks for sharing.
Jan
Hiya! Thank you for this. I'm hoping to make a turtle using my daughters old clothes as scraps. I have never done this before so its a big help. Thank you again!!! One little question though; How do you stop the edges from fraying??? Do you have to zig zag it??? Thank you a bunch!!! Xxx
What a great tutorial for a beginner! I have been looking forward to making some hexagons for some of my handmade bibs and you have just made it irresistible now!
Anonymous- Because you have sewn all the edges of the hexagon to another piece of fabric, you don't have to worry too much about fraying. Most quilts are pieced together without the edges being finished, so it should be fine.
Mrs. Lucky - Glad I could be of some help!
The best hexagon piecing tutorial :-)
Could you use freezer paper rather than plain paper and pins?
Excellent tute. I'm encouraged to try this. Good humor. Thanks.
Neame
Post a Comment