

Wednesday, August 4, 2021


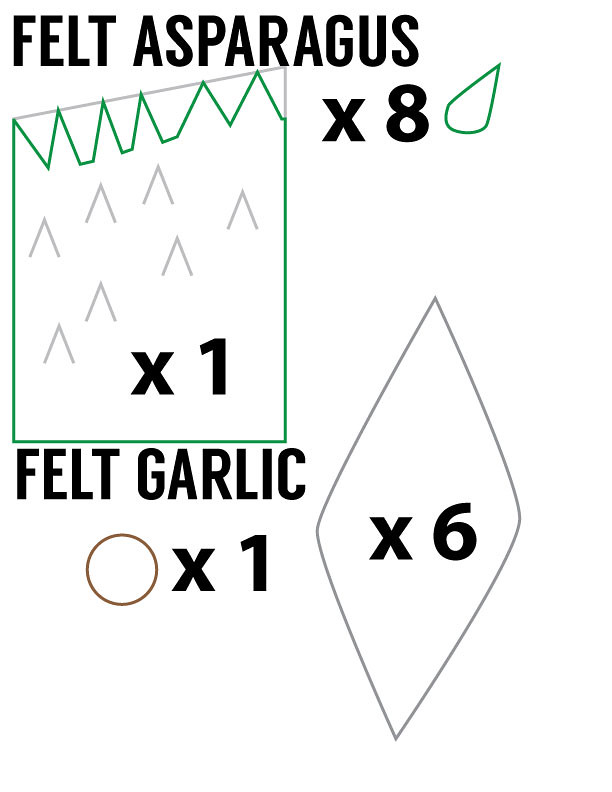
- Print the pattern below without scaling.
- Cut out the pieces in the quantities listed in the pattern.
- Take two of the white felt pieces, line them up, and sew along one edge. Stop sewing a half-inch or so short of the other end, so that you have room to fill the garlic.
- Do the same for the remaining four pieces of white felt. And then sew the three pairs of white felt together in the same fashion. You should have an empty, inside-out garlic shell!
- Turn right-side out and stuff the garlic (I used fabric scraps which makes it lumpy - polyfill would be smoother).
- With a needle and thread, sew a loose running stitch along the top of the garlic. It's good to put this seam about a half-inch from the edge of the felt, so the garlic gets a pointy top!
- Pull the running stitch to cinch the garlic closed and secure the garlic top with several more hand-sewn stitches, before tying off.
- Finally, sew the brown felt circle to the bottom of the garlic, where the six seams align.
Return to the Felt Vegetables Tutorial Collection.


0 comments:
Post a Comment