

Wednesday, August 20, 2008

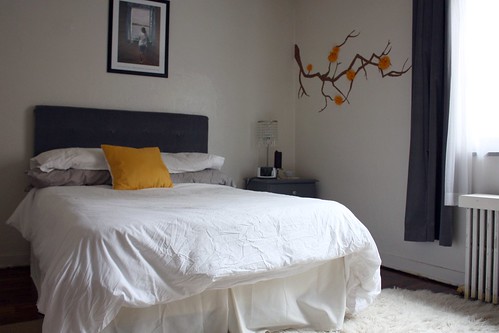
A How-To for the much mentioned ConTact Paper Wall Decal. This one is a graphic tree branch going up above my bed.
Step 0: Materials
- ConTact Paper (Self adhesive)
- Scissors
- Writing Utensil
Step 1: Draw Your Desired Base Image

Draw the desired "base image" (your end picture, minus all the details) on the back of the ConTact paper. Remember the drawing will be mirrored on the wall.
Step 2: Cut Out Your Base Image

Step 3: Draw Details on ConTact Paper
Once you've created a base image, you can now draw smaller details to add to it. Remember your drawing will be mirrored once placed on the wall.

Step 4: Cut Out Details
Step 5: Place Details on Base Image, for an idea

Once I've completed cutting out all my main parts, I like to place/layer the pieces, so I know how to place them on the wall. If you wish, you can photograph your work at this stage for some extra help.
Step 6: Peel a Small Edge of Your Base Image


Now it's time to peel a small edge of your base image. Don't peel too much of the paper backing off of the ConTact vinyl, or the sticky sides will start sticking to each other!
Step 7: Place Small Edge On Wall
Place the sticky-backed vinyl onto the wall in your desired location. Sometimes I use small pieces of Scotch tape to approximate the location of longer base images. Remember, it's important to only peel and place a small piece at a time.
Step 8: Rub Edge Onto Wall

It's important that you rub the edge of the adhesive-backed ConTact vinyl pretty vigorously in order to secure it to the wall. Some people suggest using the edge of a credit card for this stage, but I find that credit cards can scratch the vinyl surface.
Step 9: Peel a Little More, Place a Little More, Rub a Little More

Continue doing steps 6-8, peeling a little further, placing, and then vigorously rubbing the vinyl until there is nothing left to secure.

Step 10: Follow steps 6-9 for the Detail Pieces

Step 11: Create and Add Accent Pieces
In this example, my 'accent pieces' are little blue ConTact circles added to the empty branch. Feel free to add whatever you wish, or maybe nothing at all!
[Edit 10/1/2009: Bedroom redecorating required a new accent, Felt Flowers. Read how to make them, here.]


5 comments:
lovely! i am so enamored with temporary wall art these days.
Thanks! I am too, even more so before I moved. I'm kinda glad the ConTact paper obsession has ebbed a bit now, haha.
Thanks for stopping by my blog and commenting on my wall decal. I didn't know that it is that easy to make one. It is a great tutorial.
acupofsparkle.etsy.com
Good adman
ทดลองเล่น 777pg slot เป็นเกมสล็อตออนไลน์ที่มีความน่าสนใจมากในตอนนี้ เนื่องจากมีรูปแบบและสไตล์การเล่นที่น่าตื่นเต้น PG SLOT ป้ายกิจกรรมโปรโมชั่นนอกจากนี้ 777pg
Post a Comment