

Wednesday, March 24, 2010
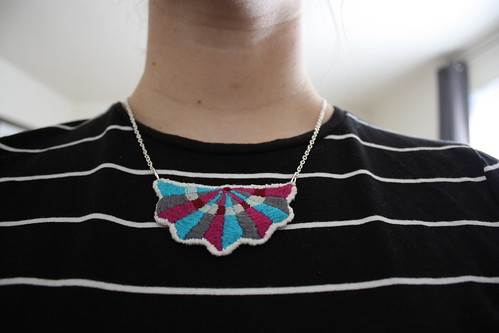
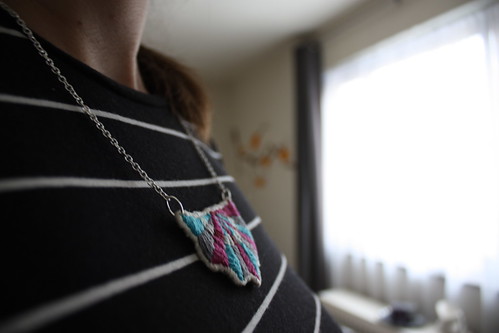
Okay. So I'm a chronic "I could do that"-er. I look at an object, I reverse engineer it, and then I do it myself. This time I blatantly ripped off etsy/spinthread's peacock fan no 2 embroidered necklace. Be forewarned: this project takes a loooong time. Way longer than it should. Maybe there's a sewing machine that could do the embroidery for you?
I started with a different design in a different blog post, but determined that the peacock fan would be a bit simpler.
Step 0: Materials
Embroidery: Have a design in mind, assorted embroidery threads, embroidery needles, small amount of muslin fabric (depending on the size of your embroidery hoop and design), piece of lace (just a bit larger than your design), scissors, embroidery hoop, pencil, and spray starch.
Necklace: 4 jump rings (2 medium, 2 large), clasp (I used a lobster clasp), a length of chain (I bought some Blue Moon Jewelry chain from my local craft store), needle nose pliers, jewelry wire cutters, and a wire nail (or large pin or small awl).
Step 1: Create the design [and print it out]

I use an ancient version of Adobe Illustrator to trace all my designs. You could also draw one by hand.
Step 2: Trace the design onto white muslin

Using a pencil, trace your design onto the white muslin. The muslin should be thin enough to see through it.
Step 3: Put fabric into embroidery hoop
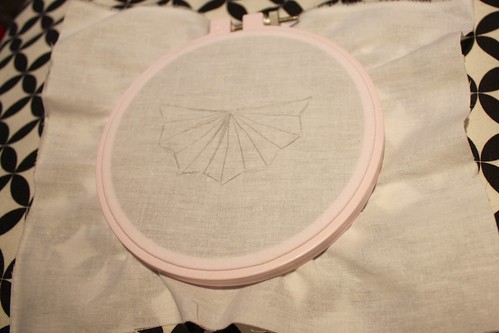
Put the fabric with traced design into an embroidery hoop. Make sure it is tight!
(To do this, remove the inner hoop from the outer hoop, place the fabric over the inner hoop, and then force the out hoop over the fabric. Then tighten the bolt at the top of the outer hoop, being sure to tug on the fabric slightly).
Step 4: Embroider using satin stitch (no filler)
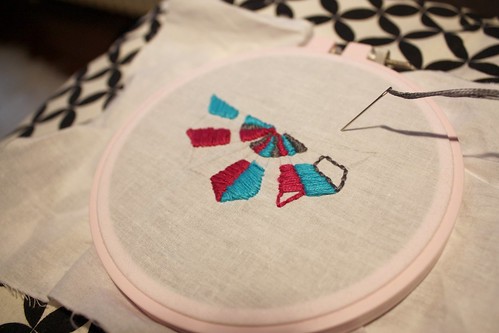
The Needle'n Thread video tutorial on satin stitch will be handy here. I use a backstitch to outline the shape I'm about to fill in, and then I use the satin stitch (without any filler) to fill in the shape.
It might be best to alternate colors on this step.
Step 5: When design is fully embroidered, spray starch the back of the design

I used a couple rounds of spray starch (allowing to dry in between) to secure the loose threads in the back of the piece.
Step 6: Trace 1/4" border and cut
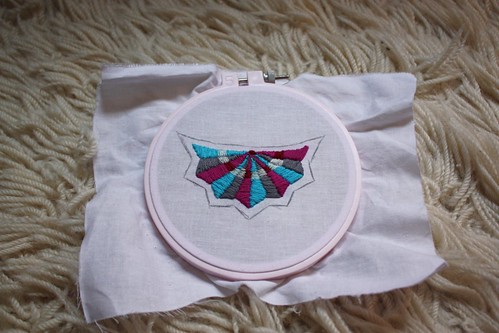
Create a small border around your design with a pencil, remove from embroidery hoop, and then cut along created line.
Step 7: Cut a piece of slightly larger lace
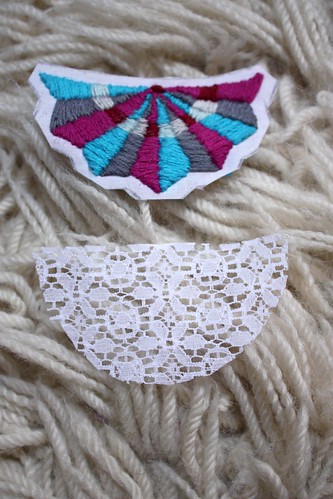
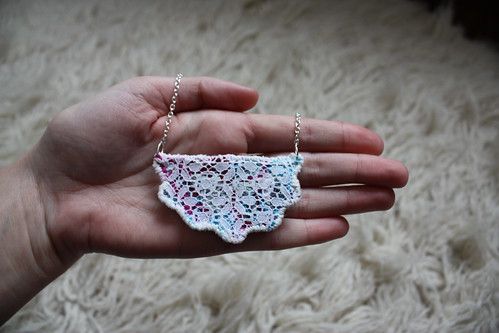
Cut a piece of lace slightly larger than the cut-out design. The lace will cover the "bad" loose-end side of the work.
Step 8: Use an overstitch to secure lace and design together
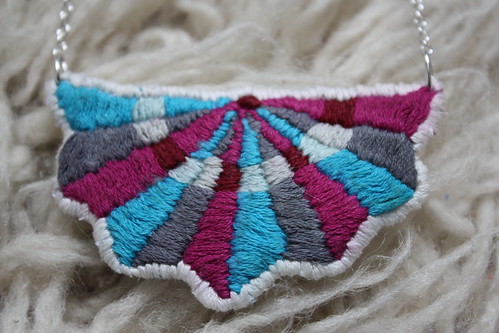
I used white embroidery thread to sew the lace and designed piece together. Notice how the stitches are close together so none of the white fabric shows.
It may be wise to quickly baste the pieces together first with some waste thread that can be easily removed.
Also, if you're afraid the embroidered piece is going to be too floppy, you may wish to sew a piece of wire across the top/width of the design, between the lace and embroidered fabric.
You're now done the embroidery portion of this project. What you have probably looks like an abstract Girl Scout badge. Now, onto the jewelry part.!
Step 9: Attach jump rings
Now that the charm is done, you can follow my step-by-step instructions for attaching the chain, here.
Using a large pin or a small wire nail, create small holes in the edge of the design piece. Open a jump ring with some pliers and slide into the newly created hole. Do the same for the other end of the design.
Step 10: Attach chain to jump rings
You may wish to follow my detailed step-by-step instructions for attaching the chain, here.
With wire clippers, cut 2 pieces of chain to make the necklace of desired length. Attach chain pieces to opened jump rings. Close jump rings with pliers.
Step 11: Attach clasp to chain ends
You may wish to follow my detailed step-by-step instructions for attaching the chain, here.
Open another jump ring with your pliers, and slip the clasp onto it. Then, slip one of the chain-ends onto the open jump ring and close the ring. To the other chain-end, attach another jump ring (open ring, slip on chain, close ring).
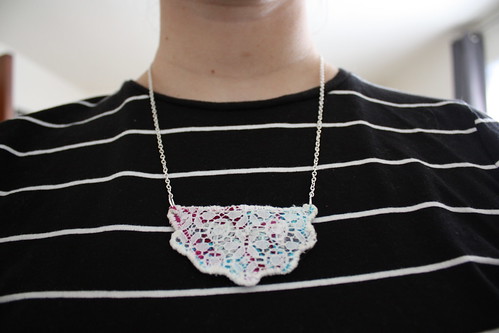
You're done!


3 comments:
Thanks! This piece came out really nice, hopefully yours will too!
Awesome, I'm doing this as soon as iv finished the scarf and quilt I'm making.
Awesome, I'd love to see what you do with it!
Post a Comment