

Thursday, May 13, 2010

I had a pair of jeans in my closet, possibly from high school, with ridiculous flaired legs, circa 2002. Not.acceptable.
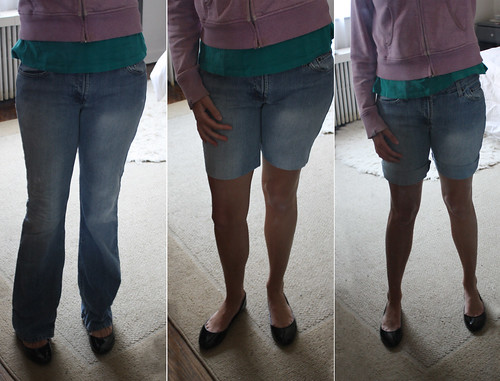
And so continues the week of destroying all the old jeans in my closet, with these rolled cuff shorts.
Step 0: Materials
You'll need: scissors, a pen/pencil, measuring tape, needle, thread, and a sewing machine.
The jeans you choose to convert should probably be a little looser-fitting than the average stretchy skinny jean. The look these days is "boyfriend shorts" which just implies some slack in the hips area.
A Note on Procedure

Step 1: Measure and Mark Pants At Desired Length, Then Cut
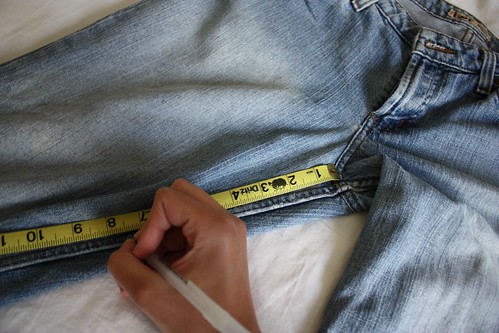
Mark your jeans where you want to shorten them, plus an extra 1/2". Here I marked the jeans at 7.5 inches from the inseam, since I want them to be about 7 inches long (eventually there will be a 3 inch cuff).
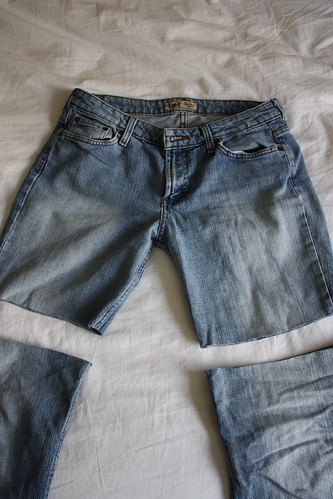
Cut the pants at the mark you made. You now have the shorts, plus the legs of the pants. You might want to check at this point that the shorts are of a desired length. You can always make them shorter at this stage :)
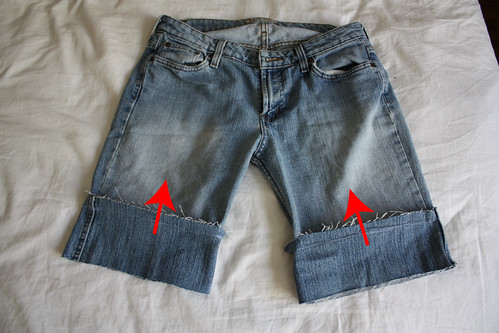
Step 2: Turn the Pant Legs Upside Down
Turn the pant legs upside down, so the edge of the shorts overlaps with the ankle of the pants.
Step 3: Line the Leg and Shorts Up at Same Width/Diameter and Cut

Line the edge of the shorts up with the pant-legs at the point where they have the same width/diameter. Cut the pant-legs along the line where the shorts-edge is (i.e., the blue dashed line in the photo).
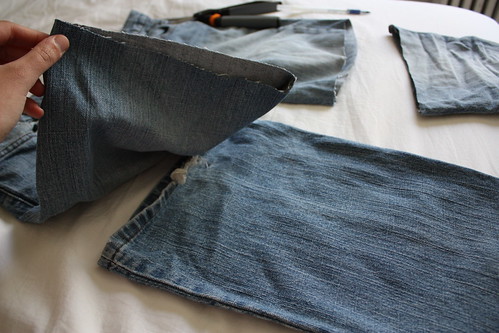
Step 4: Trim Pant Leg Sliver to be the Cuff

You now have a small strip of the pants-leg to serve as a cuff (remember, we have to do the cuff this way because the top of pants are tapered. If you just rolled up the cuff, then the roll might be too tight). Trim it to your desired length, plus 1 inch. In this case, I have a 3.5" strip, so I'll have a 2.5-inch cuff.
Step 5: Repeat for Other Leg & Line Up Properly
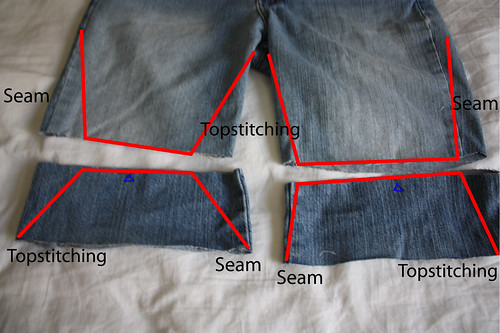
Repeat the previous process for the other shorts-leg. You now have the shorts with two cuff-pieces, they should be shaped sort of like an hour glass (the illustration points this out).
The seamed and topstitched hems should be alternated, as shown in the photo.
Additionally, you may want to mark which side is the thinner side of the cuffs, my little triangles are highlighted in the illustration. This will help you align the right part of the cuff with the shorts-edges.
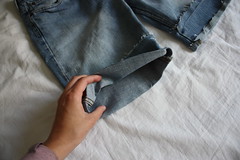
Step 6: Flip Cuff Inside Out, Thinnest Side Down
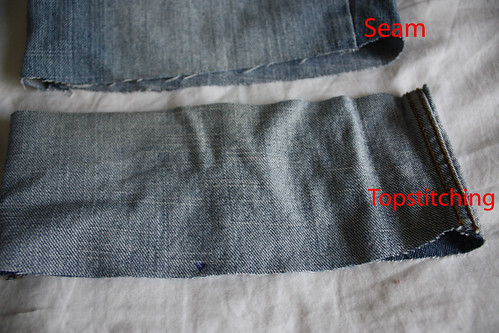
Flip the cuff-piece inside out, making sure to mis-match the seam and topstitched edges as shown. In the photo, you can see that the thinnest side (marked by the triangle) is pointing downwards.
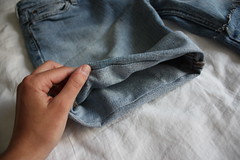
Step 7: Slip the Cuff Inside the Shorts
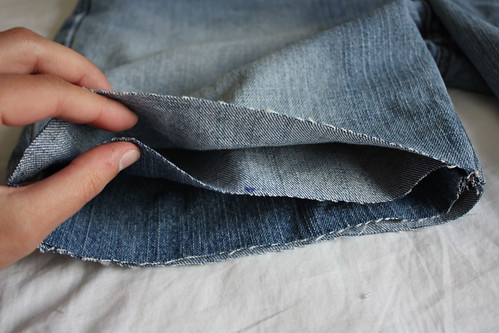
Slip the inside-out cuff inside of the shorts, lining the equal-diameter edges with each other, as shown. The thinner side of the cuff should be lined up with the shorts-edge (the blue triangle in the photo signifies the thinner side).
Step 8: Pin the Cuff Inside the Shorts, then Sew Half Inch Seam Allowance
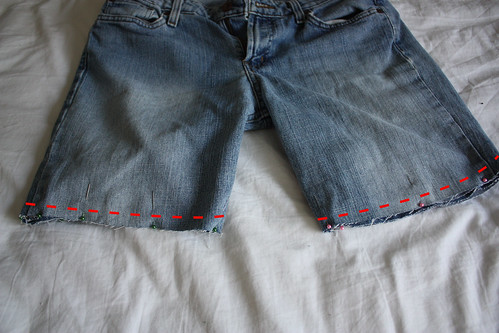
Pin the cuff inside of the shorts, and sew a half inch seam allowance, as shown.

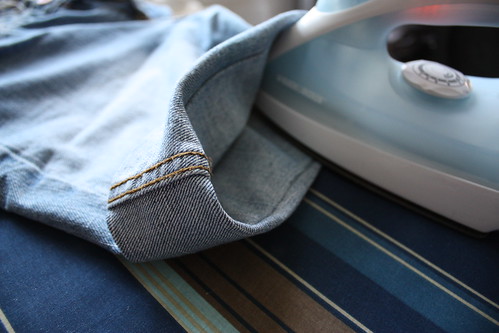
Step 9: Flip the Cuff Out of Shorts and Iron Seam Upwards
When you're done sewing, flip the cuff outside of the shorts. The "right side" of the cuff fabric should be showing. Be sure to push the seam upwards, as shown in the photo.
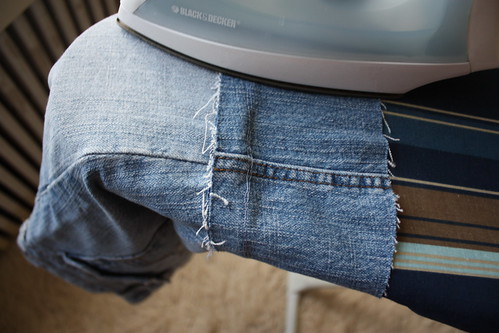
Iron the seam between the shorts and cuff so the edges are pointed upwards, towards the top of the shorts.
Step 10: Fold the Bottom 1/2" of Cuff Up & Iron in Place
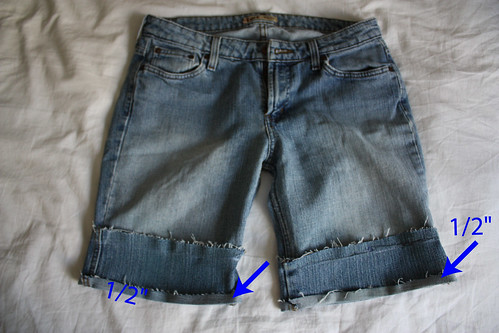
Fold the bottom half inch of the cuff up onto itself, as shown in the photo, and then iron in place.
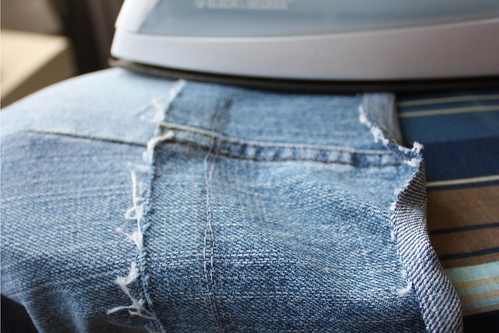
Step 11: Fold the Cuff Up with the Seam 1/8" Inside the Fold, Then Iron
Begin to fold the cuff up, as you want it to appear in the final stage...but you don't want to fold directly on the seam. Be sure to leave the seam about an 1/8" inside of the shorts. You can see in the photo that the seam is 1/8" from the edge. Iron the inside of the cuff, as shown.
Step 12: Attach Cuff with Hidden Stitch

Using a hidden stitch (either slip stitch, or a cleverly done running stitch), attach the top of the cuff to the shorts.
Here is a decent video tutorial for the hidden stitch. But really, all you need to do is use a simple running stitch to attach the shorts fabric to the hidden 1/2" ironed cuff-fabric (as shown in the cutaway illustration above).

Step 13: Repeat for Other Shorts Leg

The image above shows the hidden stitch from the outside of the cuff. You might be able to see some indentations, but you cannot actually see the thread, since the two pieces of fabric that are attached are hidden from view.
Step 14: Done!
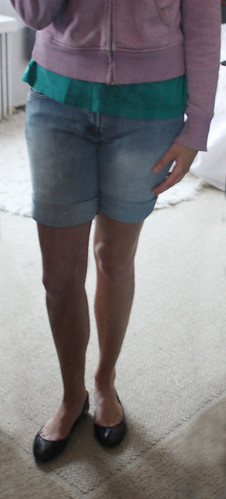
Now I just have one more pair of jeans left to modify...
I should mention that this tutorial was borrowed from Adventures in Dressmaking, but I thought I could illustrate the process a little better for some non-sewers.


5 comments:
Great job, hope you don't mind if I share pics of yours on my "You Tried It!"
Thanks for citing my tute!
Haha, yeah, go for it :)
Thanks Iris! This was such a clear and easy to understand tutorial. I really appreciate your diagrams and detailed instructions. Earlier this summer I TOTALLY thought to myself, "Hey! I can make those stylish cuffed shorts EASILY with a pair of old jeans... just cut 'em and cuff 'em, right?" WRONG. My thighs ended up looking and feeling like two little stuffed sausages. I can't wait to try this! Keep these awesome tutorials coming, please :)
Thanks, Stephanie! I felt this technique was a little too tricky without some diagrams. Lots and lots of diagrams ;)
I love, LOVE, LOVE this tutorial!! Thank you for the super-clear diagrams and great photos along the way!!
Do you have any idea how many times I've tried to to do this on my OWN JEANS, and just ended up looking like my legs were stuffed into sausage casings??
I LOVE LOVE, LOVE your trick!
And, actually, I'm even a more bit excited about hemming my HUSBAND'S jeans into shorts. I cannot find any "preppy" denim shorts for men anymore... they just don't exist. Everything is cut-up or deliberately distressed, and he hates that look!
Do men even WEAR cuffed jeans anyway? Or is that just a girl thing?
Anyway, I know I can use this trick for my daughter's adorable little jeans that she's getting WAY too tall for but still fit her perfectly in her skinny little legs and around her waist!
So what do you think about cuffed jeans for men? Should I just skip them altogether and do a European hem on the shorts? (like I do on all my jeans, because, you know, I'm EXTREMELY vertically challenged! LOL
Thoughts? :)
misadeventuresinmotherhood(at)gmail(dot)com
Post a Comment