

Sunday, December 9, 2012
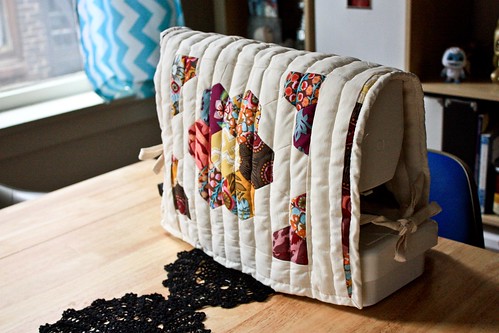
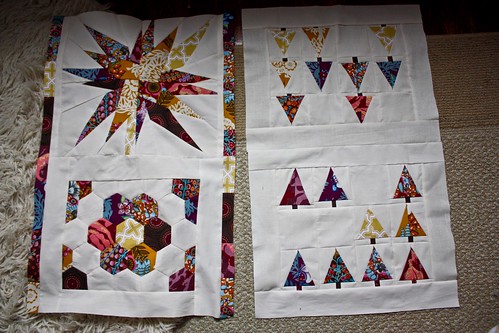
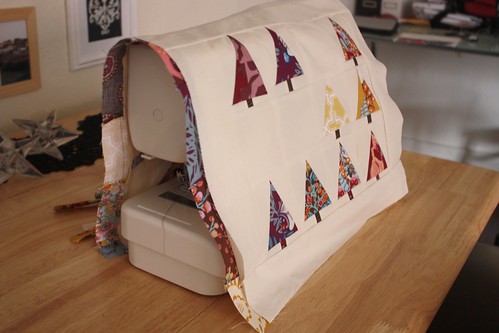
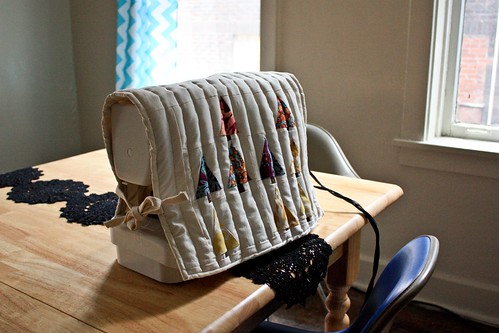
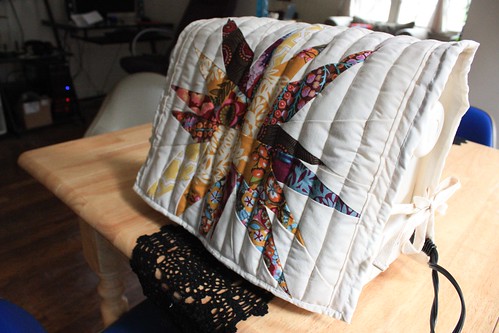
I loosely followed some directions from Ellison Lane Quilts for the construction of the cover, although, I created my own double-sided quilt for the body (based on the Little Forest Quilt from Purl Soho, hexagon quilt piecing by myself, and Love Emblem Pillows by Anna Maria Horner) with binding instructions from Crazy Mom Quilts and twill tape ties (for the lazy of us). Those little trees are just so damn cute.
If I did it again, I'd try to engineer a hole for the sewing machine's handle to come through.
I've also written up some instructions below:
Note: All hems are 1/4"
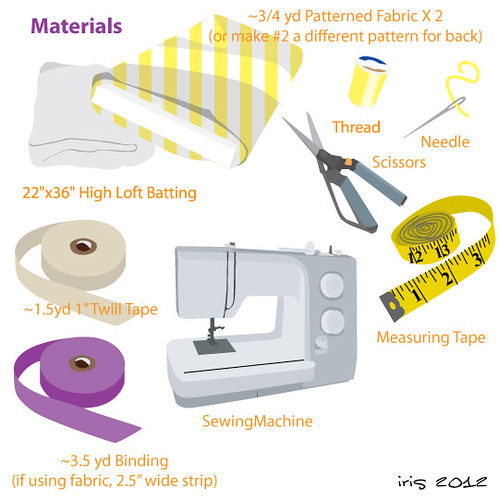
Step 0: Gather Materials.
You'll need ~22"X36" high loft batting, 3/4 yard patterned fabric for the front, and 3/4 yard backing fabric (these two can be swapped for a quilted front/back), ~1.5yd twill tape for the ties (or you can make your own with fabric), ~3.5yd binding (if you're making fabric binding, the strips should be about 2.5" wide), thread, needle, scissors, sewing machine, and measuring tape.
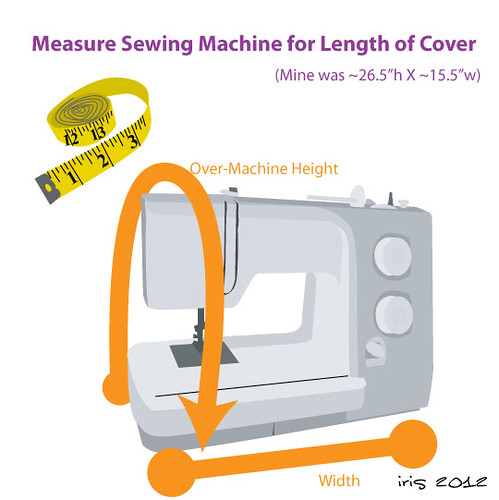
Step 1: Measure the Over-Machine Height and Width of Your Sewing Machine.
To measure the over-machine-height of your machine, measure from the tabletop on one side of your sewing machine, over the top of it, and then to the tabletop on the other side. Also, measure the width of the machine.
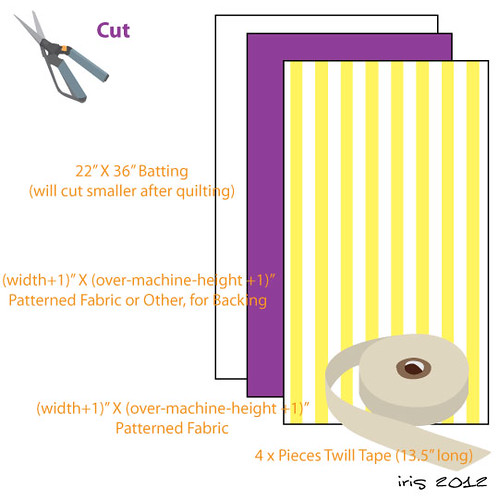
Step 2: Cut Your Backing & Patterned Front Fabric.
Cut your backing and front fabric to be [width + 1"] wide by [over-machine-height + 1"] long. You could optionally use quilt pieces for the front and/or backing, but they also need to be cut down to this size. The batting should be slightly larger than these pieces (I like to cut it down after quilting). Also, cut the twill tape (or whatever you're using for ties) into four equal lengths, approximately 13.5" long.
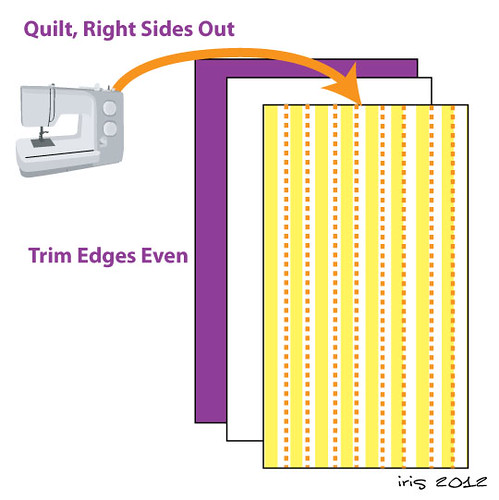
Step 3: Quilt.
Sandwich the batting in between the backing and front fabrics and quilt. It is probably best to pin the sandwich before sewing. I chose to quilt in straight lines, 1.25" apart, but you can quilt in whatever design you choose.
You might want to place the quilted cover over your machine to ensure that it's large enough.
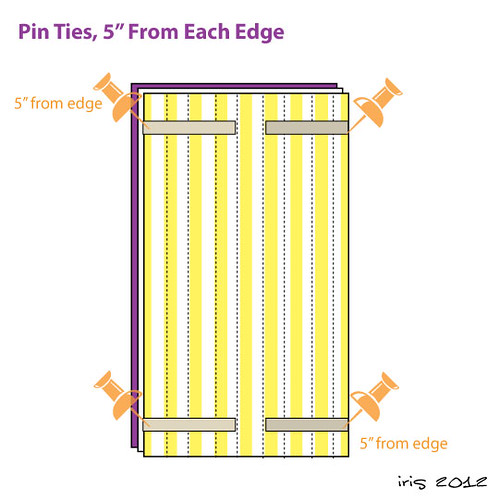
Step 4: Pin Ties to Front Fabric, 5" from the Corner, Facing Inwards.
Take each tie and pin them ~5" from the corner, on the front side of the cover, with the edges of the tie pointing inward as shown in the diagram.
You may need to adjust the 5" measurement if your sewing machine has a taller machine bed.
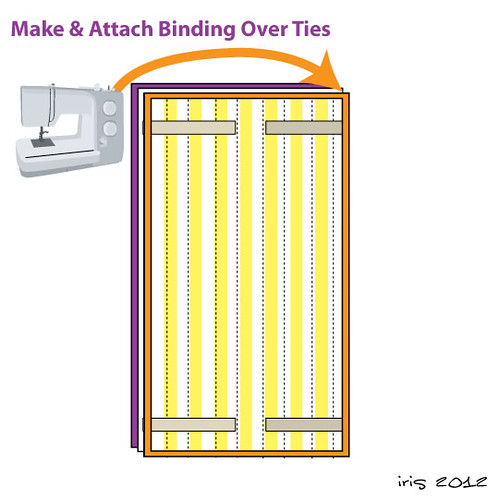
Step 5: Make Binding and Attach Over Ties.
Follow the instructions from either Crazy Mom Quilts (for photos) or from Heather Bailey (for illustrations) to make continuous binding and attach to the right side using a sewing machine. You fold over and hand-sew to the backing fabric, making sure to miter each corner.
This part can be a bit complicated.
Step 6: Fold & Sew Edges of Ties.
Fold Over 1.4" of each tie, and sew to finish off the edges.
Step 7: Done!


1 comments:
Looks fab - v clever!
Post a Comment