

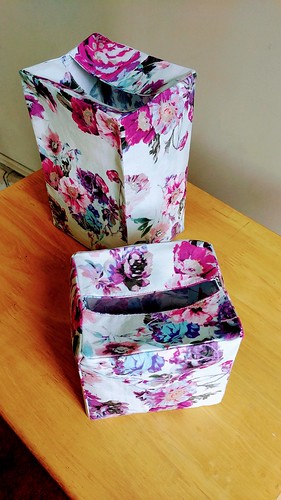
Sunday, November 4, 2018

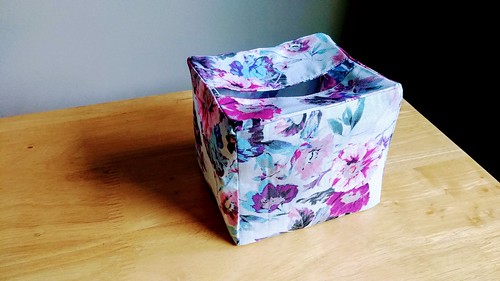
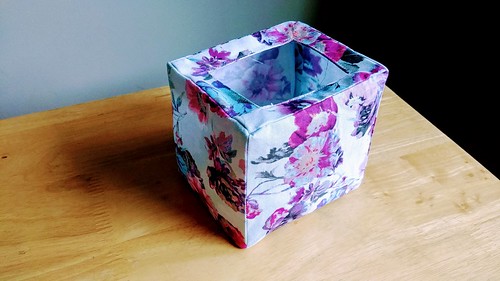
The original tutorial is from Brett Bara on Design*Sponge and it's worth a look, too. I modified it a bit by giving the bottom of the fabric box a framed structure (similar to the top), instead of just hemming the bottom and making it a cover. With this approach you could potentially lift the item by the fabric box, and the item would remain contained inside. Who knows.
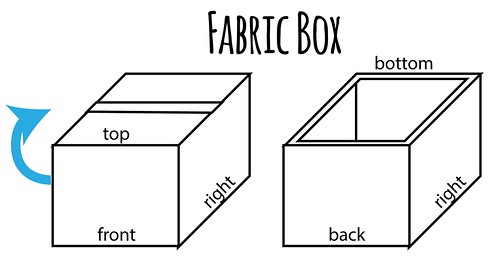
Note: If you just want a cover, the bottom frame is not necessary (just hem the bottom, according to original instructions).
Note2: If you'd like a full bottom piece, you'll have to sew the box into the cover. It's possible, but will take extra finagling.
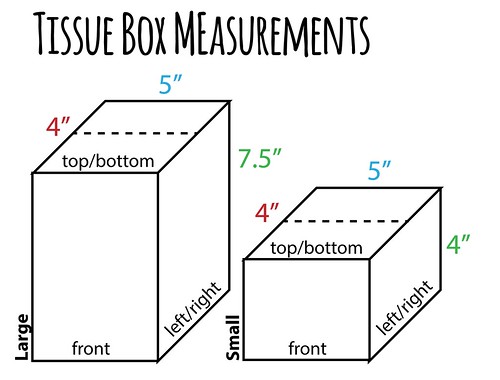
- Take measurements of box to cover.
Materials:
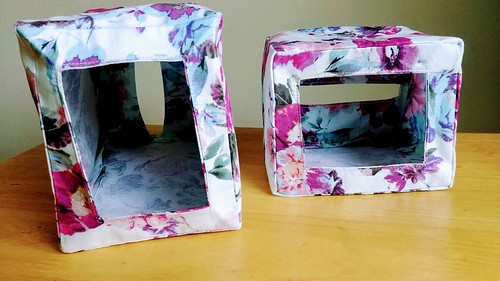
- One half yard of fabric is enough to make one small and one large box with the above dimensions,
- 1.25yd Featherweight Fusible Interfacing to make 2 small + 2 large boxes,
- Thread to match fabric,
- Sewing machine,
- Scissors, iron, ironing board
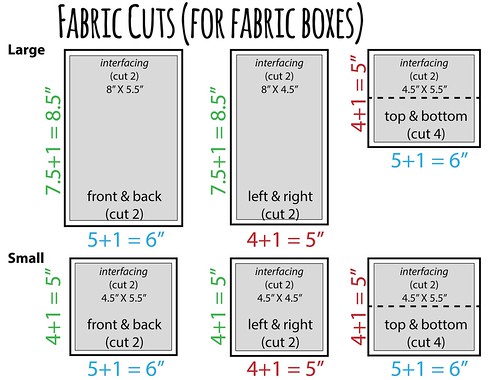
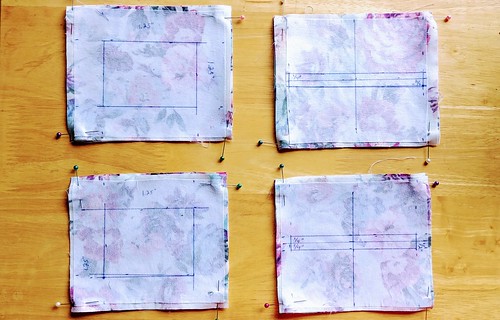
- Cut the fabric (for a framed bottom)
If you plan to use a frame for the bottom to hold the box in a little:
Add 1" to all dimensions for cutting the fabric. Cut 2 of each, and cut 4 of the top/bottom pieces.
Cut 1 interfacing piece 1/2" around smaller than the fabric piece. Cut 2 interfacing pieces for the top/bottom.
- Iron interfacing to center of fabric pieces
With iron on high-steam setting (or using a damp press cloth), iron bumpy side of interfacing to wrong-side of fabric.
You will have an extra top/bottom piece cut from fabric
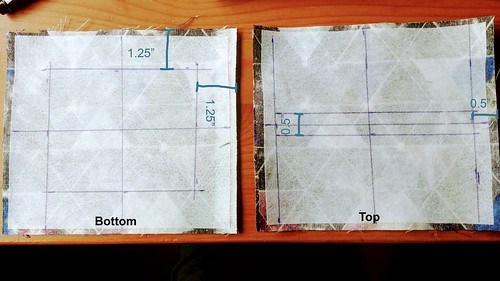
- For the top/bottom, draw out the opening placement
Remembering that 1/2" inseams will be used, draw out where you'd like your openings to be. I wanted a 0.5" opening in the center for the top, with 0.5" edge (to be consumed by inseam).
For the bottom piece, I framed out a 1.25" frame around the entire edge.

- Pin right-sides of top/bottom pieces together
- Sew on lines drawn in Step 3, then cut out opening leaving 1/8" inseam (diagonally slice corners w/o cutting the seam attaching the top/bottom to the sides)
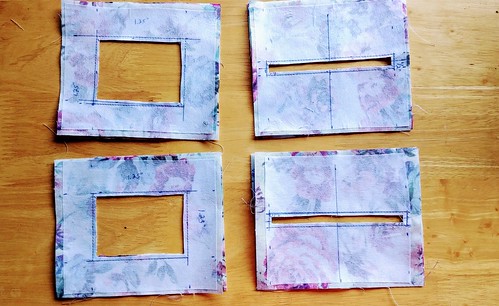
- Pull un-interfaced fabric through opening and iron one side at a time
This is a bit of a finnicky step, but if the un-interfaced side doesn't come out smoothly, no big deal. It won't be seen! Just iron smoothly as best you can. I find ironing the middle of one side at a time, and then doing the corners at the end to be the best approach.
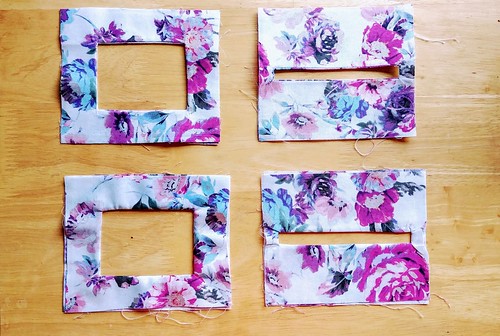
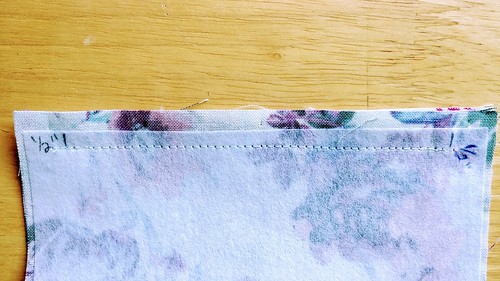
- Top stitch around the edge of the openings, and then sew 1/4" from the edges
Top stitching will be seen! I like to sew a scant 1/8" from the opening.
Then sew around the edges, 1/4" from the edge. This won't be seen, it's just to keep the pieces together.

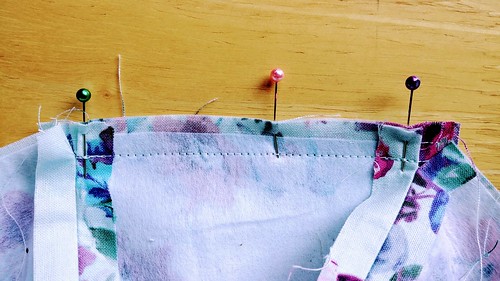
- Align sides of box together, mark out 1/2" from the top/bottom of the pieces. Front-Right-Back-Left ordering.
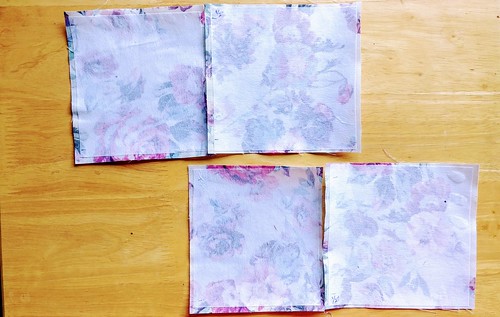
- Pin the edges of the side pieces together
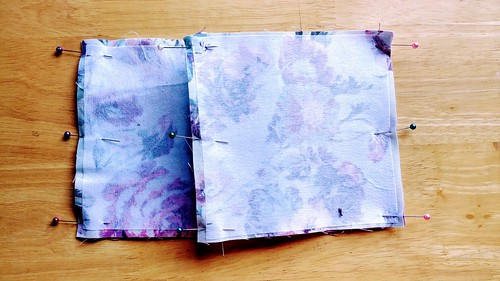
- Sew each side edge (with a 1/2" inseam) together, leaving 1/2" unsewn at the beginning and end.
- Iron side-seams open
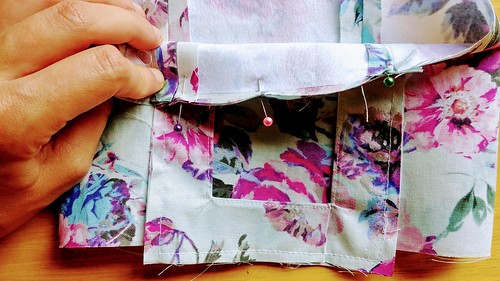
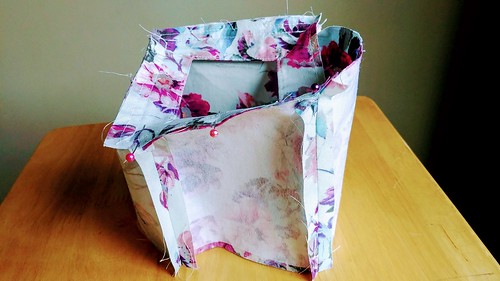
- Pin the bottom frame to the correct side piece (see color-coding in Step 1), right-sides together
This is the easiest part to mess up! Make sure you pin the short edge of the bottom piece to the short edge of the side!
Note that the bottom piece will be 1" bigger than the side piece! Align the edge of the bottom piece with the folded inseam of the previous side piece (i.e., just center it! It should have a 1/2" overhang on both sides)
If using a hemmed bottom, not a frame, you can hem the bottom now with a double 1/2" fold.
- Sew side piece to bottom piece with 1/2" inseam (1/2 of bottom piece will be unsewn at each side)
- Repeat Steps 12 & 13 for each side of the bottom piece.
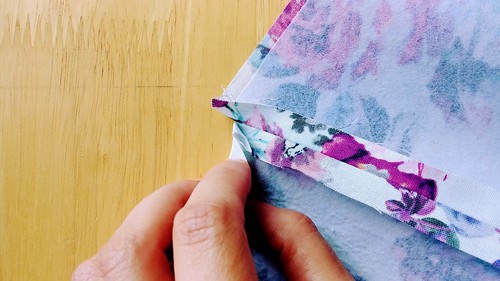
- Snip corners off at 45-degree angle, without cutting the seams!
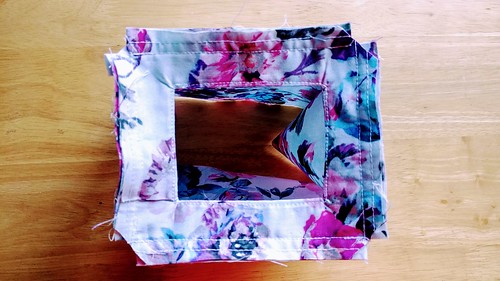
- Flip right-side out and make sure it looks correct. Iron edges.
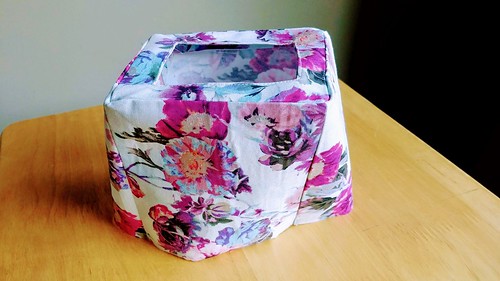
- Repeat Steps 12-16 for the Top Piece.
- Iron edges, poke out corners. Done!


0 comments:
Post a Comment