

Friday, March 19, 2010
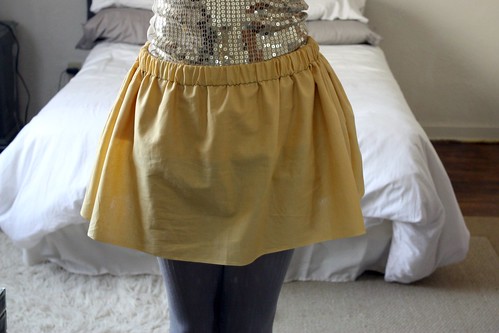
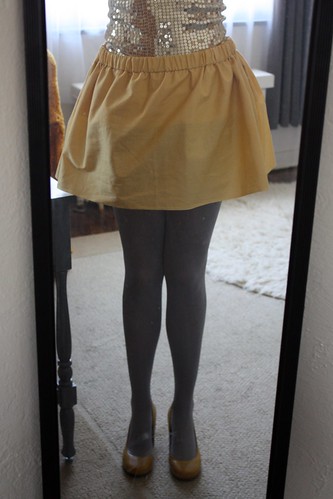
This skirt took me approximately 15 minutes to put together, and since it's just for a costume, I really couldn't be more pleased.
As stated in the previous entry about making curtains, making an elastic waist skirt is nearly identical to curtains, except with the added step of sewing the two sides together. The first 4 steps (shown below) are the same as the steps for the flat top and ruffle top curtains, as seen in the curtain figure here. These are sort of abstract, I know, but this time I'm actually going through a step-by-step photo process.


Now, before you get all weird about ruffle-top skirts, let me tell you, I've seen them around. An example? At the moment, you can find the B&W Paperbag Skirt by Babooshka below from Threadsense.

Step 0: Materials
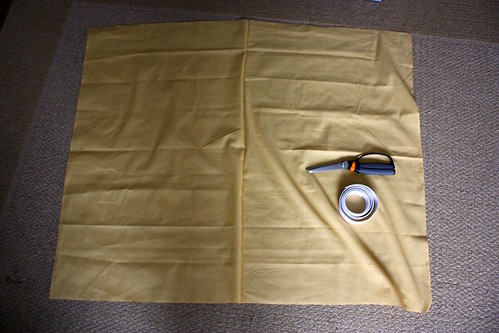
One yard of 44" fabric (this works for a 29" waist/38" hips, but if you're making it for someone thinner it will be more ruffle-y, or less ruffle-y, if wider. You can play it by ear and buy more fabric if desired)
~30 inches of 1.5" width elastic (for 29" waist/38" hips)
Scissors
Needle/Thread/Sewing Machine
Step 1: Cut Fabric in Half, Lengthwise

Cut the fabric in half, the longest length possible. (In elementary school, we would say "cut it hot dog style", so you get two long/thin pieces).
You may notice I'm using pinking sheers here. Because. I'm lazy and I made this skirt in 5 minutes, and I had no intentions of doing any finishing seams. (Instead of using pinking sheers, you might want to iron or sew a 1/4" hem as in Step 2 of the abstract directions)
Step 2: Sew Right Sides Together Along Short Edge
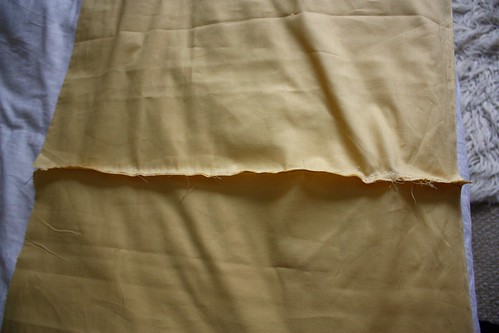
Place the right sides of the fabric facing each other, and with a 1/4" or so seam allowance, sew along the shortest edge of the fabric.
We've finished the prep work, and are now beginning to [loosely] use the instructions from the abstract figure above.
Step 3: Sew a 1/4" Double Seam on the Non-Elastic Side of the Skirt
I am using the selvedge edge on the bottom of my skirt, so I'm being lazy and not doing this part (the selvege edge won't fray). But if you would actually like a nicely finished skirt, I highly recommend folding 1/4" over twice and sewing. This will also give the bottom of the skirt a little weight.
Step 4: Fold Fabric to Desired Skirt Length and Pin
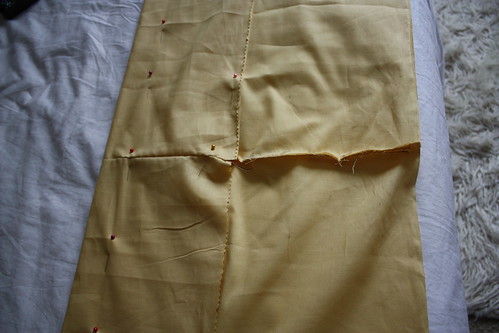
Fold the fabric so it is approximately the desired skirt length. Make sure to include a few extra inches for the elastic.
I will sew along the line created by the pins closest to the edge (to the left). This will create a tunnel for the elastic to go through.
Step 5: Feed Elastic Through Tunnel and Sew Into Loop
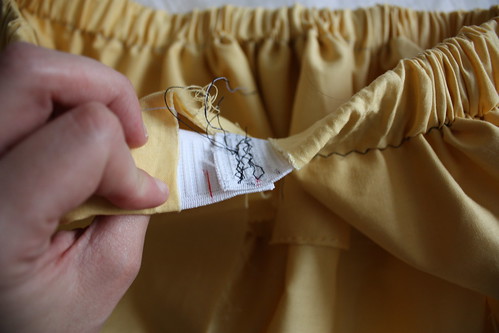
Attach a safety pin to one end of the elastic, and feed it through the tunnel created in the last step. This process usually takes 5 minutes or so, so be patient and persistent.
Once the elastic is all the way through and you have both ends, sew them together as shown in the photo. (Don't mind the sloppiness of the seams. My sewing-machine-from-the-street and I were having a minor argument this day).
Step 6: Place Two Remaining Edges Together
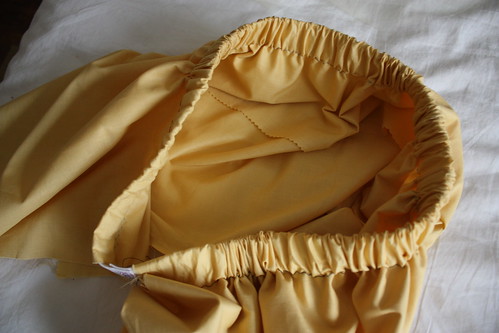
Your piece should now look somewhat like the photo. Keeping the skirt inside out, place the two "loose" edges together.
Step 7: With Right Sides Together, Sew Loose Edges
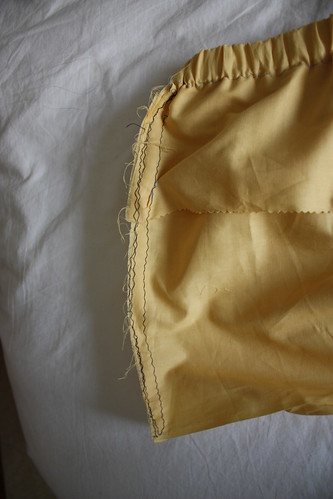
With the skirt still inside out, sew the two loose edges together. Starting just below the elastic (do not sew over the elastic!) sew with a 1/4" or so seam allowance. (Don't mind the sloppiness of the seams. My sewing-machine-from-the-street and I were having a minor argument this day).
Done!
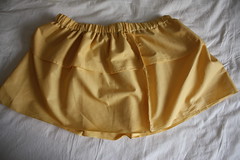
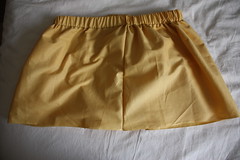
You can tell in the photo below that the "country classic cotton" I used is too thin for a normal skirt (you can see my sloppily folded over edge), but as this skirt is meant to go under another article of clothing, I'm not too concerned.


0 comments:
Post a Comment