Showing posts sorted by relevance for query wedding printable. Sort by date Show all posts

Wedding Paper: Invitations

Friday, November 18, 2016

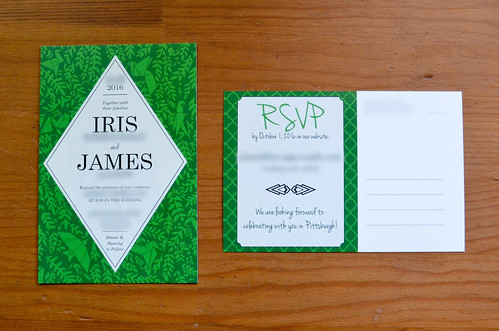
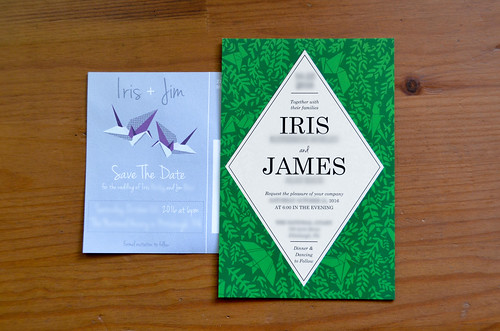
Wedding Invitations - front and back
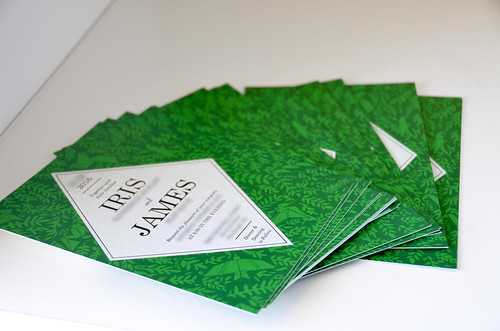
We decided to go fairly hands-on with our wedding invitations, though not quite as extreme as the Save the Dates. We did not print these ourselves, but got a whole stack of 100 for ~$40 from postcards.com. Cardstock quality is good, with some gloss, and the New Jersey US Postal Service seems less likely to shred these than the Save the Dates. They're probably one of the cheapest options for printing when you design your own. If you need some design help, I'd recommend Zazzle's templates, or possibly Printable Press for a higher end option.

We got our inspiration from two discontinued stationary lines from Printable Press, shown in this APW blog post. And then merged those designs with this Dottir & Sonur wallpaper that had been sitting atop my 'Illustrations' board in Pinterest forever. This produced the following as the front of our wedding invitation postcard:

The back of the postcard was made to match the background from our wedding website (AppyCouple's 'Georgetown' design).

In making a printable, I realized that wedding invitations are heavily personalized, so it's tricky to give out a ready-to-print version. Instead I've included these templates:


We used the minimal fuss calligraphy, just as with the Save the Dates, to address the invitations. And the bird postcard stamps, too. Everything is on-theme, but not too matchy-matchy. My life is complete.

Wedding Invitation and Save the Date
Stack of Wedding Invitations

Typefaces used: 'Century Schoolbook', Jenna Sue available from FontSquirrel.

Wedding Printable: Origami Crane Postcards

Wednesday, February 10, 2016

Designing Save the Date Postcards for Origami!
Welcome to J's pet project: origami crane Save the Date postcards. The paper goods are sort of at the bottom of our priority totem pole for this grandiose event, mostly because we're pretty adept at using Adobe Illustrator on our own. So why not go whole hog and print everything ourselves, too?

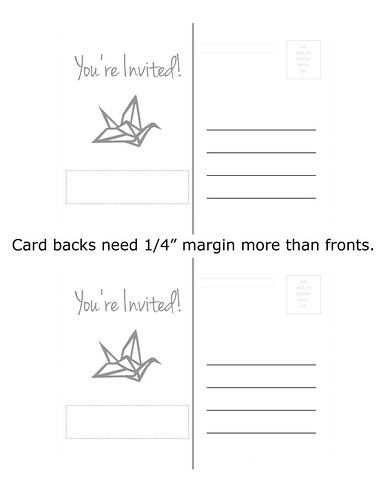
At-home printing was actually somewhat out of necessity. The square front of the postcard needs to be exact, and so the back of the postcard needs 1/4" bleed margin with nothing in it. You print the fronts first, feed back through the printer, and it prints at a slightly wonky location. If you want any chance of the fronts and backs lining up, you need to have the bleed margin. Also, the USPS has some pretty specific requirements for size & weight of postcards, and we would recommend printing on 80-95lb cardstock, if you can find it. We did these in 67lb, and it's okay but they tend to get a tiny bit shredded in the mail.

Also, if you're planning on printing your own invitations, might I recommend A Practical Wedding's 'How To Print Your Own Wedding Invitations'? We ignored much of the advice and it ended up costing us a bit. Basically, try not to print something with too much color, because the cost of ink will greatly drive up the cost of this process. Although, it still won't be nearly as expensive as printing as FedEx/Kinko's ($2.50 per sheet!). If you are going to go heavy on the ink, might I recommend using a lighter shade of grey? Black ink is cheaper than the color inks.

Just for fun, I've drawn up a basic paper crane postcard invitation, and shared instructions for making these beasts below. Just in case you too were feeling a bit nutty (only a bit) and wanted to do this yourselves. The bright side of printing them yourselves - you can adjust the color schemes as your printer runs out of the varying color inks!
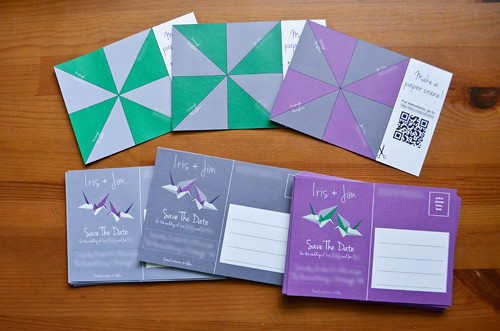
Origami Crane Save the Dates
Pilot Testing the Origami Save the Dates
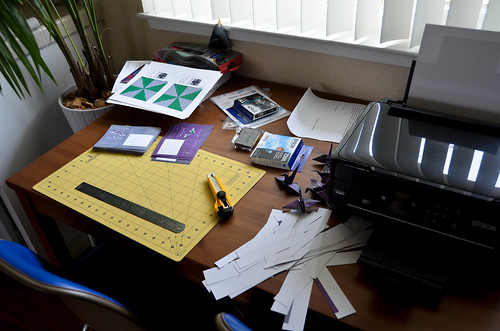
DIY At Home Wedding Stationary Studio
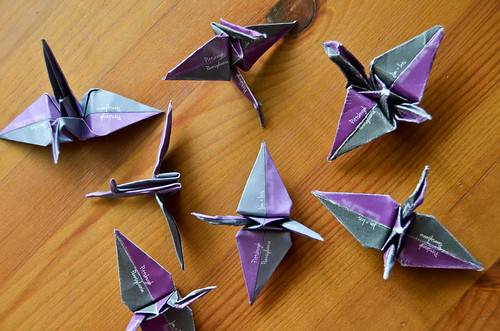
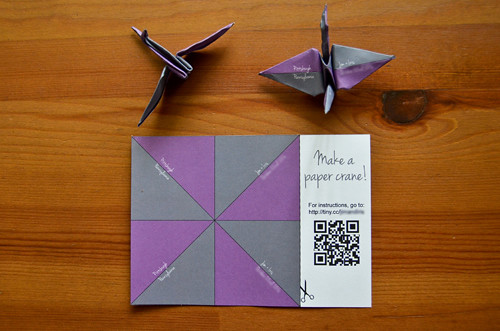
Completed Origami Save the Date Cranes!

  1. Print off postcards on 70-100lb cardstock, flip over and print on the other side of paper. The printables are below (full resolution available on flickr if you click through).
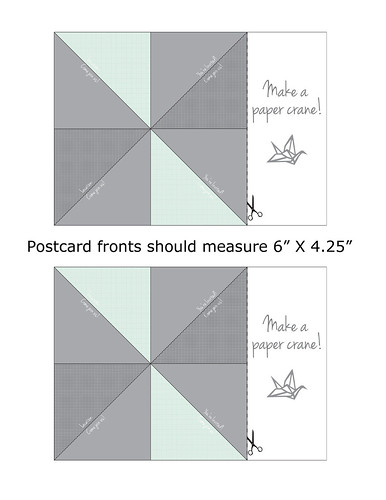
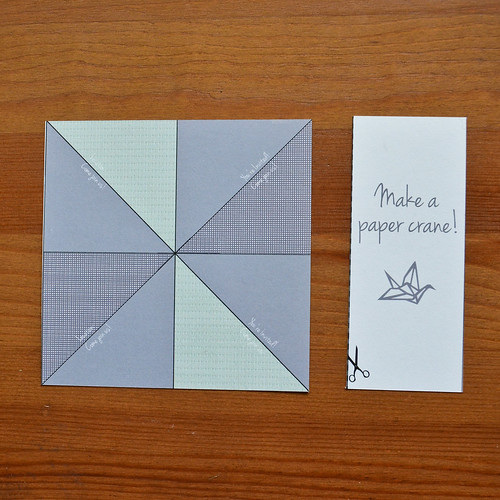
    Printable: Postcard Front (cut along black lines) Printable: Postcard Back (1/4" bleed margin)
  2. Cut postcard out of cardstock. We used an X-acto knife, but whatever works.
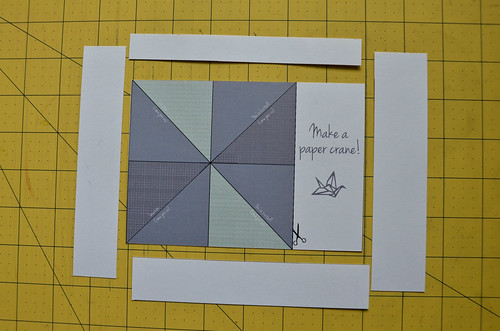
    Step 4. Cut postcard out of cardstock
  3. Step 4. Address, stamp, and mail to whoever! You're good to go!


How To Fold Origami Paper Crane

These directions are mediocre. We like this video instructional tutorial for making a paper crane: www.youtube.com/watch?v=KfnyopxdJXQ
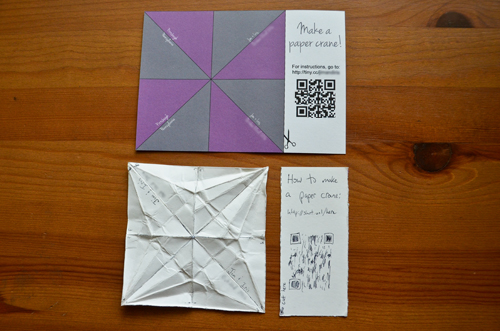
  1. Cut off square along scissor line
    Step 5. (As a recipient) Cut off along scissor line
  2. Pre-fold along all 4 lines (2 diagonal, 2 perpendicular)
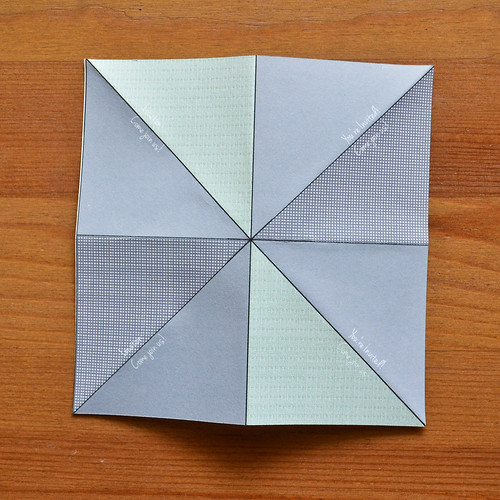
    Step 6. Fold along all 4 lines (2 diagonal, 2 perpendicular)
  3. Fold along diagonal line, then fold left and right corners inwards. The pre-fold lines should help you here.
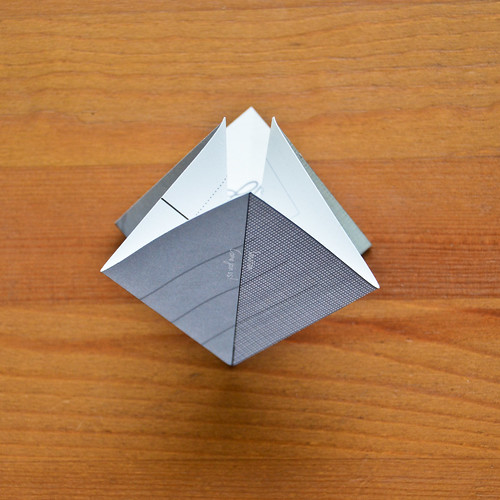
    Step 8. Fold left corner inside
  4. Turn 180 degrees and do some more pre-fold lines (bring side corners to center line).
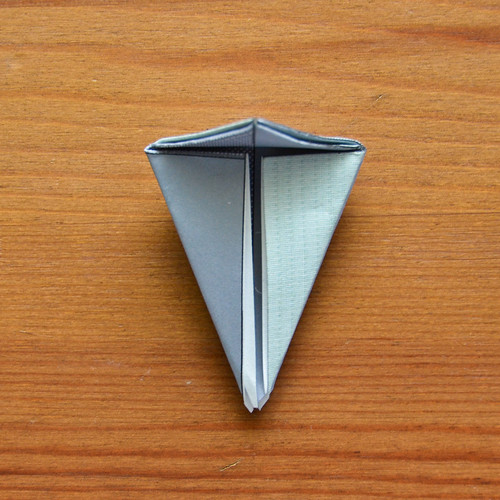
    Step 9. Flip around and pre-fold side corners inwards, and top corner downward.
  5. Pull bottom corner upward, folding along pre-fold lines. Repeat for other side.
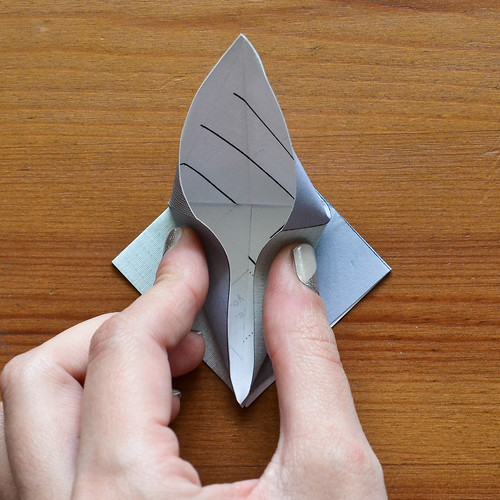
    Step 10. Pull one side upward, folding along pre-fold lines from previous step
  6. Fold corners inward to center lines, these will become the neck and tail
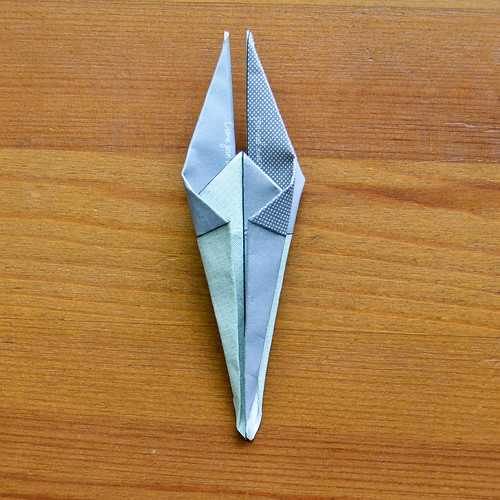
    Step 12. Fold wings in and upward, fold remaining corners to center line (on both sides)
  7. Close neck and tail, then bring inward and upward.
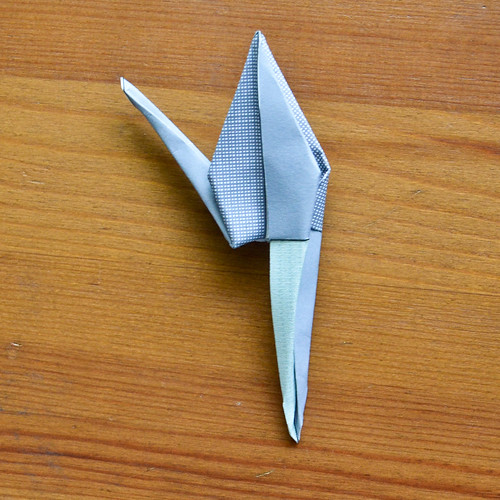
    Step 13. Open up edges and fold head and tail inward and upward
  8. Fold head downward and you're done!
    Step 14. Fold down head and you're done!
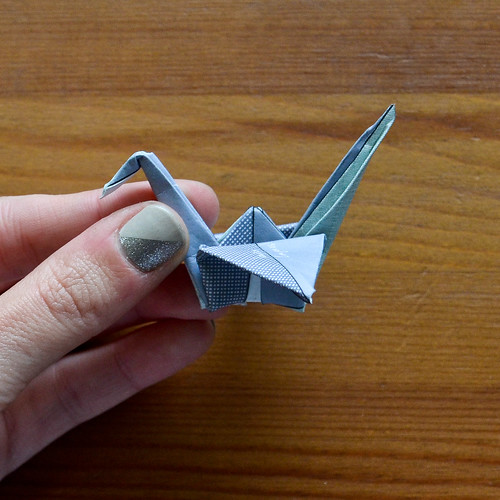
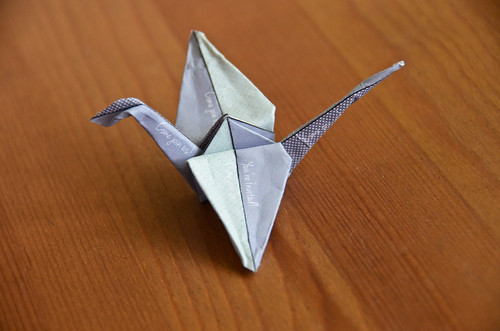
Completed Paper Crane from a Postcard!
Note how the event details are printed and folded in such a way as to be visible in the final origami crane. It's pretty spiffy.

Typefaces used: Jenna Sue, available from FontSquirrel.com. Details were probably described in 'Verdana'.
Wedding Printable: Escort Cards & Table Numbers

Friday, November 11, 2016

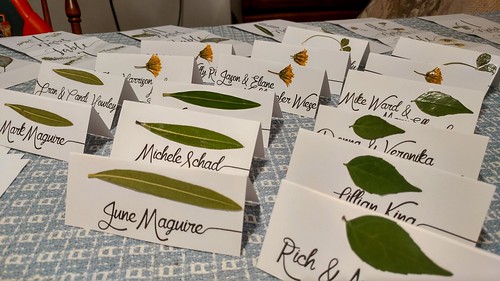
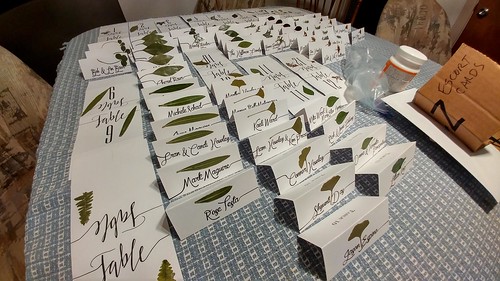
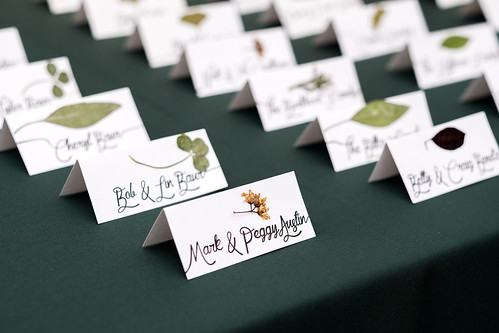
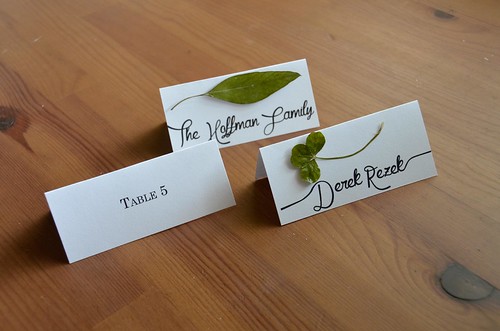
Botanical Escort Cards

There are two rules to wedding DIY:
(1) Only DIY stuff you like (like pressing leaves and Illustrator tracing).
(2) Only DIY stuff, where a failure does not mean catastrophe (i.e., monogram handkerchiefs).

This project meets both of these requirements. If the pressed leaves didn't come out right, then at least the escort cards would look alright on their own. And Mod Podge-ing leaves to cardstock isn't so hard, but it is a nice, long meditative process. I think they came out really, really well.

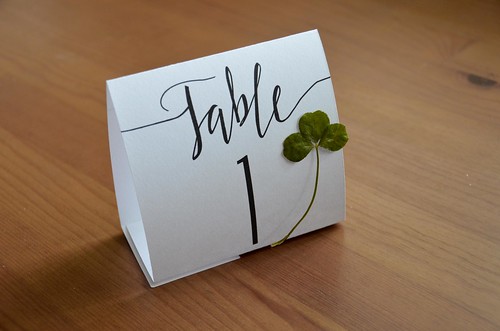
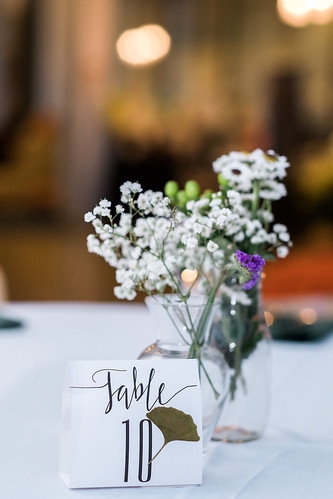
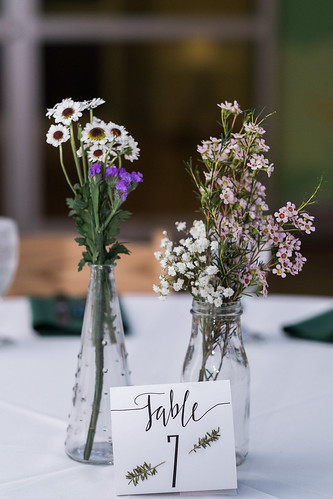
Botanical Calligraphy Table Numbers
Escort Cards with Pressed Leaves
Photos below by Caitlin's Living Photography
Wedding: Reception
Wedding: Reception Wedding: Reception

The templates for the Table Number Tents & Escort Cards are below. The actual table number tents used hand-traced calligraphy similar to this from etsy/PrintCutWorld, but below I've swapped it out for MF Queen Leela (copyrights n'at). For the escort cards, you have to play around with the height of the names. In a paper/effort-saving measure, we put all groups onto the same escort card which meant that occasionally the names would spill over into a second line. Reduce font, add line, wiggle the ampersand around until it looks right. Rinse. Repeat.

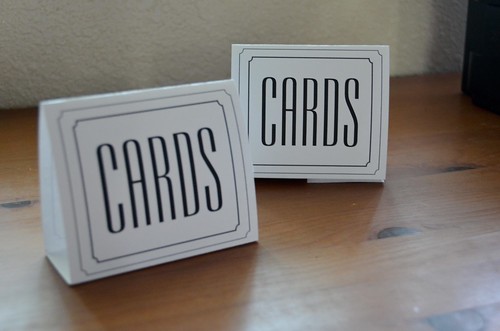
Edges need to be trimmed to make table tents & escort cards look correct. They should span the entire length of the paper. Table number tents can be folded in the same manner as the Cards Cardstock Table Tents or trimmed to fit into a table marker holder like these from Target. If I were to do it all over again, I might consider spray painting these reasonable priced Wooden Table Numbers with Holder Bases from Amazon. $18 for 20 table number markers is a fantastic deal!

Typefaces: MF Queen Leela (modified with card-spanning extensions), Century Schoolbook, hand-traced calligraphy

Wedding Printable: Advice Cards

Friday, November 4, 2016

Step 3: Done. Pretty much.

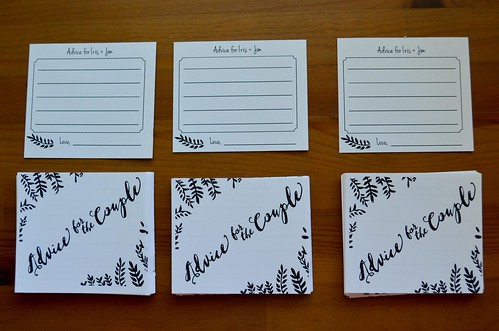
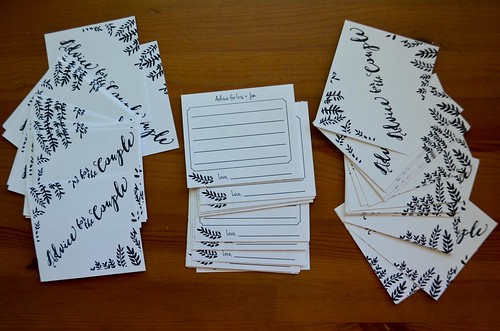
In case you need 'advice cards' or some other on-theme paper product for your guests to scribble all over, enjoy this 'Advice for the Couple' double-sided printable. It's best done on card stock.

I updated the typeface in the printable to use MF Queen Leela, which actually looks a bit better than the faux-handwriting we ended up using. My loss is your gain.

Step 0: Design Your Cards
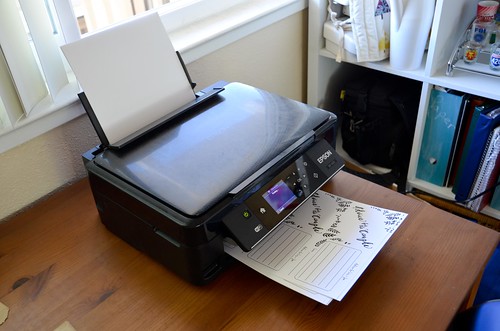
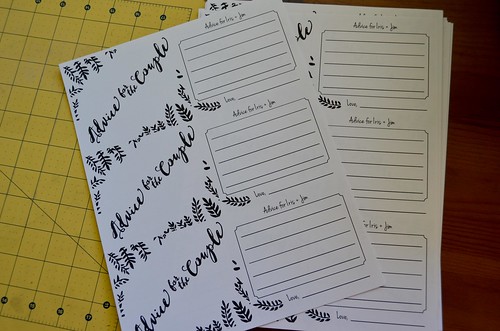
Step 1: Print the two-sided cards
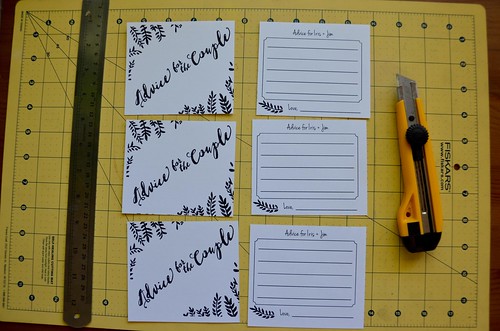
Step 2: Cut into Sixths
Step 4: Cardstock is a really nice choice for this.
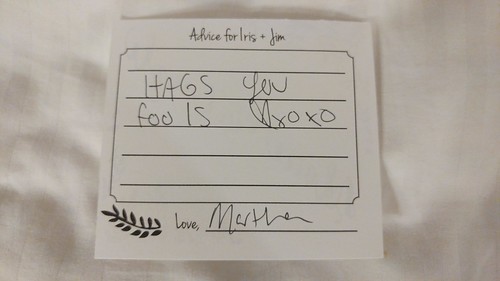
Advice Card - Filled Out

Typefaces used: MF Queen Leela available from dafont.com and Jenna Sue available from FontSquirrel.com.

Wedding Review: Making Your Own Wedding Printables

Friday, December 2, 2016

A quick search of the blog for 'wedding printables' will show you that we've assembled our own fair share of paper and graphic design elements for this ginormous event. This is just some tips and tricks for creating and designing your own printables for any event. 'Doesn't have to be a wedding.

Or you can just ignore all these tips and do whatever. Fonts aren't going to make or break a party!

  1. Start with a 'font story': Pick a FANCY-ish header typeface and a legible, plainer DETAILS typeface. Maybe one more ACCENT typeface.
    We didn't do this super consistently, but we generally used 'Century Schoolbook' for our details, Empire BT font for formal headers, Jenna Sue font for more informal headers and signatures, and MF Queen Leela for the occasional extra fancy thing. Our Save the Dates, invitations, advice cards, table tents, and escort cards all generally followed this. The exception to all this is the cookie bags in which we just did whatever the heck we wanted.

    APW has a really good collection of freely available handwriting fonts and script fonts, which are a really great start for figuring out what typefaces get you going!
  2. Etsy and Google are your inspiration friends: Rely on other people with legit graphic design skills to be your muse.
  3. Live Trace artwork you like in Adobe Illustrator: I don't use 'Live Trace' much, and prefer to hand-trace since I get cleaner results. But there's a pretty steep learning curve to hand-tracing, so live tracing might be a better option. Select object to trace > 'Live Trace / Tracing Options' > Make sure 'Preview' is checked > Play with 'Threshhold' slider until you get something that resembles what you want.
  4. If Live Trace in Adobe Illustrator isn't possible, hand-trace or use The GIMP (free): I've got a somewhat-outdated tutorial on the blog, here but you can find a slightly more coherent tutorial up on my personal website. Adobe Illustrator can be a bit pricey, so if a trial or one-month subscription isn't an option you can always try your hand at The GIMP. It's free and has a lot of the same functionality as Illustrator.
  5. Use free printables or templates: I've included a bunch of templates and completed printables throughout the blog, which means lots of people on the Internet likely have other designs to share.
  6. If all else fails, buy on Etsy or elsewhere: Graphic design 'n stuff is a hobby around these parts. If it isn't one of yours, screw it, it's not worth it. I really like the work of etsy/ Larissa Kay Designs and the more affordable printables of etsy/WellingtonCoveDesign. But Printable Press also has tons of lovely stationary suites. Zazzle sells lots of matching template suites & prints it for you, at more affordable rates.

Wedding Printable: Cardstock Table Tents

Wednesday, September 28, 2016

How To: Table Tents Tutorial!
So much paper, so little time. It is far, far cheaper to print paper goods on your own. Especially for little one-off projects like these 'table tents'.
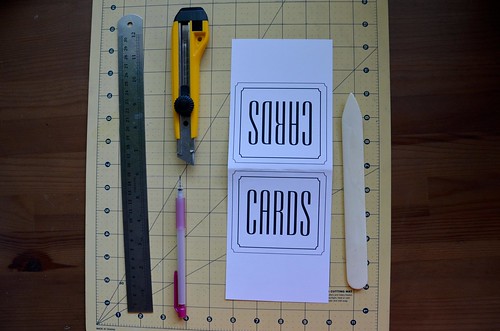
  1. Print off your table tent design (onto cardstock, preferably). Below I've included a sample design for a 'Cards' and 'Gifts' table tent and also a blank template that has all the folding and cutting guides you need. For a table tent made on letter paper, the ideal length is 11" with 1.75" on either end being dedicated to the base. The paper is first cut in half, yielding a table tent that is 4.25" wide.
  2. Gather up your supplies, which in this case should include: your printed design, an Xacto knife, cutting mat, Xacto guide (metal ruler), pencil, and a bone folder
    Step 1: Print Design, Cut in Half
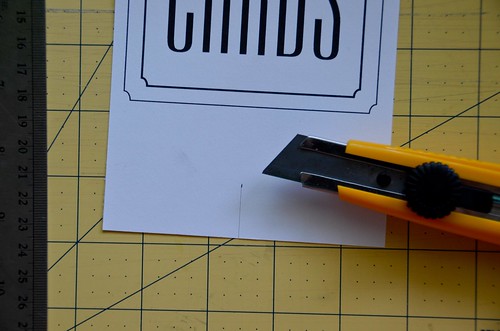
  3. Cut your design in half, along the cutting guide and then cut the notch along the provided guide (there are two notches on either end)
    Step 2: Cut the Base Slit on both sides
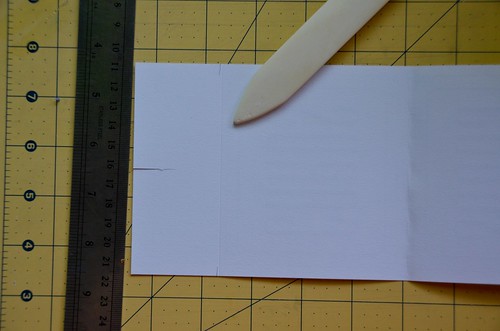
  4. Use a pencil to transfer the three folding marks to the back of the cardstock, and then use the bone folder to score along those three sets of pencil marks
    Step 3: Score the basex2 and top folds with bone folder.
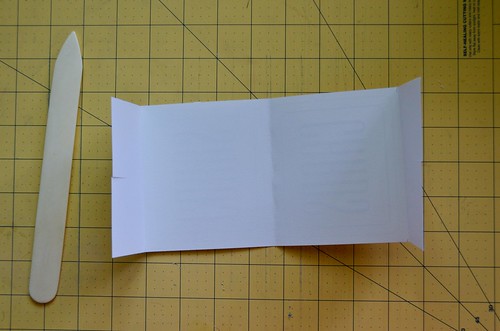
  5. Fold along the three score marks
    Step 4: Fold all the folds
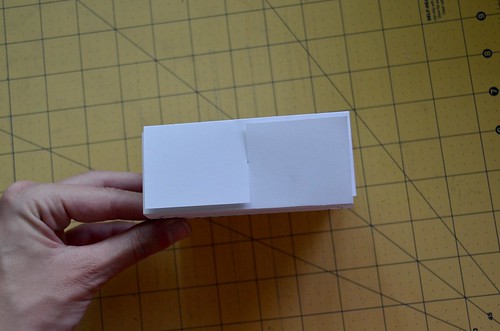
  6. Form the base of the tent by interlacing the two notches
    Step 5: Complete base by sliding either side into the slit
  7. Done!
    How To: Table Tents Tutorial!
Font used: Empire BT, available from ufonts.com.
For the actual wedding I ended up hand-tracing some nice calligraphy from etsy/WellingtonCoveDesign.