
Now we come to one of the most impactful and time consuming parts of the kitchen renovation! The paint!
I pretty much followed
YoungHouseLove's 'How to paint your cabinets', and don't have much to add
except, I was putting on waaaaay too thin coats of paint at first. This
is not my first time using Benjamin Moore Advance, but it is the first time I've figured out how to greatly reduce the appearance of paintbrush strokes. By loading the brush with a little more paint than I usually do, the foam roller had more to mush around when I went over my brushstrokes with it. This seemed to result in a much smoother finish for me.

As the
tutorial states, prep really is key. So there were many rounds of sanding, scrubbing with liquid sandpaper, scrubbing with TSP, wiping down, waiting to dry, etc. etc. But the cabinet doors are looking really nice now, especially the uppers. Another tip on prep work: even if your liquid sander/deglosser doesn't tell you to rinse off the solution, you definitely should, otherwise it'll end up showing a bit in your final result.
I also seemed to have the best results hiding hinge holes when I slightly overfilled them with wood-filler by hand, waited 16+ hours for it to dry, and then sanded it down with coarse and increasingly finer sandpapers. I did the upper white cabinet doors last, so they're pretty darn close to the most flawless of all the cabinet pieces, which is good, 'cos they're at eye level!

After one coat of primer (above) things weren't looking that great, but primer isn't really meant to cover with color, just seal in stains and wood filler/spackle/drywall/etc. Here I used Zinsser Bullseye 123 or Benjamin Moore Advance primer.

Those cabinet interiors are looking
soooo good. It took me about 3 coats of Benjamin Moore Advance satin in Balboa Mist to get full coverage. Through this activity, I learned why most people prefer to not paint their cabinet interiors. So much time, labor, and muscle strain! However, most people have wood-interior cabinets, and not a 1950s dark rose. So painting the cabinet interiors it was! I am quite pleased with how they look, even though I didn't worry too much about hiding paint brushstrokes or not dripping. So many awkward angles on a ladder...my priority was just to cover that pink color! Once everything's in the cabinets again, none of the painting flaws will be noticeable, I'm pretty sure of it.
The Balboa Mist interiors look pretty white next to the moderately-primed cabinet exteriors, but next to a crisp white, that changes quickly!
The cabinet lowers were painted with 1 coat of dark-tinted Zinsser Bullseye 123 primer and 3 coats of Benjamin Moore Advance satin in Enchanted Forest, waiting 16+ hours between each coat of paint (this is really
very important with this paint). Benjamin Moore Enchanted Forest is raaaaaather close to Farrow & Ball's Green Smoke, which everyone seems in love with at the moment, although my
inspiration boards also pull out other shades of green as options.

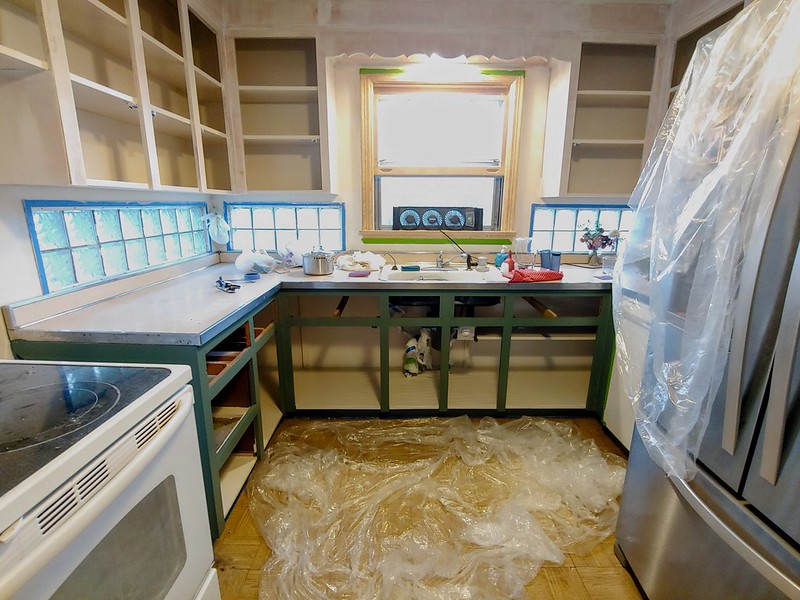
Once the lowers were finished, I promptly covered them in drop cloth to protect them from dust, water, and other wear...although, it did not appear to phase M who's new nickname is "
Turd Ferguson."

After one layer of Chantilly Lace in Benjamin Moore Advance satin alkyd, I caulked any visible cabinets in the cabinets/walls/trim. Two medium-thickness layers of Advance were almost enough, but I went with three layers on the upper cabinets for complete coverage and a pretty smooth finish. The cabinet frames aren't super perfect, but shouldn't be a problem as the doors mostly hide them. I focused extra energy on ensuring the upper cabinet doors look good.
Once I was done with the cabinet frames, I went back over and fixed any mistakes, and then allowed them to cure for 30 days before using them.

And then it was cabinet doors time (I could only do so much painting at a time). It's important to number/label them so you can keep track of which door goes where, especially if you're painting two-tone cabinets! Don't want to mismatch anything!


Painting the doors really took over the workshop (and my life) for quite a bit there, especially with the 16-hour dry time between each coat of paint. It's worth it though, Benjamin Moore Advance paint dries noticeably smoother and harder than other typical (non-alkyd) water-based paints.
As for the walls and trim, our more standard painting approaches applied, so I essentially followed our usual
Deep Dive Painting Process which also includes scrubbing walls with TSP, spackling, sanding glossy trim, priming
everything, and two coats of good quality paint. The trim is Benjamin Moore Advance satin in Chantilly Lace to match the upper cabinets, the walls are Benjamin Moore Regal Select eggshell in Balboa Mist, and the ceiling is in Benjamin Moore ceiling paint (i.e., flat) in Chantilly Lace.

The Bejamin Moore Balboa Mist looks really awful when I first cut in with it (above), probably because it's resting next to so much white. Thankfully, once I filled in all the walls, it came out looking nice, bright, neutral greige:

Balboa Mist looks really lovely next to a crisp white, like Chantilly Lace. Just like
everyone says.
Done! |
Nook Lower Cabinets |
Window Staining |
Staining Open Shelves |
Countertops |
Ceiling Light |
Temporary Storage |
Painting Cabinets |
Window Stripping |
Nook Demo |
Nook Design |
Details |
Ideation |
Inspiration


0 comments:
Post a Comment