

Wednesday, June 26, 2013
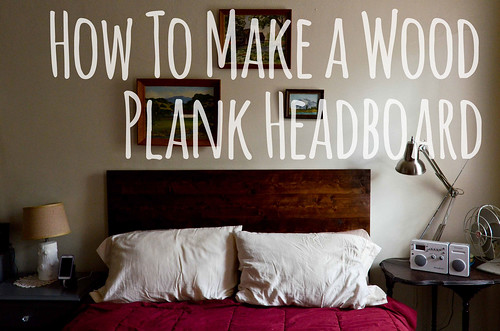
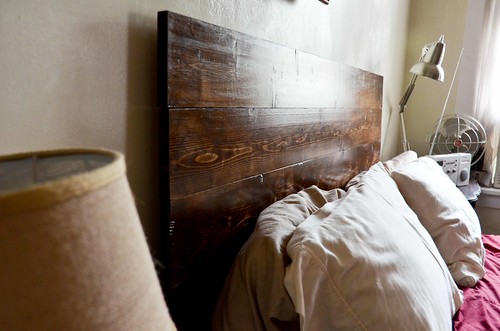
Behold, our wood plank headboard inspired by this tutorial from She's Crafty. Combine that tutorial with two of my favorite bedroom inspiration photos, and we have the makings for a DIY wood plank headboard. It really does not require too much skill, supplies, or money. I think we did the whole thing for around $60.
[Edit 8/15/13: In the future I would probably use knickels, like Little Green Notebook did to get the planks the tiniest bit spaced apart.]

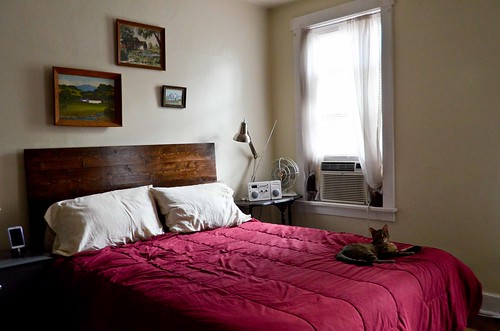
While I was sad to sell the upholstered headboard I made before moving, I was happy to start with something new. In the twelve weeks between Seattle and Japan I was able to cobble together the headboard-less situation above. But day-by-day the low quality blueprint image above the bed got on both our nerves and we finally broke down and did something about it. Of course, when changing up the headboard, I also had to rearrange artwork and craigslist an antique side table, work lamp, and vintage GE desk fan. Craigslist is good to me ;)
The effect is sooo much more pleasant than what we had before!

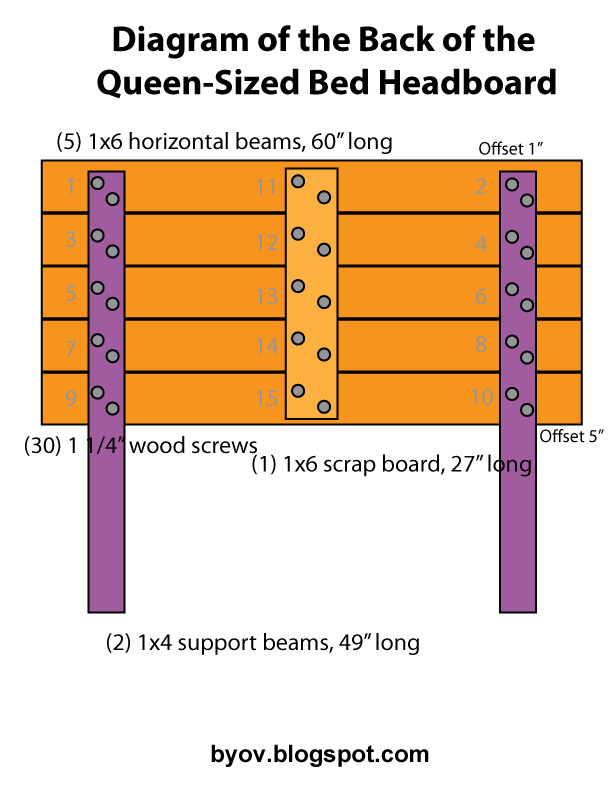
Note: The written instructions below are for a queen-sized bed that is approximately 60" wide and 23" tall, with a headboard that is five horizontal planks. The images above will help you calculate how much lumber (and what sizes) you will need for a different-sized bed.
Step 0: Gather supplies
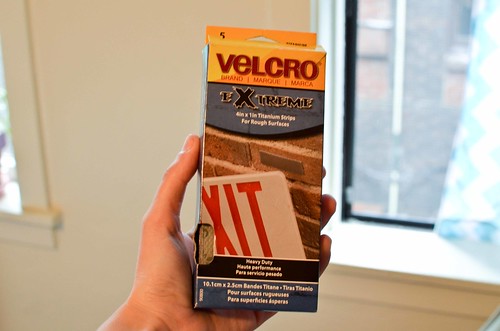
You will need: (30) 1 1/4" wood screws, a drill (or hammer and nails), (3) 1x6 10' long whitewood boards (cut in half, with one scrap piece being further cut to 28"), (1) 1x4 10' long white wood board (cut to 2x 49" pieces), Minwax Oil Stain, Water-based Polycrilic, Fine Sandpaper, 2 Paintbrushes, and (2) 4" strips of Velcro.
Step 1: Take Some Measurements
These written instructions are for a queen-sized bed that is approximately 60" wide and 23" tall, with a headboard that is five horizontal planks. There is a summary image above that will help you calculate how much lumber (and what sizes) you will need for a different-sized bed.
Step 2: Purchase Supplies
Purchase your supplies at the hardware store. If you do not own a saw, most big chain hardware stores have lumber cutting services and they will cut the wood to your desired size. Avoid purchasing warped boards if at all possible.
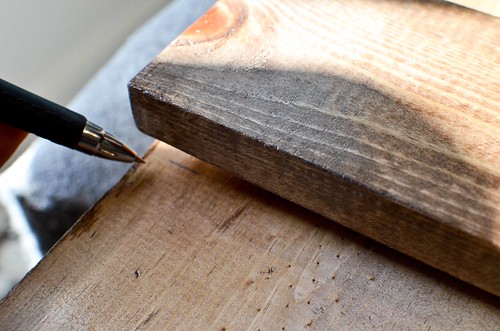
Step 3: Sand All Lumber
Sand all lumber, wiping down with a damp cloth. Be sure to sand the corners and anywhere else that might be a snag-hazard.
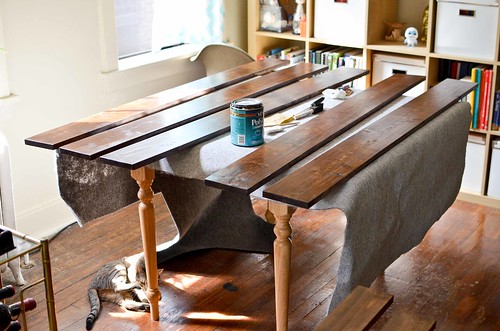
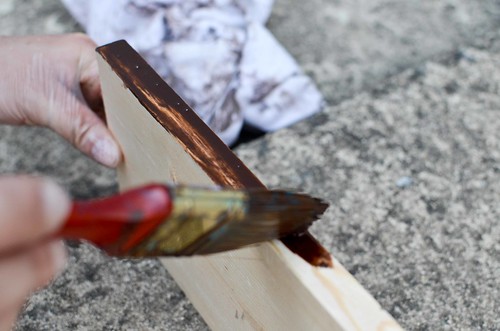
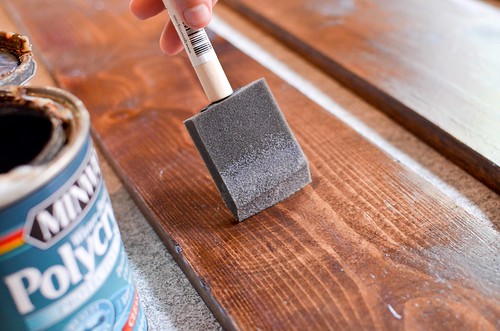
Step 4: Stain & Seal Lumber
According to the directions on the wood stain, give your boards several coats of stain, allowing 2 hours of dry time in between coats. Then apply at least two coats of Polycrilic sealer according to the directions, allowing to dry in between. This is a two day process!
Step 5: Line Up Left Support Plank
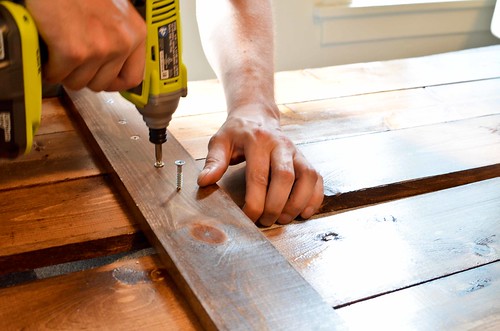
Align your horizontal planks (the 5 1x6s), face down on your work surface. Place a support plank on top, set 1" down from the top of the headboard and about 5" from the sides of the headboard.
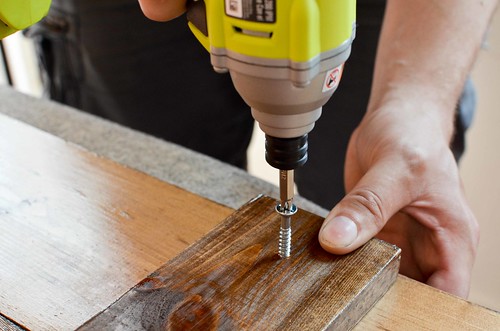
Step 6: Attach Left Support Plank To Top Plank
Starting with the top horizontal plank under the left support plank, pre-drill two holes (offset from each other). The drill bit should be slightly smaller than the screws themselves. Pre-drilling prevents the wood from splitting.
Next, insert the screws and drill them in.
Step 7: Repeat Step 6 For The Top Of The Right Support Plank
Attach the right support plank to the top horizontal plank using two pre-drill holes and screws. Be sure to offset the right support plank 1" from the top and 5" from the sides. (The ordering of the screws is best described by the above diagram).
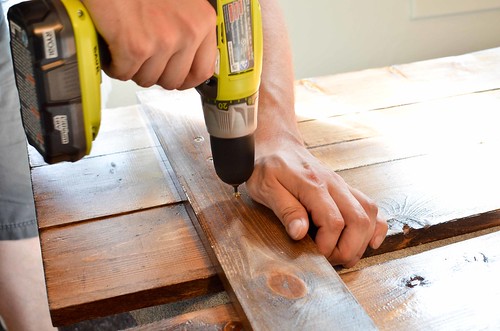
Step 8: Repeat Step 6 & 7 For Each Horizontal Plank
Use two screws to attach the support plank to the horizontal plank, starting with the left support and then going to the right support, before working on the next horizontal plank down.
Be sure to make sure that each plank is even with the previous one as you move downwards. You may need a second pair of hands and some strength to hold slightly warped boards even.
Step 9: Attach Scrap Piece Of Board To Middle
Because of the way we had our lumber cut, we ended up with a spare piece of board which we had cut to be slightly smaller than the headboard (28") and we used this scrap wood as an additional support beam in the middle of the headboard. This scrap plank was attached just as in Steps 6-8. This is likely an optional step.

Step 10: Place Headboard Behind Bed And Apply Velcro
The bulk of the headboard should be supported by placing the support beams behind the bed. We did not do any fancy measurements to be able to screw the headboard into the rails, so for some additional support we inserted Velcro with both sticky sides revealed between the wall and each support beam. This is likely an optional step.
Now You're Done! Admire your handiwork!


12 comments:
Pretty darn CUTE!! Looks like the feline apprentice was quite necessary too. I cannot wait to decorate our bedroom! We finally installed the rest of the flooring yesterday...now for the trim, crown moulding, and finishing the windows and doors......I have a while to wait. ;)
Smart AND clever - I knew I liked you for a reason Iris
The final result is really lovely.
It looks beautiful!
Oh! I like that! And I totally don't have a headboard myself!
love that idea !! So nice!
Been seeing so many great DIY headboards recently. Gosh I cant wait to get our own home finally!
Daisy Dayz
Oh I love how this turned out! Great job!!!
I am happy to find this post very useful for me, as it contains lot of information. I always prefer to read the quality content and this thing I found in you post. Thanks for sharing.
The post is very nice. I just shared on my Facebook Account.
Great
Thank you for such an easy-to-follow and inspiring tutorial! The wood plank headboard idea is both stylish and budget-friendly, making it perfect for a DIY project. I appreciate the detailed steps and tips—it’s great for beginners like me. Looking forward to trying this out and adding a rustic touch to my bedroom
Epicforce Tech
Post a Comment