Wednesday, May 14, 2014
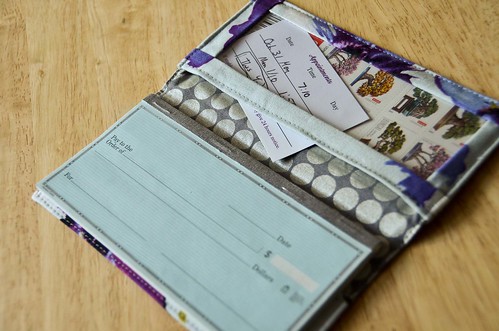
My checkbook has been getting creased rumbling around in my purse since its cheapo vinyl cover busted one bajillion years ago. An Etsy search has revealed that I could get a replacement fabric checkbook cover for a mere $10 plus shipping. Screw that.
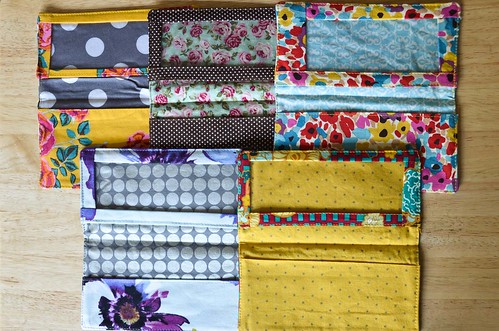
There's lots of tutorials all over the interwebs, the simplest coming from CrazyMomQuilts. However, I prefer Rebecca Mae Designs Checkbook Cover Tutorial. Although, it doesn't have a handy vinyl window pocket up top, and the plain pocket below that holds the checkbook is too tall. I've remedied these issues with the below tutorial, and also ended up with a few checkbook covers (stamp booklet holders?) that match my outfits.
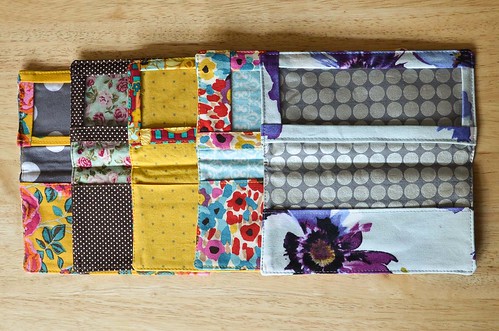
Alternatively, you could play with the proportions and turn this into a handy passport cover. Add a snap and make a mini wallet. This tutorial produces a checkbook cover that is 6.5" X 6.5" (then you fold it in half). Play with the proportions and make whatever you want!
I've added a bit of extra girth to the sashing strips that are not reflected in the photos. This will ensure that your checkbook covers come out looking a little more balanced than some of these, especially if you're not a super accurate seamstress
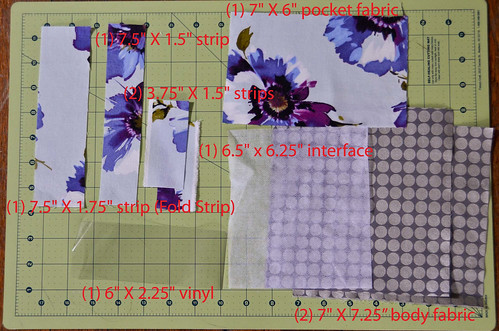
Step 0: Supplies
Body Fabric: (2) 7.25" X 7" rectangles
Pocket Fabric: (1) 7" X 6" rectangle
Vinyl Window Pocket Fabric: (1) 7.5" X 1.5" strip, (2) 3.75" X 1.5" strips, and (1) 7.5" X 1.75" strip (called the Fold Strip)
Vinyl: (1) 6" X 2.25" rectangle (you might even be able to re-use the vinyl from an old plastic checkbook cover)
Fusible Interfacing: 6.5" x 6.25" rectangle
Scissors, thread, pins, iron, etc.
Alternate Design Options
No Vinyl Window: Cut a second 7" X 6" rectangle in the pocket fabric
Small Vinyl Pocket: Like this one. Follow directions for "No Vinyl Window" above, but also cut a smaller vinyl rectangle and sew it onto the pocket after Step 2.
Mix-and-Match: Change up what fabrics you use for each of the pieces. Make the outside match the pockets, or whatnot!
Patchwork Cover: See the CrazyMomQuilts tutorial
Stupid Simple: See the CrazyMomQuilts tutorial
Prepare Plain Pocket
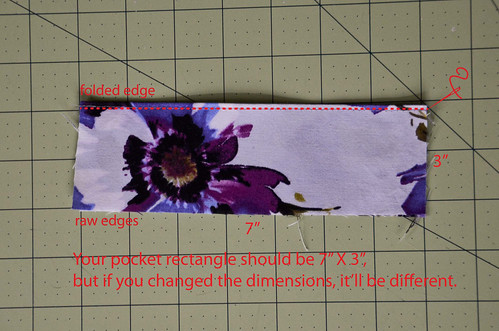
Step 1: Fold Pocket Fabric in Half, Matching the Longer Ends
This pocket piece should be about 7" X 3".
Step 2: Sew a Scant 1/8" Seam Along the Folded Edge
Prepare Vinyl Window Pocket
Step 3: Attach Pocket Fabric Strips to Vinyl Rectangle with 1/4" inseam
Sew each of the four strips to the vinyl rectangle (short strip to short side, long strip to long side), making sure to attach the 1.75" wide strip (referred to from here on out as the "Fold Strip") last. Don't worry about matching up the edges, you'll trim them down to size later. Just be sure to center each piece along the vinyl. This process is similar to simple patchwork sashing without cornerstones.
Usually, you'd iron each sashing strip open before attaching another one, I just used my hands. BE VERY CAREFUL USING AN IRON AROUND THE VINYL.

Step 4: Double Fold Seam and Pin
Fold the Fold Strip over .5", and then again, reducing its size by 1" (if you don't have enough fabric left, just try to make sure the final size of the strip is .25-.5")
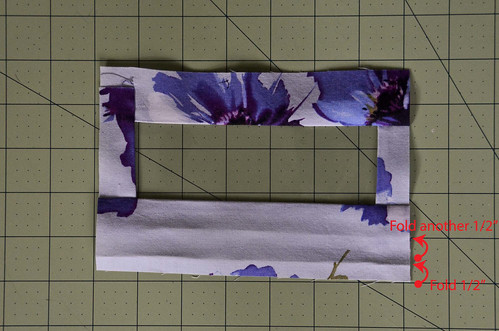
Step 5: Sew Scant 1/8" Seam of Fold Strip
Sew a Scant 1/8" Seam along the edge of the Fold Strip. Now the Vinyl Window Pocket should basically mirror the Plain Pocket, both in size and in the fold/seam detail. (Optional: You may want to put another seam just above the one you just sewed, right next to the vinyl.)
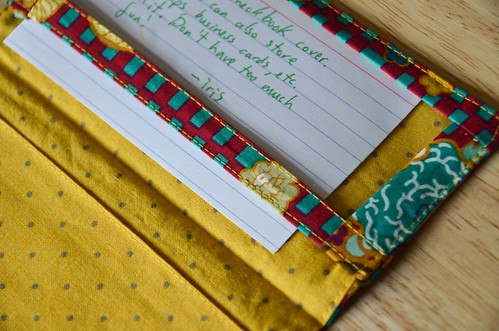
What the Fold Strip looks like when attached to the rest of the pieces. Note the two seams!
Step 6: Trim Vinyl Window Pocket to 7" X 3"
Trim the pocket to be 7" X 3", but don't trim the folded part of the Fold Strip. Try to make the strips approximately the same size all around 0.5-0.75" wide. It's more important that the short strips are the same width.
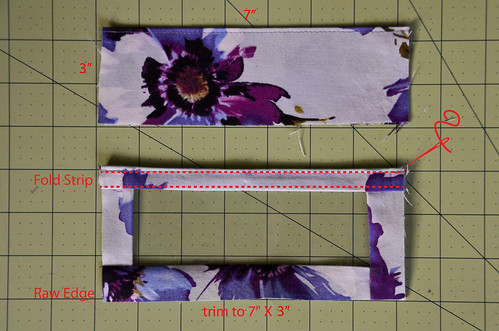
Prepare the Cover Body
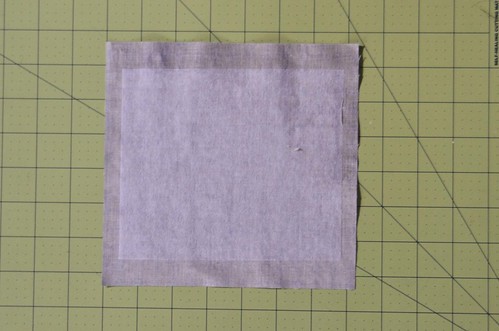
Step 7: Center & Fuse Interfacing to Wrong Side of one of the Body Fabric Rectangles
Here's a secret, I've fused super lightweight interfacing to both of the body pieces, just to strengthen it a bit, no harm. Also, I cut the interfacings too small this time but used them anyways. Checkbook covers are a forgiving art ;)
Step 8: Place Pocket Pieces on Body Rectangle, Right Sides Up, Folded Edges to the Center and Pin
We're about to make a checkbook sandwich. The bottom piece is a right side up body rectangle, the filling is the right sides up pockets, and the top is a wrong sides up interfacing rectangle.
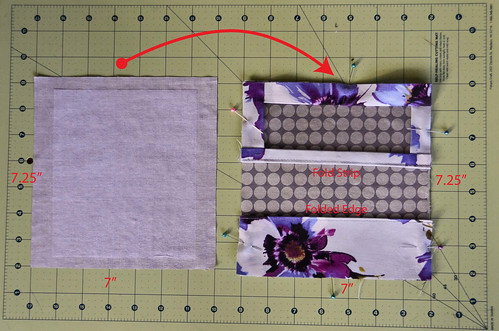
Step 9: Place Interfacing Rectangle from Step 7 on Top of Pocket Pile and Pin
Top 'o the sandwich.
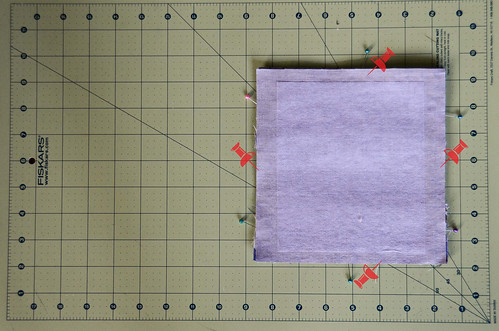
Step 10: Sew 1/4" Seam Around Entire Pile, Leaving Opening to Turn
Trial and Error has shown me that the opening should be on the bottom of the plain pocket (i.e. start sewing on the bottom part of the checkbook cover).
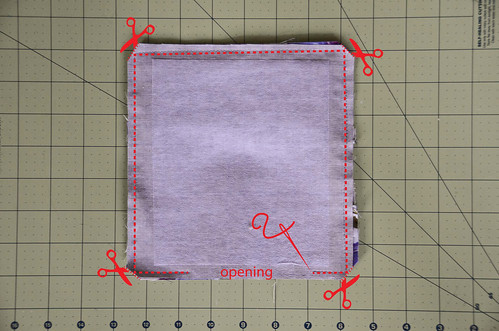
Step 11: Clip Corners, Turn Right Sides Out, and Iron
If something still looks inside out, either you did Step 8 wrong, or you still need to flip the pocket to the proper side. The ironing can be a bit tricky here, especially since you need to avoid the vinyl and you need to make sure to fold/iron the opening's raw edges inwards.
Step 12: Sew 1/8" Seam Around Outer Edge of Cover, Closing Opening
There's no need to reverse-sew when you start, as you're sewing in a circle/rectangle, so your last stitches will secure those first ones.
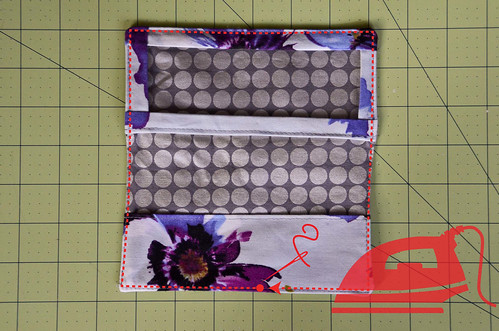
Step 13: Fin!


3 comments:
Yep! This is just fantastic! And your fabrics are beautiful! Hope you have a lovely weekend!
These are so pretty! I have a lot of colorful fabric scraps that would be perfect for this project, but after two years of not using it I recently gave away my sewing machine. Maybe I can bribe my friend into making me one...my checkbook just floats around my purse and gets occasional folded corners.
These are so great, Iris! I love all of your color combinations! Thanks for taking the time to share how you made them.
Post a Comment