

Friday, August 13, 2021


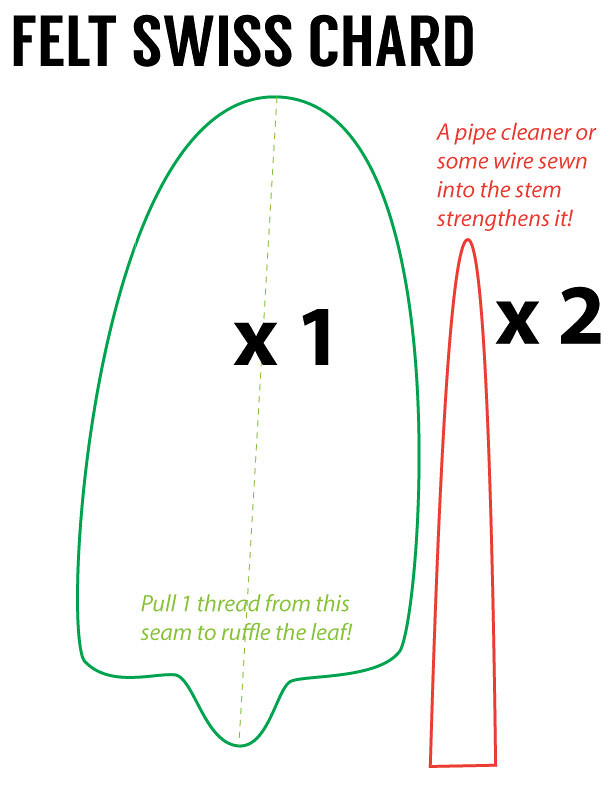
- Print the pattern below without scaling.
- Cut out the pieces in the quantities listed in the pattern.
- Machine-sew a rather wide straight stitch from the top to bottom of the leaf. Back-stitch only one of the ends (i.e. the top)!
- Pull one of the threads of this seam to ruffle the leaf to a desired amount.
- Line up the two stem pieces on either side of the leaf (pins are helpful here). Sew ~3 seams in the form of leaf veins horizontally across the leaf and the stem.
- Machine sew a long, thin rectangle in the middle of the stem pieces, attaching them together. But leave the bottom open at the moment!
- Push a pipe cleaner or wire between the two stem pieces to give it some structure.
- Sew the bottom of the stem closed.
Return to the Felt Vegetables Tutorial Collection.


0 comments:
Post a Comment