Showing posts with label w. Show all posts

Pocket Scrapbook

Wednesday, October 11, 2017

Pocket Scrapbooking

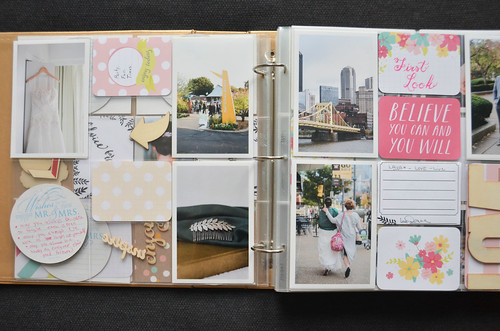
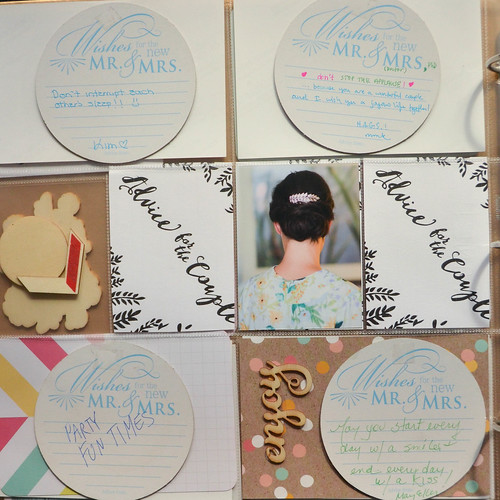
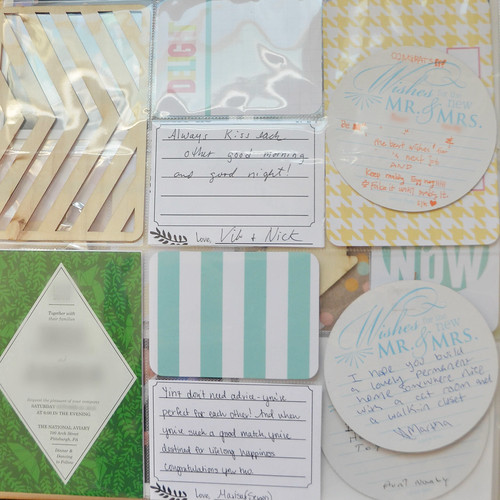
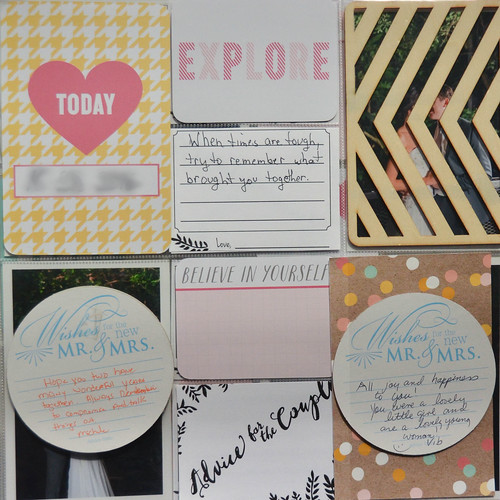
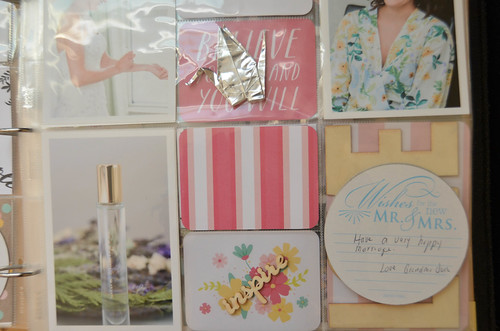
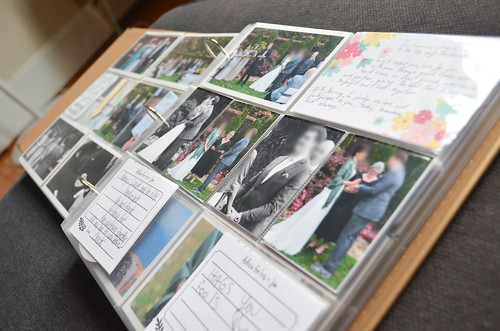
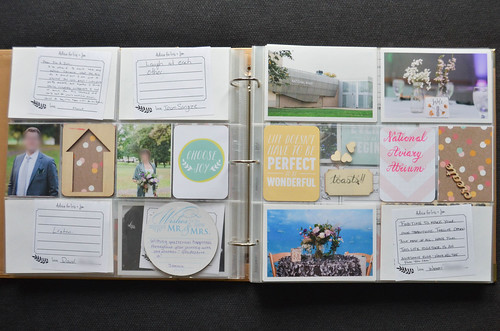
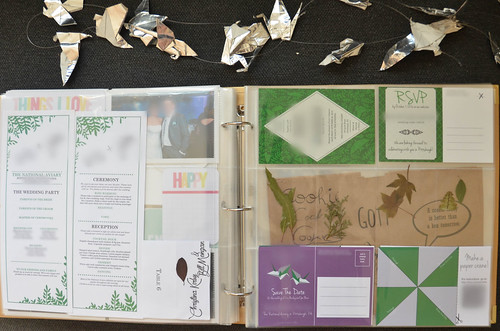
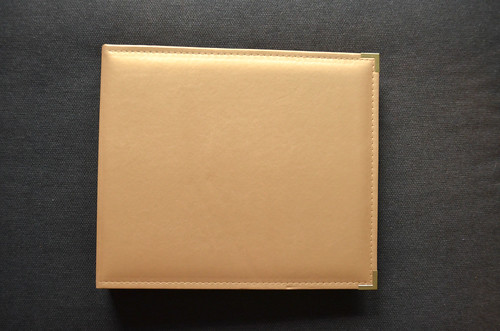
We had all those lovely advice cards from the wedding, plus some advice coasters from a bridal shower, a pile of printed photos from the photographer, assorted wedding programs, invitations, Save the Dates, leftover escort cards, cookie bags, bird origami, and these objects weren't going to make it in another picaboo photo album. So, I browsed JoAnn Fabrics and found a Project Life Value Kit with core cards and woodcuts for $8. A few months later, I stumbled upon a 12x12" Recollections photo album for $12 & the Project Life Photo Pocket Pages Big Variety Pack 2 for $15. So for $35, I had myself a pocket-based scrapbook. I happened to have a piece of paper in the perfect confetti color scheme for the value pack, so I cut it into a couple 4x6s, but mostly 3x4s, used it as a bit more pocket filler.

I don't care much for scrapbooking as a pastime, but if I have to do it, pocket scrapbooking is by far the least painful avenue of attack.
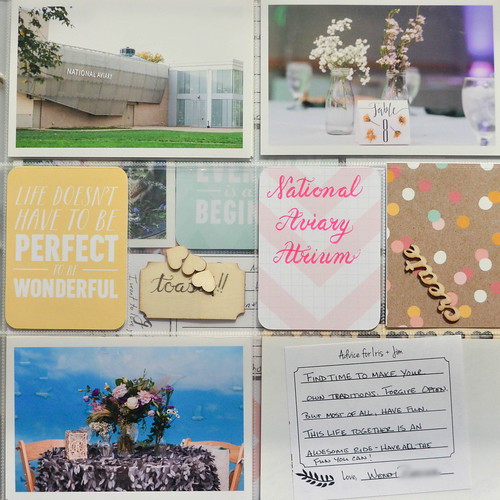
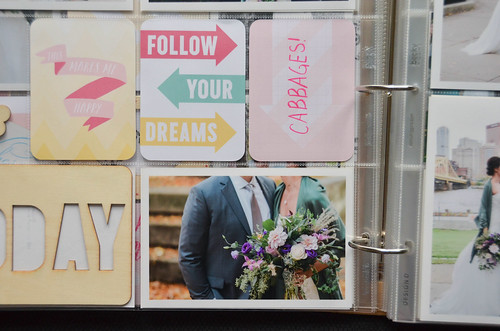
With a few different pocket arrangements provided by the variety pack, and a random smattering of cards, photos, woodcuts, coasters, and advice notes, each page looks different enough from the other. I made the pages double-sided, so I used fewer pocket pages, and thus ended up with lots extra for some other random event, I suppose.

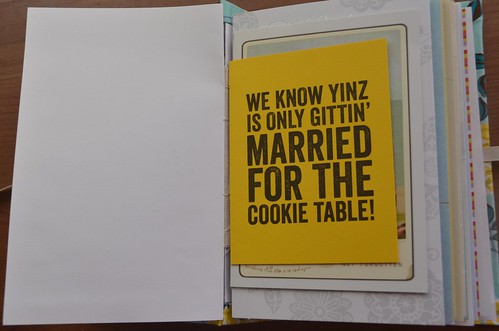
I'm really loving the canned sayings on the core cards, as they relate to the wedding theme. "Why not now?" "Follow your dreams". Likely meant for a different sort of photo album, but it works here in a rather silly manner.

Pocket Scrapbooking
Pocket Scrapbooking
Pocket Scrapbooking
Pocket Scrapbooking
Pocket Scrapbooking

The part I was least enthusiastic about was that all these cards seem to demand personal notes to be written...and I'm just not much for verbalizing this stuff. So for the most part I scripted in captions for what was happening in the photo layout, or the location, or the date, or the names of the bridal party. And then I also added in some song lyrics from the evening, the dessert options, the readings & readers, and our vows. I suppose I could also squeeze in the food menu somewhere, lol. All information not stored in the Picaboo album!
Pocket Scrapbooking
Pocket Scrapbooking
Pocket Scrapbooking
Pocket Scrapbooking
Pocket Scrapbooking

Photo Albums

Sunday, October 8, 2017

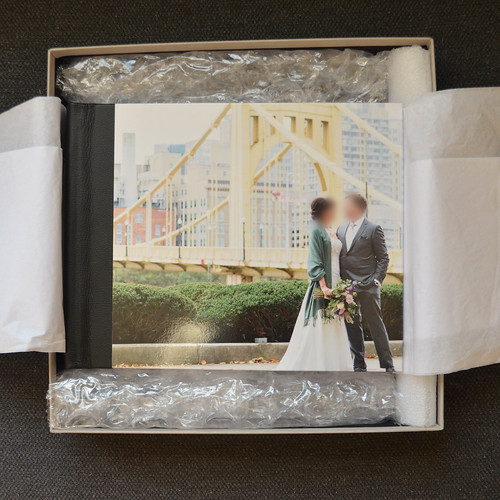
Picaboo Madison Hardcover Photo Book in the box
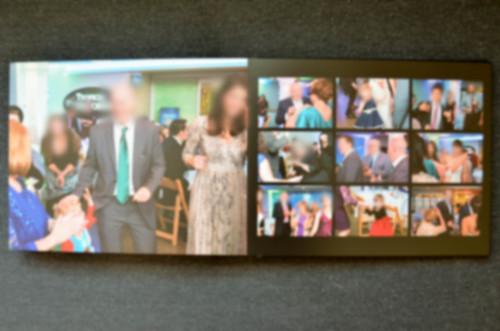
I've finally completed our wedding album, using a sampling of our photographer's photos. I went with a Picaboo Madison Photo Book. It has a front cover with a photo, a glove leather spine and back cover, thick cardstock seamless lay-flat pages, black endpapers, and is shipped in a Picaboo box that my other Classic Photo Books definitely did not have.

Price-wise, the Madison Photo Book and the more expensive Flush Mount Photo Book have their own Groupon Deal: $120 for $200 to spend on a Madison album is pretty good. For Classic Photo Books, I usually go for the $35 for $100 or equivalent 65% off coupons/sales. Conversely, if I'm ordering several albums at a time, I wait for a 40% off + free shipping sale. Picaboo Photo Books take about one week from ordering to arrive, which is pretty speedy.

WYSIWYG Layout Editor

All photo books on Picaboo are designed through a What You See Is What You Get editor, which means you just drag and drop photos onto the pages. They have an auto-layout feature too, but I never use this as the software doesn't really have an eye for design or the ability to prioritize photos. Including every photo would create a prohibitively expensive (or prohibitively ugly) photo book, and the Picaboo Auto Layout doesn't really "select" photos, so much as cram them into any layout possible.

I provide considerable design care to the events before the reception dancing. Black and white layouts, calligraphy text art, song lyrics, no more than 3 photos on a single page. By the time I get to the dance floor photos of any wedding album, I basically just start plopping the photos into 1-9,9-1 photo page layouts.
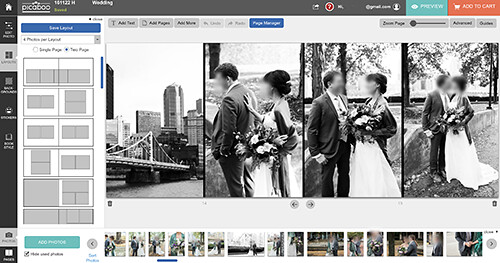
Picaboo Photo Layout Software
Picaboo Madison Photo Book - seamless lay-flat page spreads

Protective Box

There's some features unique to the Madison Photo Book that are not shared with the Classic books. The first noticeable feature is the storage box that the Madison Photo Book is shipped with. It's a nice touch, especailly since the glove leather cover is a little delicate.
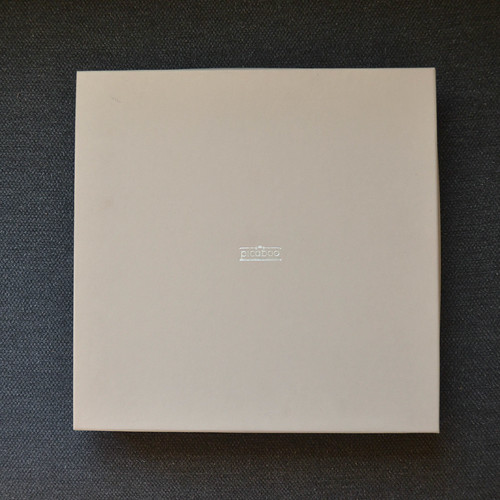
Picaboo Madison Storage Box Picaboo Madison Hardcover Photo Book in the box

Thick Pages

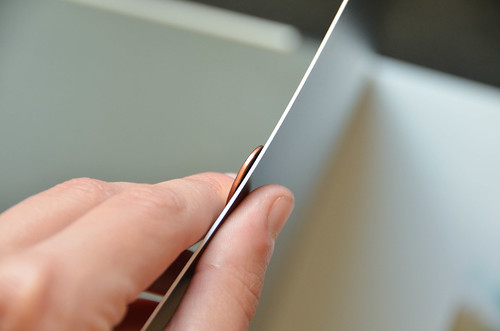
The Madison Photo Book is super thick compared to most Classic Photo Books and this is because the double-thick board pages are about the thickness of a penny. Our wedding album is only 82 pages, but it has the heft of a slab of marble.
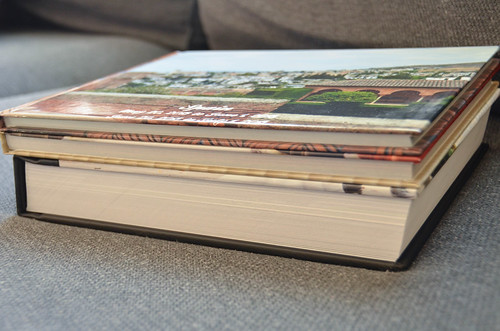
Madison Photo Book thickness compares to some Classic Photo Books
Picaboo Madison Photo Book with Cardstock Pages (as thick as a penny!)

Lay-flat Pages

Below is a photo with a Classic (non-lay-flat) Photo Book atop the Madison which is lay-flat. It's a pretty big difference visually, but the price of a Lay-flat Classic Book is only about $20 more than a one without Lay-flat pages. When I have a little extra money on my Groupon/voucher, I most always upgrade to Lay-flat pages, before adding extra pages.
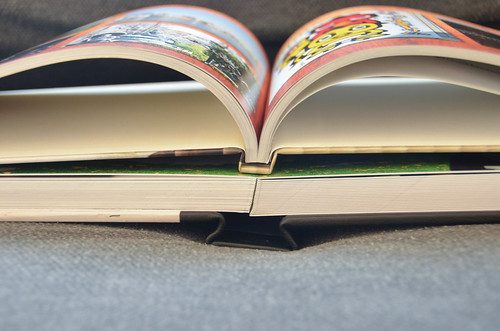
Picaboo Classic Photo Book on top of a Picaboo Madison Photo Book (with seamless lay-flat pages)

Seamless Pages

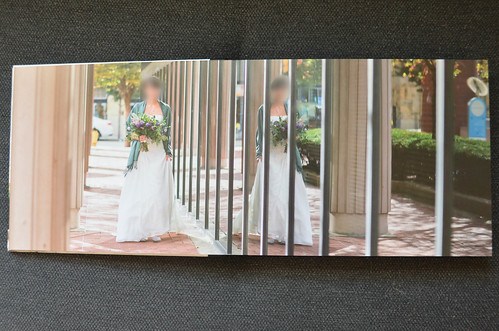
With Picaboo Classic Photo Books, it's possible to have Seamless Lay-flat, or just Lay-flat [with 1/2" black seams in the middle]. The Madison Photo Book is of the Seamless Lay-flat variety, and gives the option to make some dramatic 22" wide photo spreads. When the album has a seam, you just need to take a little more care to where the seam is, so that you don't cut down through someone's face or an important detail.
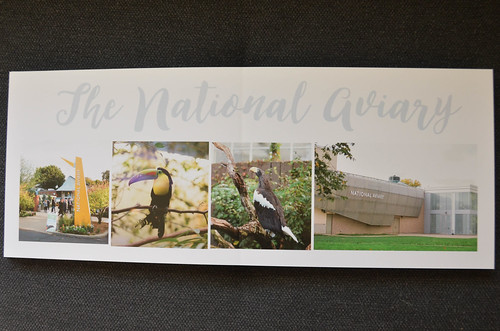
Picaboo Madison Photo Book - seamless lay-flat page spreads


Endpaper

While not a super critical detail to me, the Madison book has an extra cardstock page before the endpaper, which are all in black. The Classic albums have a bit of wax paper and white endpapers.
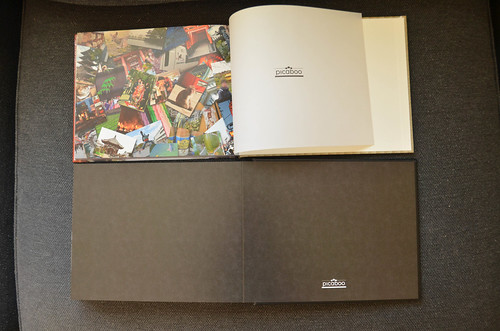
Picaboo Madison Hardcover Photo Book with black endpapers

Glove Leather Cover

The spine and back of the Madison Photo Book are done in glove leather, color of your choice. It's a nice touch, but I care more for the paper quality than the leather quality of the cover. It is very soft, though.
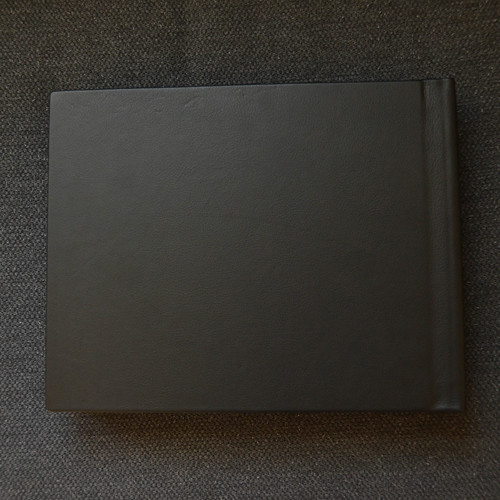
Picaboo Madison Hardcover Photo Book with glove leather back cover

Pricing

Price-wise, Classic Books start around $20, adding Lay-flat pages adds around $20 to that, and Seamless Lay-flat Books start around $65. The Madison Book starts at $200 and the Flush Mount Book at $400. Minus any coupon/sale. Do not pay full price for any Picaboo product! Check Groupon and the Special Offers page first. Settle for nothing less than 60% off. The marketing approach on these things is weird.
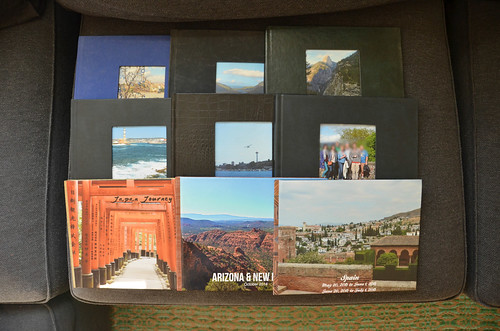
Half my collection of Hardcover Photo Books
Shutterfly & Picaboo Photobooks
More Photo Book discussion, here

So. Many. Photo. Books.

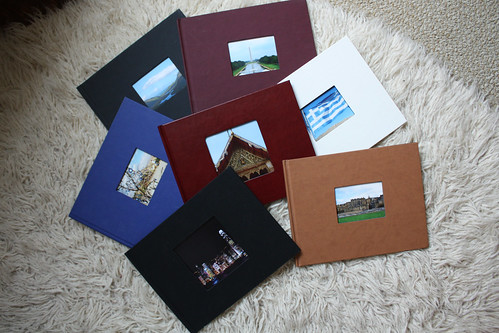
Lately, I've been putting together Classic wedding albums for weddings I've attended, along with an anniversary album for a wedding I formally photographed, two Lay-flat Seamless albums for our mothers, and then our own Madison book. An obsessive wedding album phase that took me on a tour of nearly all of Picaboo's album options. But now I'm all out of weddings to album-ify.
My Recent Picaboo Wedding Albums


How To: Greeting Card Book

Wednesday, May 24, 2017

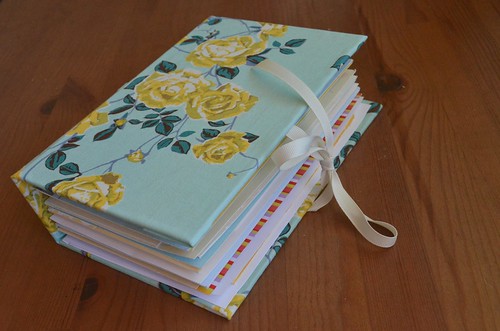
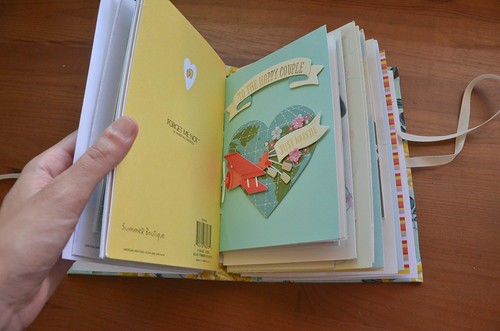
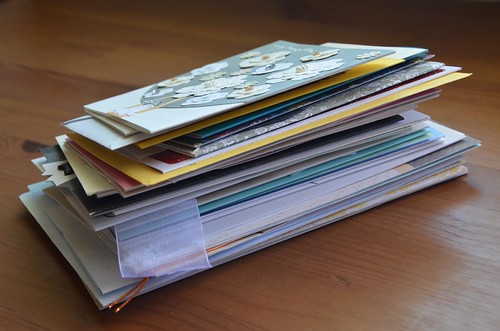
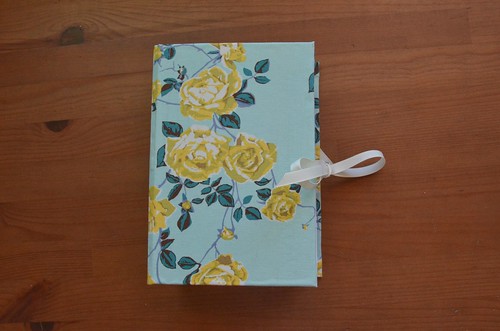
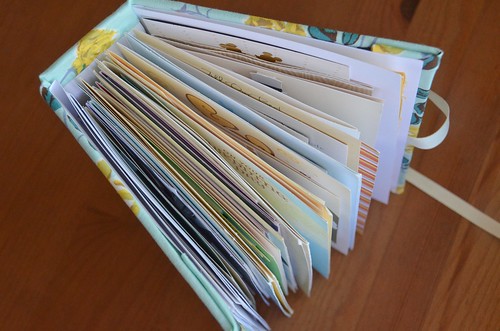
So many wedding cards, and nothing to do with them! I decided to try my hand at dreamyelk's Turn Wedding Cards Into a Book Tutorial and this is what we got:

Completed Greeting Card Album

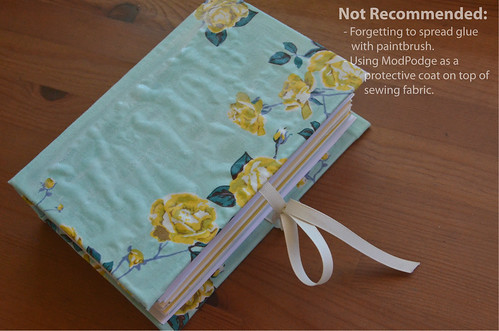
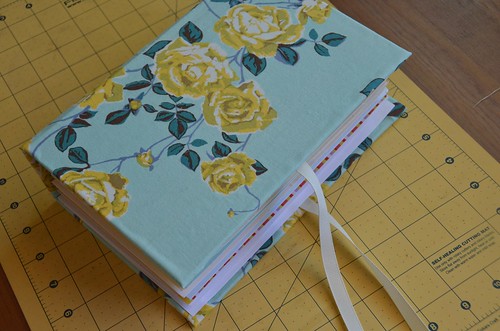
I went a little off script by using sewing fabric (Anna Maria Horner's Social Climber). This is not the greatest idea, unless you're very careful about spreading out the glue on the book board with a paintbrush, and maybe even using a bone folder to smooth out all the bubbles afterward. Alternatively, you can make your own paper-backed book cloth with either {pH neutral glue or Heat'n'Bond or homemade paste}, less than 50 gsm Japanese/kozo paper (or tissue paper), a glass board, a paintbrush, and a rubber hand brayer. Alternatively, you can buy book cloth or a nice, solid scrapbooking paper for the cover. Pretty much all the supplies can be found at Paper Source or elsewhere about the Internet.

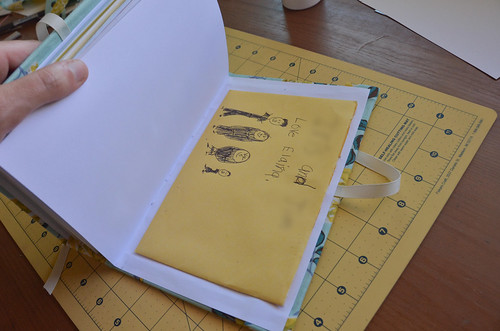
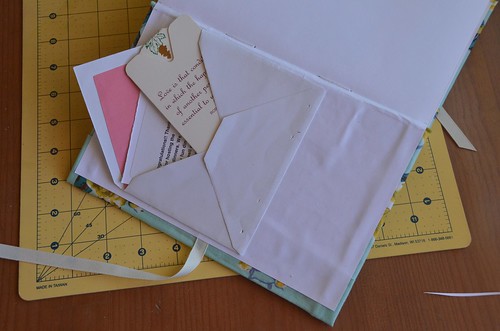
I also used my pH neutral glue to attach a pretty little envelope to the front endpaper, to hold the little notes that came with Amazon and Crate & Barrel packages. So don't worry, people, we've even got your two-line gift notes from merchants archived forever. And on the back endpaper is a masterpiece of a larger envelope, for holding a letter from my grandmother and other larger notes.

How To: DIY Wedding Card Album
More envelopes/artwork glued to the endpapers.

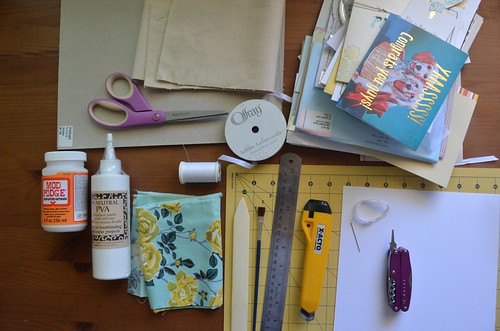
  1. Gather Supplies.
    • book boards (8.5X11 *2) - Paper Source
    • book cloth - Paper Source (preferably not sewing fabric) OR large decorative cardstock for book exterior
    • PVA glue (pH Neutral)
    • canvas (~6X6")
    • ribbon (~1.5 yards)
    • embroidery floss (or strong thread - linen thread is the bookbinding gold standard)
    • sewing needle
    • scissors
    • 3 sheets card stock (for endpapers, can be decorative)
    • ruler
    • bone folder
    • paint brush (for glue)
    • Xacto knife
    • cutting mat (for Xacto knife)
    • awl (i.e. pointy metal object)
    • stack 'o greeting or wedding cards (no more than ~40 cards/book. The tutorial shows an album of 36 cards)
    JoAnn Fabrics is good for the canvas, ribbon, thread/floss, needle, bone folder, and card stock; also an Xacto Knife, paint brush, and ruler if you don't have them already. Paper Source or the Internet can get you the Book Boards and Book Cloth as well as many of the other items already mentioned.
    SuppliesStack of Greeting Cards
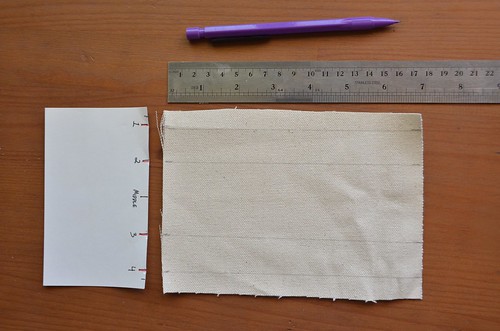
  2. Make a hole punch template.
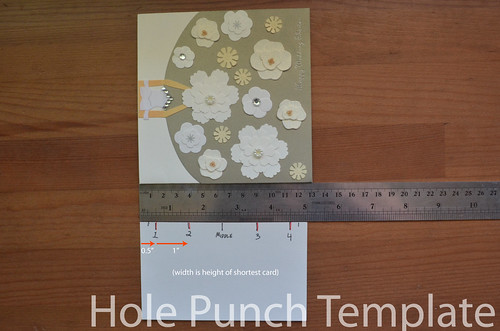
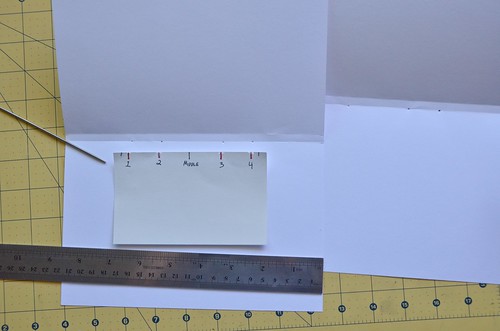
    Make a hole punch template so you place holes in the cards in the exact same spot each time. The width is the height of the smallest card. Mark the middle of the card & label, then mark 1/2" from either edge. Then mark 1" toward the center from that 1/2" mark. Number these 4 lines 1-4, as in the photo.
    1. Making a hole punch template
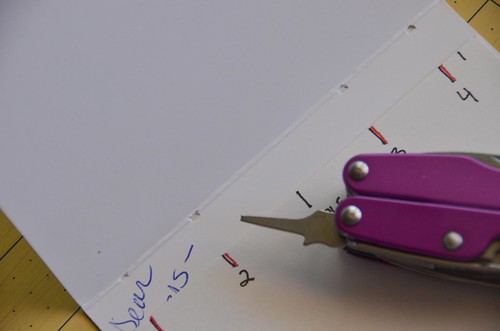
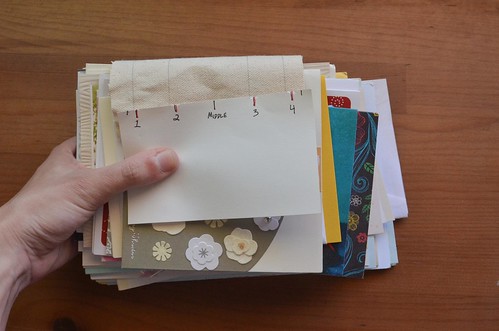
  3. Start punching 4 holes into every card, using the template.
    I used an awl, but a tiny screwdriver or metal knitting needle (or similar) may also work. Use the template to ensure the holes are in the same position for each card.
    2. Start punching 4 holes into every card, using the template
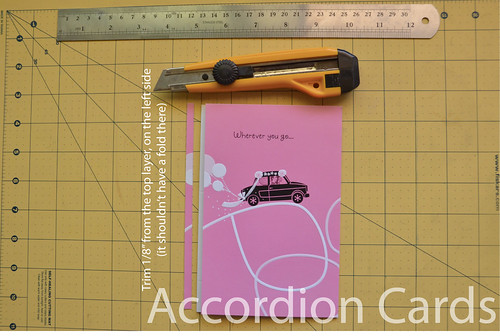
  4. Non-Standard Cards Require a Different Approach.
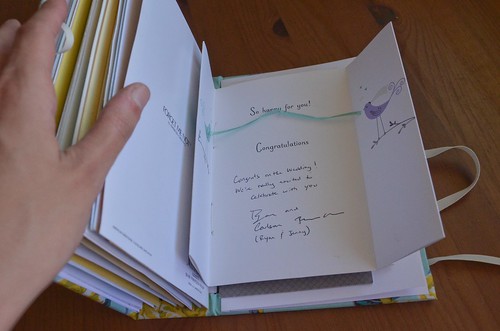
    Sometimes, you'll encounter a non-vertical fold card or accordion card, or some other specialty card. You'll need to do something different for those (see dreamyelk's suggestions). For the accordion cards, you just cut off 1/8" from the top layer, so it doesn't get in the way of the binding and then punch in the 4 holes, as usual.

    I still have no idea what to do with flat cards.
    Non-Standard Cards Require a Different Approach
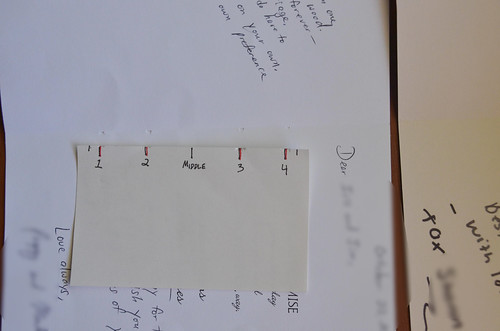
  5. Use the 'Middle' label to ensure the holes are centered.
    Most of the time, I just eyeball the middle of the card. That's usually good enough.
    Use the 'Middle' label to ensure the holes are centered
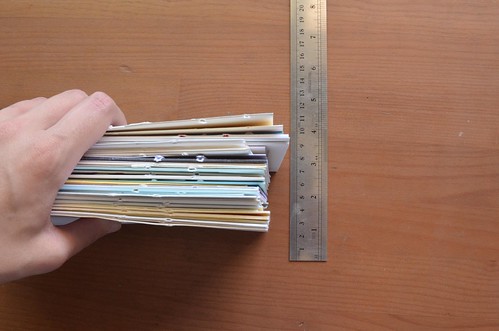
  6. Measure the height of your card stack.
    3. Measure the height of your card stack.
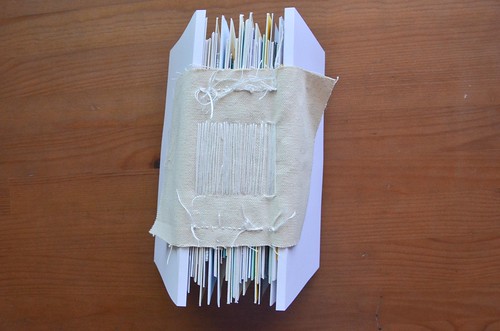
  7. Cut a piece of canvas: (height-of-card-stack + 4") X height-of-smallest-card.
    Also, use the hole punch template and draw 4 lines that align with the 4 numbered hole lines.
    4. Cut a piece of canvas: (height-of-card-stack + 4") X height-of-smallest-card
    Showing How Canvas Will Work
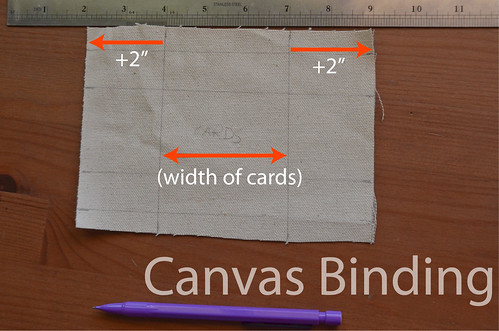
  8. Mark line 2" from both edges of canvas.
    5. Mark 2" line on either side of canvas
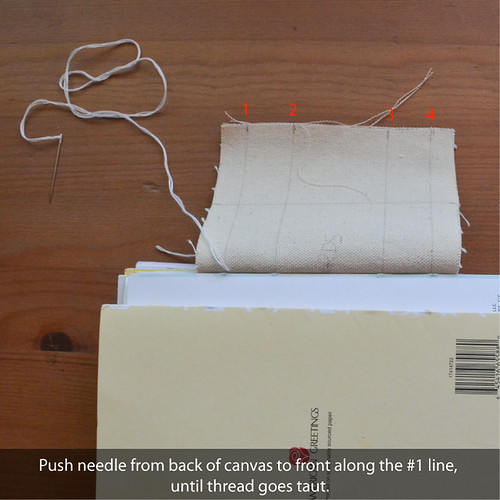
  9. Starting on one of these 2" lines, push a needle & thread from back of canvas to front, starting at the #1 line.
    I cut my floss about 6-9 ft and split my embroidery floss into 2 strands at a time, similar to how I prep for handkerchief embroidery.
    6. Starting on one of these 2" lines, push a needle & thread from back of canvas to front, starting at the #1 line.
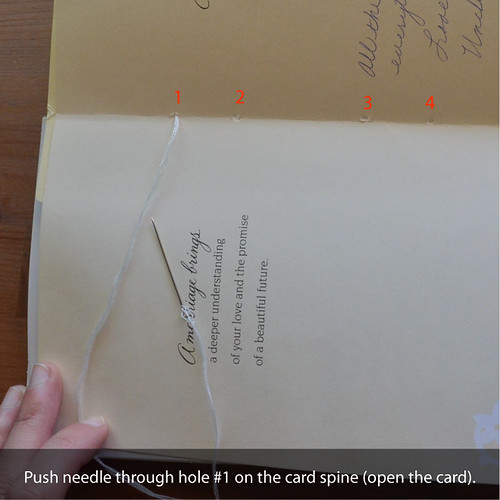
  10. Push needle & thread through hole #1 of the first card spine (you'll need to open the card).
    7. Push needle & thread through hole #1 of the first card spine (you'll need to open the card).
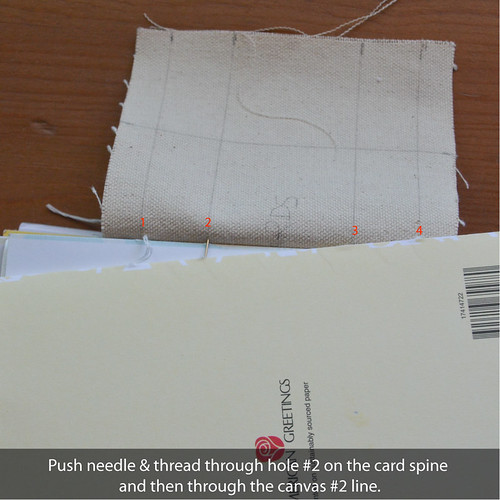
  11. Push needle & thread through hole #2 of card spine, and then through the canvas at line #2.
    8. Push needle & thread through hole #2 of card spine, and then through the canvas at line #2.
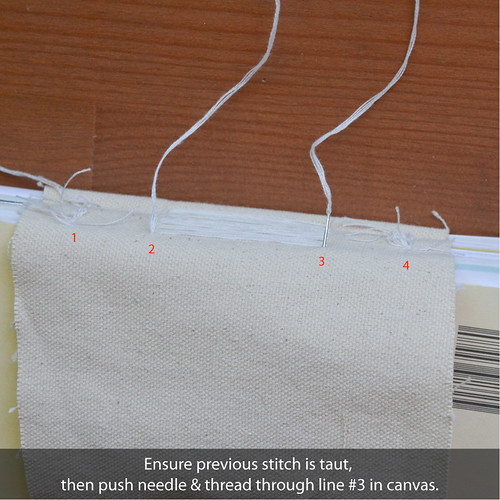
  12. Ensure previous stitch is taut. Then push needle & thread through line #3 in the canvas.
    9. Ensure previous stitch is taut. Then push needle & thread through line #3 in the canvas.
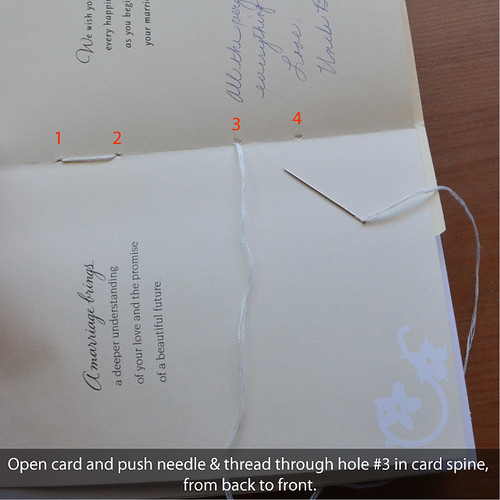
  13. Open card and push needle & thread through hole #3 in the card spine, from the outside of the card through to the inside.
    10. Open card and push needle & thread through hole #3 in the card spine, from the outside of the card through to the inside.
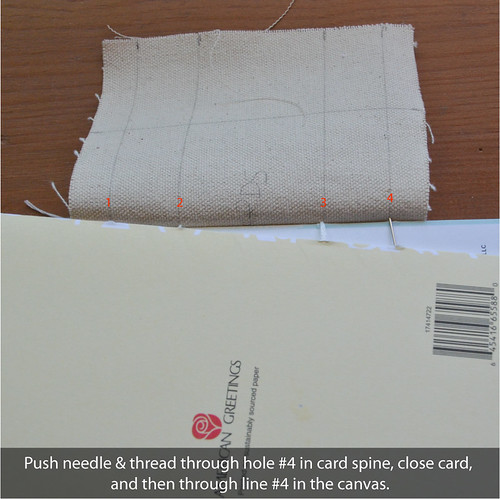
  14. Push needle & thread through hole #4 in card spine, then through line #4 in the canvas.
    11. Push needle & thread through hole #4 in card spine, then through line #4 in the canvas.
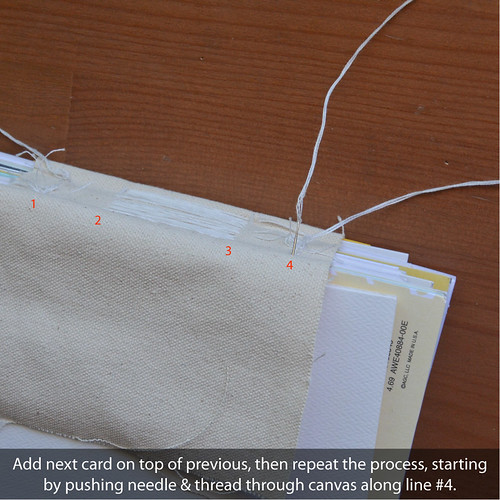
  15. Pull stitches taut. Then add the next card on top of the previous, and repeat the process in the other direction. Start with canvas line #4, and work back down toward #1 as before.
    12. Pull stitches taut. Then add the next card on top of the previous, and repeat the process in the other direction. Start with canvas line #4, and work back down toward #1 as before.
  16. Repeat from Step 9 until all cards are sewn to the canvas.
    Hopefully, all your cards fit between the 2" marked lines, because you'll need about that much leftover canvas to glue to the book boards.
    This won't work with flat cards! I haven't figured out what to do with those yet.

    When finishing a strand, be sure to secure the end of the thread with a knot. I like to go back through a previous stitch, and then pass my needle twice through the loop that's formed (just before pulling thread taut).
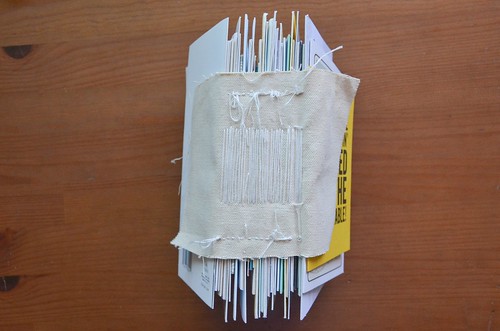
    13. Stitch more cards as described, until they're all attached to the canvas.
    Outside of stitched card
    Inside of stitched card
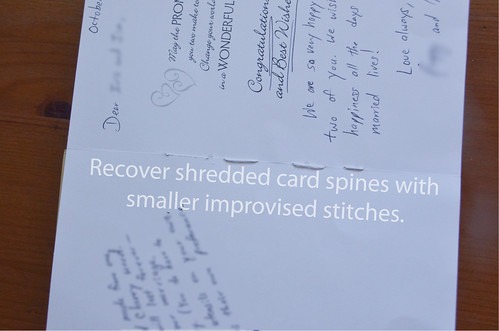
  17. If the spine of the card shreds, use smaller stitches (i.e., make new holes).
    It's best to be careful when pulling the stitches through the cards, some of the spines are a bit finicky.
    If Card Spine Shreds, use smaller stitches (i.e., make new holes)
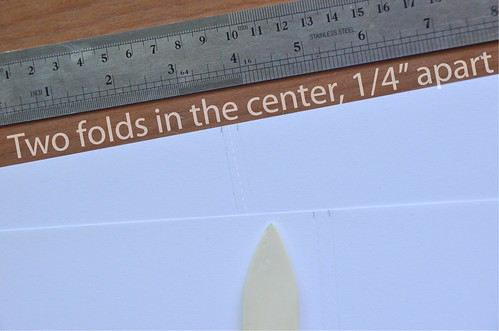
  18. Use Bone Folder to Press 2 Centered Lines, 1/4" from each other.
    Card stock needs to be approximate size of largest card when the cardstock is folded in half.
    I wish I'd used a prettier cardstock. C'est la vie!
    14. Use Bone Folder to Press 2 Centered Lines, 1/4" from each other
  19. Repeat for second piece of cardstock.
    Another set of 2 bone folder lines, pressed into the center, 1/4" apart.
    15. Repeat for second piece of cardstock.
  20. Use hole punch guide to punch holes into folded card stock.
    16. Use hole punch guide to punch holes into folded card stock.
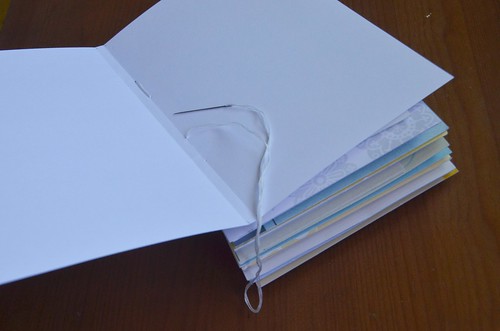
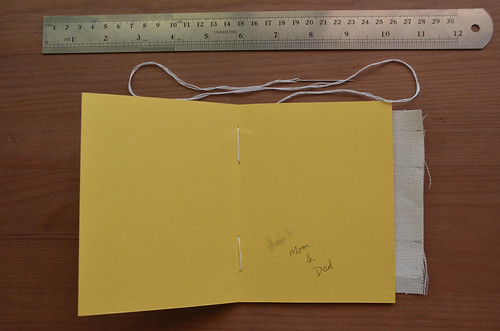
  21. Sew cardstock to canvas & card stack as before, making sure untouched fold is on the outside.
    17. Sew cardstock to canvas & card stack as before, making sure untouched fold is on the outside.
  22. Attach second folded card stock to other side of cards as before.
    18. Attach second folded card stock to other side of cards as before.
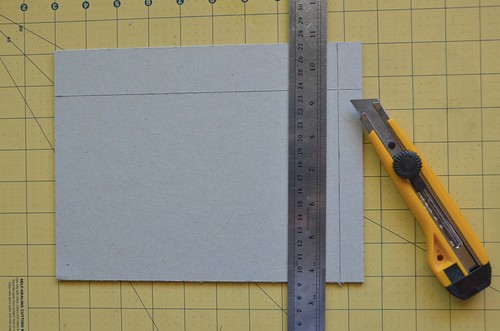
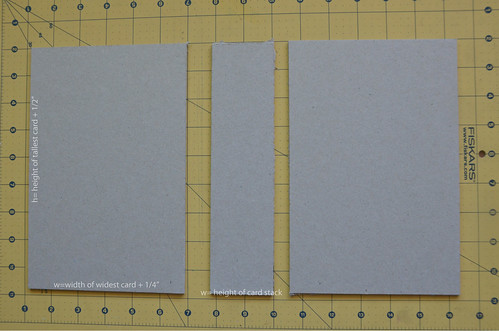
  23. Use Xacto knife or box cutter to cut book board into 3 pieces.
    It may require repeated slicing with an Xacto knife.

    2 boards: height = height of the tallest card + 0.5" || width = width of widest card + 0.25"
    1 board: height = height of the tallest card + 0.5" || width = height of the sewn card stack
    19. Use Xacto knife or box cutter to cut book board into 3 pieces.
    Book Board Measurements
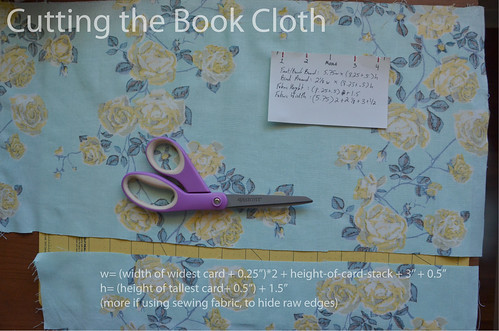
  24. Cut Book Cloth / Paper to Size.
    width = (width of widest card + 0.25")*2 + height-of-card-stack + 3" + 0.5"
    height = height of the tallest card + 0.5" + 1.5"
    20. Cut Book Cloth / Paper to Size
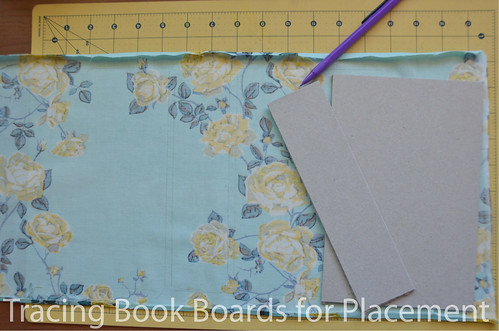
  25. Trace the book board piece placement onto book cloth.
    Spine is centered. 1/4" space on either side, then each of the front/back pieces on either side of spine piece.
    21. Trace the book board piece placement onto book cloth
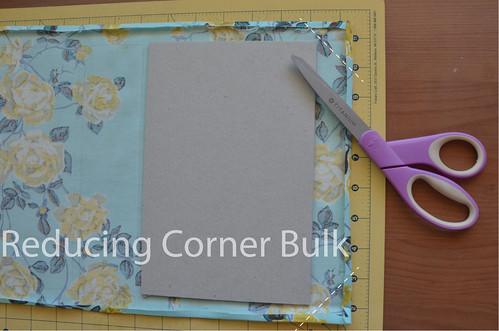
  26. Trim 4 corners off book cloth at 45 degree angle, 1/16" away from the book board.
    I didn't do this step with the sewing fabric, as I was afraid the cut would fray. Instead, I ironed 1/4" fold all around the fabric, so that the ends would be glued under.
    22. Trim 4 corners off book cloth at 45 degree angle, 1/16" away from the book board.
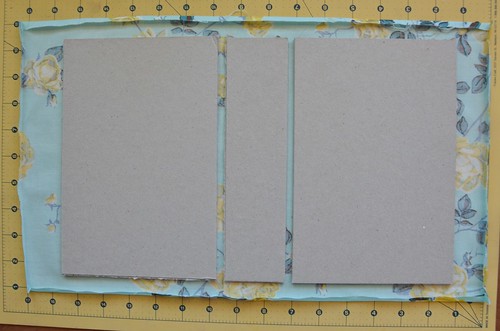
  27. Use PVA glue applied to the book boards to glue book boards to the book cloth.
    Edit: You may wish to cover the spine piece in card stock before gluing the book cloth down, leaving the book board exposed in the middle for the ribbon. This way the card stock ends will be hidden by the fold of the book paper/cloth. Although it may also make the spine less secure, so, who knows!

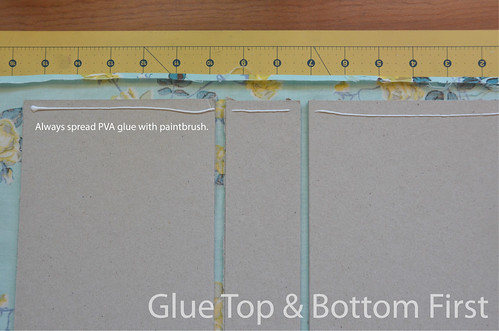
    Note: Spread the glue out with a paintbrush! Do not attach with globs! It may show through.
    23. Use PVA glue to glue book boards to book cloth.
  28. Probably should avoid Mod Podge...
    I did some experimentation with the back of the book. It may not look pretty, but at least it's sealed from the elements!
    Probably should avoid Mod Podge...
  29. Use PVA glue to secure top of book cloth to the book boards.
    24. Use PVA glue to secure top of book cloth to the book boards.
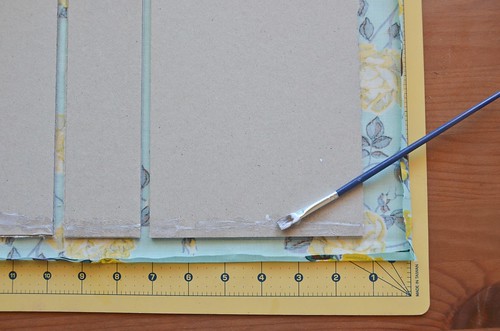
  30. Repeat for the bottom of book boards.
    25. Repeat for the bottom of book boards.
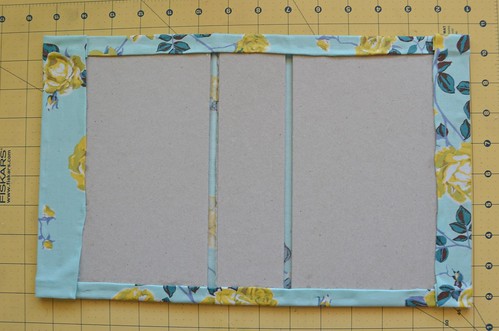
  31. Glue the sides of the book cloth to the book boards.
    26. Glue the sides of the book cloth to the book boards.
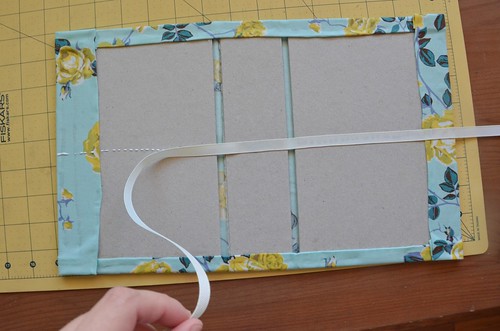
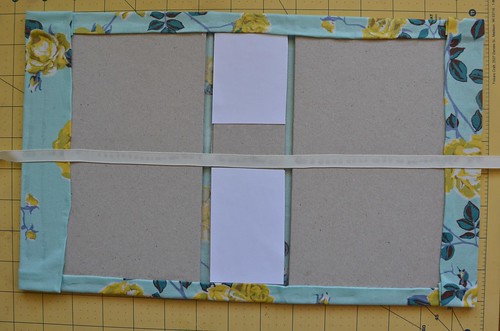
  32. Center ribbon, and glue across book boards and cloth.
    Ribbon needs to be long enough to wrap around the card stack and tie into a bow.
    27. Center ribbon, and glue across book boards and cloth.
  33. Glue card stock scraps to top & bottom of spine.
    ( If not done at Step 23)
    28. Glue card stock scraps to top & bottom of spine.
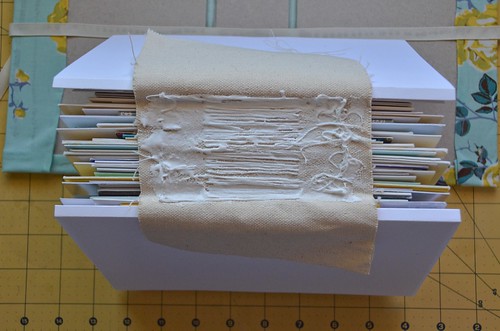
  34. Spread out glue on binding canvas.
    29. Spread out glue on binding canvas.
  35. Press binding canvas with wet glue to book board spine (centered).
    30. Press binding canvas with wet glue to book board spine (centered)
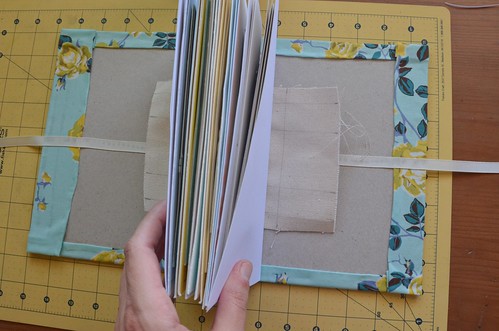
  36. Glue canvas strip to book board.
    31. Glue canvas strip to book board.
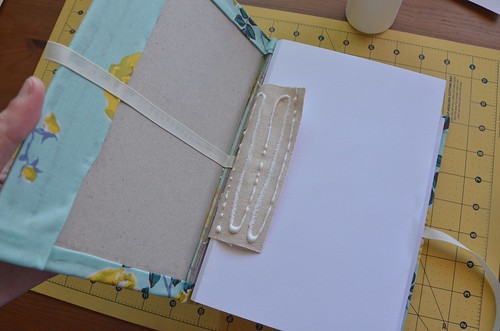
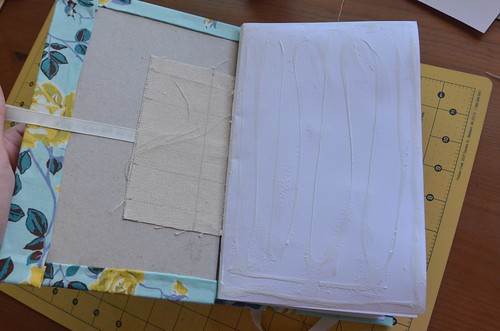
  37. Glue card stock endpaper over canvas strip and onto book board and cloth.
    !!! Be sure to spread glue to very edges of cardstock so it doesn't come up! !!!
    32. Glue card stock endpaper over canvas strip and onto book board and cloth.
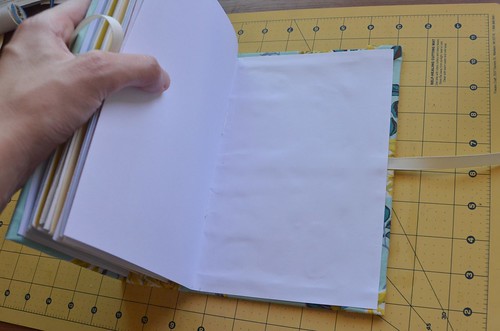
  38. Press out bubbles in cardstock endpaper as best you can.
    33. Press out bubbles in cardstock endpaper as best you can.
  39. Repeat for other endpaper. Close book and let endpapers settle for a bit (may require some wiggling).
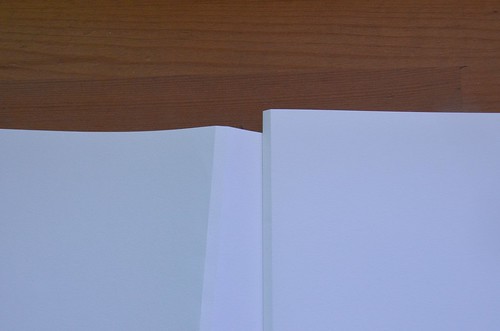
    Mine didn't settle quite right this time. I think next time I'd pay more attention to getting the endpaper folds to align with with 1/4" space between the bookboards.
    34. Repeat for other endpaper. Close book and let endpapers settle for a bit (may require some wiggling).
  40. Glue envelopes to endpapers, if desired.
    Envelopes can hold smaller notes and cards that are too small to fit with the rest.
    35. Glue envelopes to endpapers, if desired.
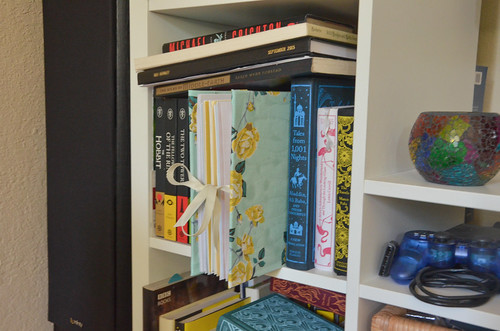
  41. The book needs to be press closed somehow and allowed to dry (I placed the spine in my bookshelf).
    36. The book needs to be press closed somehow and allowed to dry (I placed the spine in my bookshelf).
  42. Done!
    DIY Greeting Card Album

Finished Wedding Card Album
DIY Wedding Card Album
Accordion Card in DIY Card Album
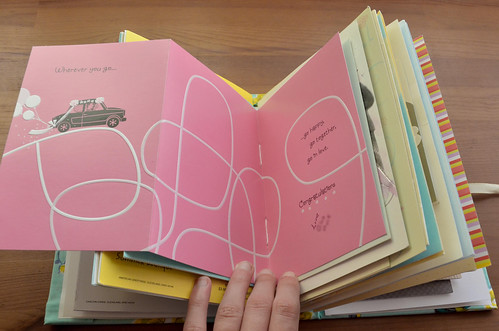
Inside the Handmade Card Album

Maybe I'll bind our advice cards next, although that'll require a different approach as they're single card, not folded. This method looks promising for binding single pages.