

Sunday, September 15, 2019
4 guests came to visit us, and the toilet handle broke and then sink got irrevocably clogged. And so we ended up with this upgrade.


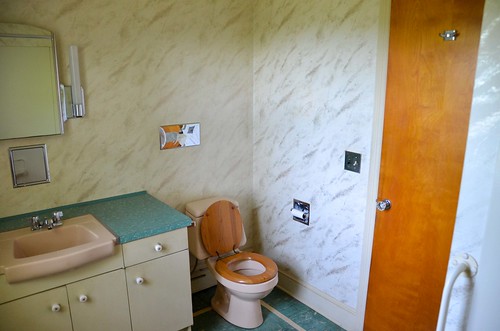


The vanity cabinet is the same one, original to the house, just repainted and some 2 inch trim added to the edge of the cabinet doors (like so, but wider trim). The cabinet just looked so cheap and basic beforehand, with uneven doors, odd cabinet knobs, and just super simple. But it is all wood, which is hard to find affordably, and that means it's easy to rehab with some paint and elbow grease.


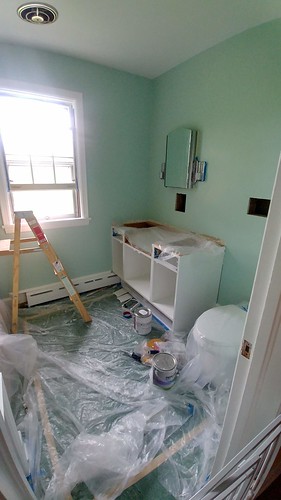
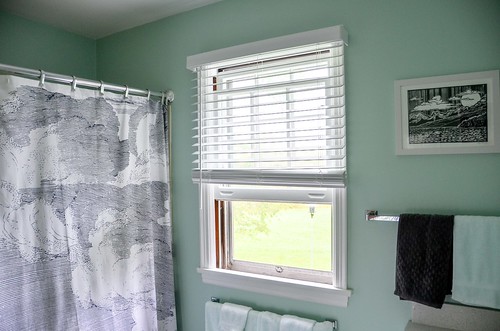
I followed the deep dive painting process exactly, although, as in the upstairs bath, I also taped off everything a little more fastidiously than typical. Small spaces can be tricky. Ceiling paint is Rustoleum PermaWhite in eggshell, which is mold and mildew proof, not just resistant! Trim & cabinets are Benjamin Moore Advance water-borne alkyd paint in the white straight from the can, semi-gloss. Such a pain, but so much smoother than typical latex paint. I even painted the windows completely! I typically greatly procrastinate on this part, but I did the uppers and lowers in one go, and it's done and I don't have to do it again.


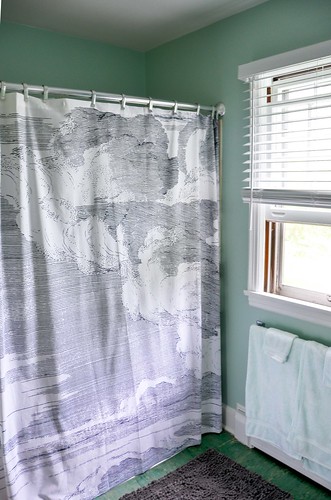
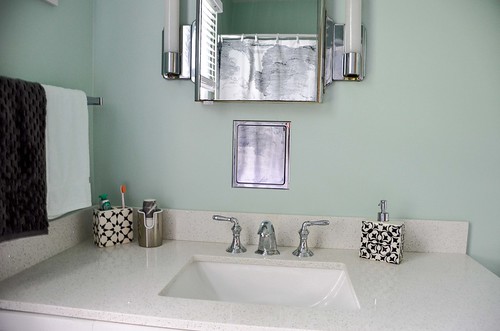
Walls are done in Benjamin Moore Aberdeen Green in Regal Select in a pearl finish (once again, more mold resistant than flatter finishes). It is not really a soft neutral as some would have you believe. It's really full-on, in-your-face mint. I love aberdeen green in this space with the white accents, but there's nothing subtle about it.

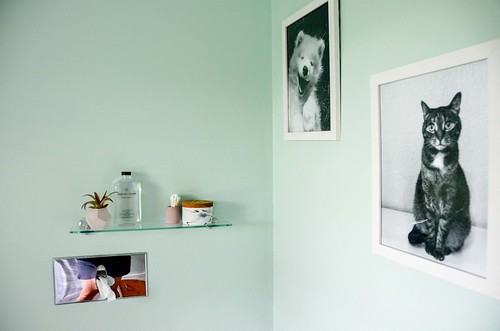
West Elm's Cloud Shower Curtain really brings home the black & white accents here. The blockprint on the wall is out of print from etsy/RiseandWander. Cement containers in blush and marble are from etsy/CedarandStoneGarden, and the soap dispenser + toothbrush holder are the Mallorca line from Target. I have a severe soft spot for Islamic tile.


1 comments:
Omg the last picture - that's the cutest. Y'all did some amazing work on the existing vanity. I need to send you some pictures of our master bathroom to get some tips. Also, is that an original light fixture because I love it
Post a Comment