How To: "Lighten Up" LED-Embellished Tote Bag

Saturday, May 29, 2010

This is the silliest thing I have ever created. And that's saying a lot.
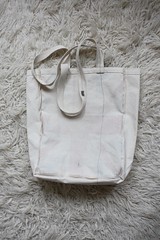
Closure-Sensitive Tote Bag

Remember when you were a kid, and you made a potato (or lemon) battery by hooking a potato up to a light with two pieces of wire? Well, this is a slightly more crafty version of the potato battery...but we're using conductive thread instead of wires, and a coin cell battery instead of a vegetable, and sewable LED lights instead of a light bulb!

Some friends and I are running a multi-session technology workshop for some local middle school girls from Gwen's Girls this summer. I needed to create a demo project to give the girls some ideas for their own project. If middle school girls can do it, there's a high chance that any craft person could, too!

What I did is very simple, and you can probably do it, too! (No electronics-knowledge required! Just sewing!)

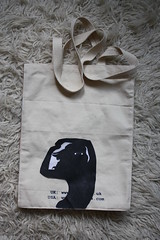
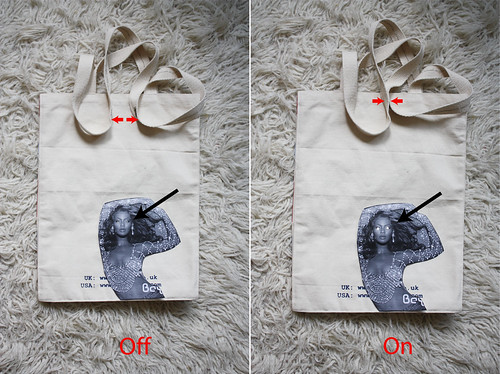
I made a tote bag with the image of Beyoncé on it. When the straps of the bag are connected (i.e., the bag is "closed"), then Beyoncé's eyes light up. Basically, it's a switch, and when the straps are connected it closes the circuit, supplying power to the LED lights. When the straps are not connected (i.e., the bag is "open"), then the lights are off.


Step 0: Materials
Note: The electronics we're working with are very low power. You will not shock yourself. It will all be okay :)

A Tote Bag or some other piece of fabric/clothing to sew electronics into
An image to act as the "body" for the LED light "eyes"
1 Sewing Needle (I use a smaller embroidery needle, since the conductive thread is thick, but the holes to sew the battery are relatively smaller. You may need to try a few different sizes of needles before you find one that works for both)
2 LilyPad LEDs
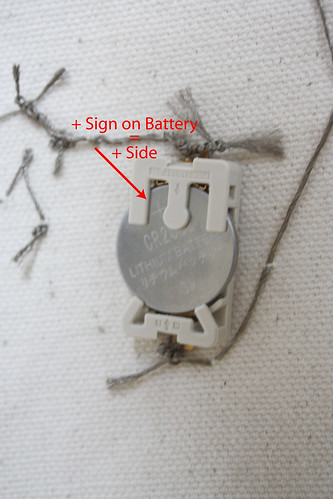
1 20mm Coin Cell Battery inside 1 Sewable Coin Cell Holder
Some Conductive Thread
Total Electronics Cost: About $12, plus shipping & handling
(Alternatively, SparkFun sells a LilyPad E-sewing Kit for about $50, if you plan on doing more than just this one project)

Step 1: Sew Positive Sides of Battery and LEDs together with Conductive Thread

The diagram above illustrates how you'll be attaching the parts involved, with conductive thread. The first step is to sew the plus-sides of the LEDs and the plus-side of the battery together (the green dashed line in the picture). Secure the end of the thread with some knots (as you would normal, sewing thread). The LEDs should be on the outside of the bag, and everything else should be on the inside. You should sew through the holes of the plus-sides a few times, securing the piece in place.

If at any time you run out of thread while sewing one of the three lines of thread, just cut another piece and make sure the new pieces touches (several times) the "old" piece. The electric current needs to be able to run through the entire line of thread.
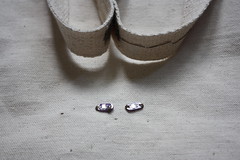
Plus-Sign Engraved in Battery


Step 2: Sew Negative Sides of LEDs Together and Up Strap

Following the diagram above, use conductive thread to connect the minus-sides of the LEDs to each other. MAKE SURE TO NOT INTERSECT THE THREADS FROM THE PREVIOUS STEP WITH THIS LINE OF THREAD.

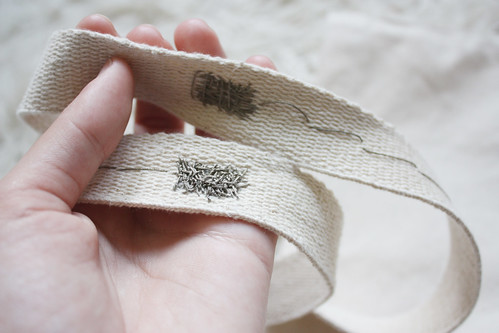
Using a running stitch (trying to make the thread not appear on the right-side of the bag), sew up to the top/middle of strap #1. Once you get to the top of the strap, using satin stitch sew a rectangle with the conductive thread. Secure the end of the thread with some knots (as you would normal, sewing thread).
Satin Stitch "Thread Patches"


Step 3: Sew Negative Side of Battery Up Strap #2

Following the diagram above, sew a few stitches through the minus-side of the battery to secure it in place (using conductive thread). This is denoted by the orange dashed line in the figure. MAKE SURE TO NOT INTERSECT THE THREADS FROM THE PREVIOUS STEPS WITH THIS LINE OF THREAD.

Then, using a running stitch, sew to the top of the second strap (you probably need to go under the bottom of the bag and up the other side). As before, use a satin stitch to sew a rectangle with the conductive thread. Make sure the two rectangular conductive embroidery patches will connect when you put them together.
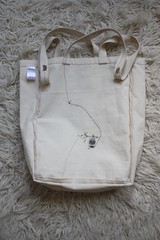
Inside the Tote Bag Inside the Tote Bag (the other side)


Step 4: Test the Bag by Pressing Straps Together

When you press the two satin-stitched thread patches to each other, the LEDs on the outside of the bag should light up. If not (or if it lights up all the time) you either (1) connected something wrong or (2) some of the threads that should not be touching are touching. Make sure the three different pieces of thread (denoted by different colors in the diagram) do not touch each other, except at the straps!
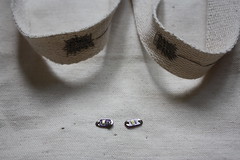
LEDs Off LED Lights On


Step 5: (Optional)Attach Image Over LEDs
I chose to attach an image over my LEDs, to "pretty them up" and give them a purpose as eyeballs. This might make a good Halloween project...

Step 6: You're Done!
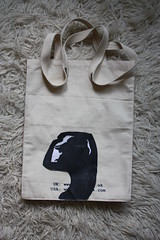
Shadow Tote, Lights Off Shadow Tote, LEDs On

Your bag should now be functional!
Think of what you could do with a buzzer or a tri-color LED instead of just single-color LEDs! If you want to get more advanced, you're going to want to check out the rest of the LilyPad Series including the arduino, and different sensors (light sensor, microphone, temperature, etc.). These more advanced projects will require some programming ability...

This Happened: Fate and a Camera

Thursday, May 27, 2010

The Old Port of Mykonos

Last June, I was in the Greek Islands (for work!). Halfway through my trip, I was sitting on a beach in Santorini at 9am, just before having to leave to catch a ferry to the next island. I laid my towel down on the empty beach and dug my feet into the sand, only to find an abandoned digital camera. I flipped through the photos, I could identify Turkey as well as the very beach I was sitting on. Running short on time, I delivered the lost camera to the scuba dive shop located directly behind me, and headed to the harbor.

After a day and night on Mykonos, wandering about the town, there was someone new checking into the room next to me. He was asking about things to do in town, things I had already stumbled upon. I offered to show him around and we had dinner. As a conversation topic, I mentioned the digital camera that I had found. He looked at me, surprised, "Whose digital camera?!" Earlier in his trip he had traveled to Turkey to visit family, and ended up on that same Santorini beach, where he lost his camera (and more importantly, the photos on the memory card).

Despite numerous phone calls to the dive shop, who repeatedly insisted that I was lying and that none of their employees would ever steal, his second camera search yielded nothing but a good story.

I'm not sure how two people end up at the same stretch of a smaller beach, and then a day and a half later check-into the same hotel on another island 2 hours away. Do you believe in kismet?
Paradise Beach

"Secret Garden" by Michelle Armas at UrbanOutfitters

Tuesday, May 25, 2010

Have you ever found a painting that speaks to you? Each time you see it again, you find things you never noticed before? Looking at it fills you with some strong emotion?

New Bedroom Artwork

I was driving through Pittsburgh's Southside Works when I spotted two young women carrying the above giant canvas down the street. I already own a smaller version of the print, so I contacted the artist, Michelle Armas to see if she had a local distributor. Turns out, UrbanOutfitters is carrying a 4'X3' version of the "Secret Garden" painting that I've been in love with since before December.
New Bedroom Artwork

If I had seen it in the store instead of on the street first, I probably would have had a heart attack on the spot. I love this painting. And now, it's displaced my Salvador Dali print, which waits patiently on the floor :(
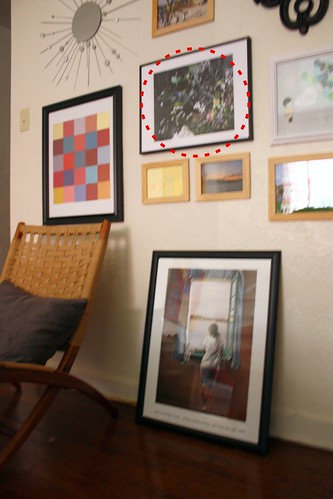
"Person at the Window" (by Salvador Dali) Displaced to the Floor...
This Happened: Underage Molester of Minors

Sunday, May 23, 2010

Feet at the Beach

Underage Molester of Minors (aka "The Child Molester")
I had a brief flashback yesterday, back to 2003 at the Jersey shore with my friends from high school. There were three of us, 17 years old or so, swimming in the ocean. Every time a wave hit, some random ~12 year old boy would be pushed into us with the force of the water. At first we thought it was an accident, then we realized his hands were brushing over our legs each time. So, G accidentally smacked our underage molester with the next wave, and with the surprise he swallowed a good mouthful of salt water.

Retribution can be hilarious.

Success: Wiksten Tulip Skirt

Friday, May 21, 2010

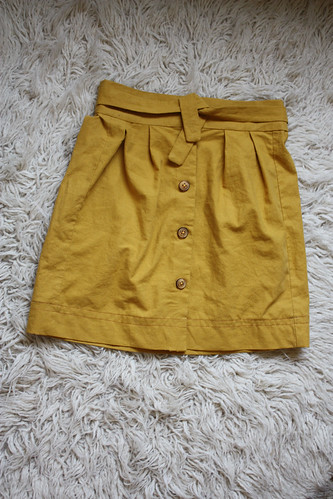
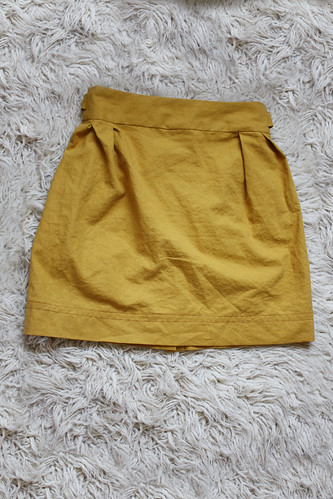
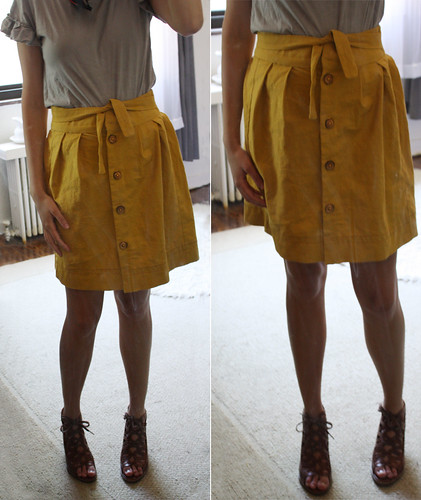
Tulip Skirt Sewn from Wikstenmade's Stitch Winter 2008

Button- and tie- front skirts have been showing up everywhere (including Steven Alan), and I jumped on the bandwagon. This skirt was sewn from the pattern by Jenny Gordy of Wikstenmade in the Winter 2008 issue of Stitch Magazine.

Be sure to check out the list of pattern errors beforehand! (Something I did not do...)
Tulip Skirt Sewn from Wikstenmade's Stitch Winter 2008

The color in the photos is far lovelier than the skirt's color in person (think a pale marigold with a sort of pea green added in), but it's slowly growing on me. The pattern is fairly simple to follow, once you figure out how to cut the pieces out. It's been a very long time since I've made something from a pattern, but I was able to succeed with relatively few major errors.

It's handy to keep in mind that the skirt sits on the natural waist, but modifying it to land at the hip would not be overly difficult (go up a size, then make the front/back/placket pieces shorter). I've also seen a few versions in the wikstenmade flickr pool of the skirt with buttons at the top instead of the hook/eye and tie closure.
Tulip Skirt Sewn from Wikstenmade's Stitch Winter 2008

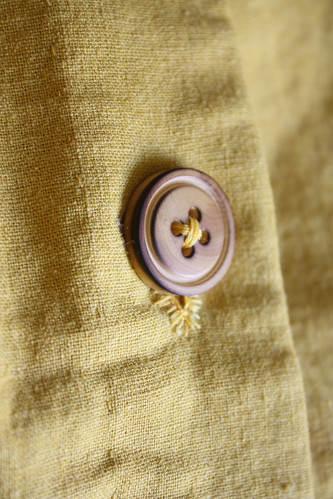
I don't trust my sewing machine from the 70s' ability to make button holes ( I tried ~10x and was still having difficulty), so I followed Cal Patch's tutorial for sewing a buttonhole by hand. I think this method worked out okay, but I recommend practicing a few times before doing it on the real garment.
IMG_3975

How To: Peter Pan Collar Tank Top

Wednesday, May 19, 2010

How To Peter Pan Collar Tank Top

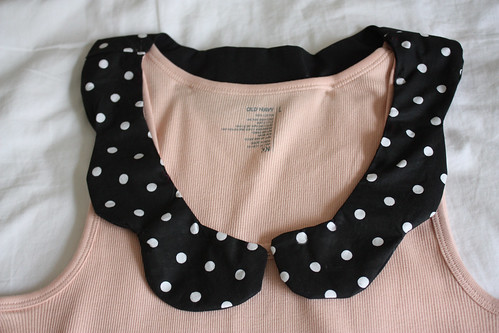
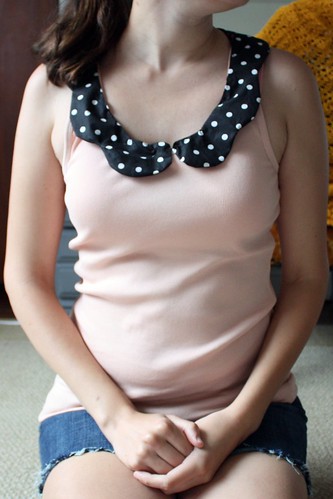
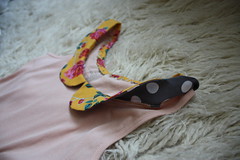
I saw this peter pan collar tank top (shown below) from UrbanOutfitters and figured I could do something similar with what's already in my closet. I took an Old Navy Perfect Tank and gave it a wavy peter pan collar. The black polka dot collar is just a first draft (as is the pattern, which needs some tweaking). I have new fabric coming in the mail for the final version. I'll post photos when that's done, but I wanted to get this up speedily.

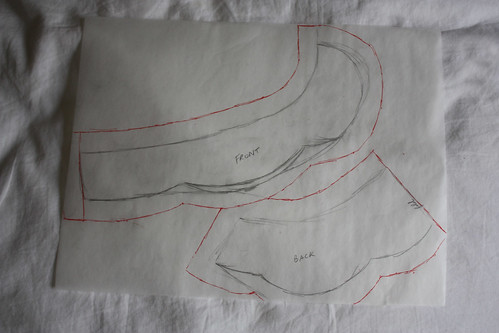
Anyways, if you want to use the provided peter pan collar pattern (below) you can skip a few steps, to where you start cutting the pieces out of the fabric. Otherwise, follow steps 1-5, which were inspired by a tutorial for a detachable peter pan collar.


Step 0: Materials
Materials: Pre-washed Tank top (I used an Old Navy perfect tank, size L). Pre-washed fabric for the collar, Pre-washed facing fabric, pins, needle/thread, tracing paper, pencil, scissors...

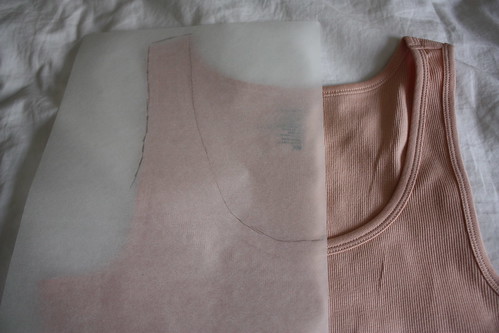
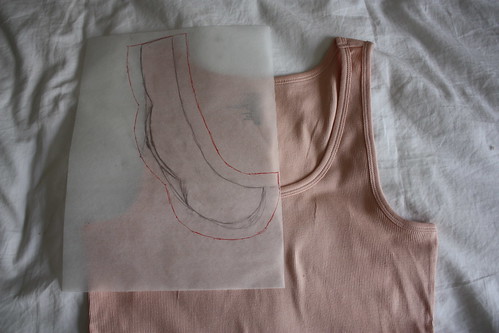
Step 1: Trace Outline Half of front Neckline

Trace over the curve of the front neckline on the tracing paper. you may also want to trace the width of the tank straps, as shown.
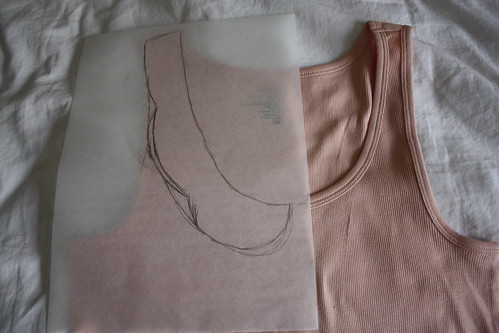
Step 2: Draw-in Desired Collar Shape

Using the pencil, draw in the desired peter pan collar shape.

Step 3: Outline 5/8" Around Collar Shape

Draw an outline, 5/8 of an inch outside of the collar shape (you'll need 3/8" for the seam allowance, and 2/8" extra).

Step 4: Trace the Back Neckline of Tank Top

Just as you did with the front, trace half the back neckline of the tank top.

Step 5: Draw in Collar Shape with 5/8" Outline
Step 5a: Draw in Collar Shape with 5/8" Outline

Just as you did with the front collar piece, draw in the desired collar shape for the back, and then outline 5/8" outside of that shape.

IMPORTANT: Add about one extra inch (or half inch) to the strap-side of the back tank top piece. Otherwise, the back collar won't drape low enough.

Remember, you could use the provided pattern, if you're working with a size Large Old Navy Tank.


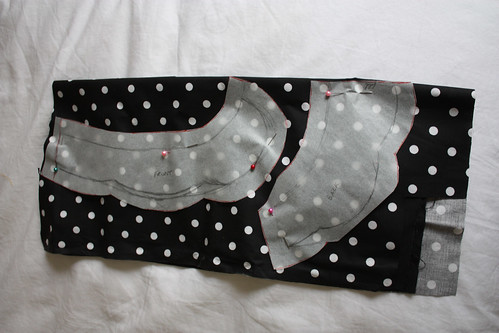
Step 6: Fold Facing & Lining Fabric in Half, then Pin Pieces
Step 6: Fold Facing & Lining Fabric in Half

- Cut out the pattern pieces
- Lay the facing and fabric wrong-sides up on top of each other.
- Fold fabric pieces in half, together, in a way that the pattern pieces can fit.
- Pin the front pattern piece to the middle of the folded fabric.
- Pin the back pattern piece along the fold of the fabric. Be sure to pin the "fold" of the pattern piece, and not the strap side.

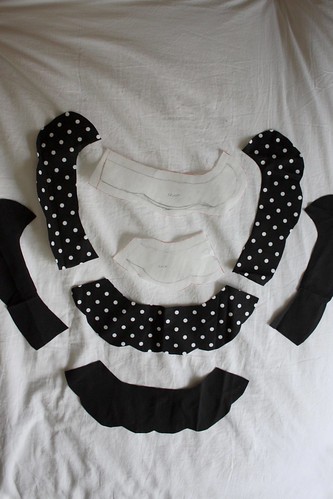
Step 7: Cut Pieces from Fabric

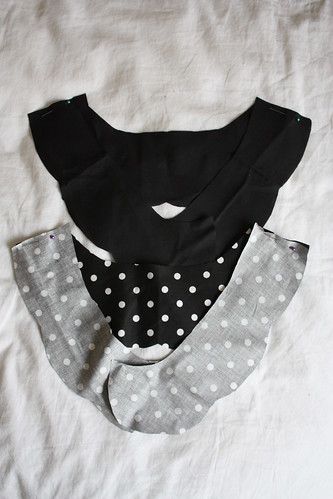
Cut the pieces from the fabric, You should have 6 pieces, as shown.

Step 8: Pin Edges Together and Sew with 5/8" Seam Allowance

Pin the connecting edges of the facing and fabric pieces together, right-sides facing each other. Then sew along the edges, using a 5/8" seam allowance.

Step 9: Iron Allowances Open then Pin Facing and Fabric Together

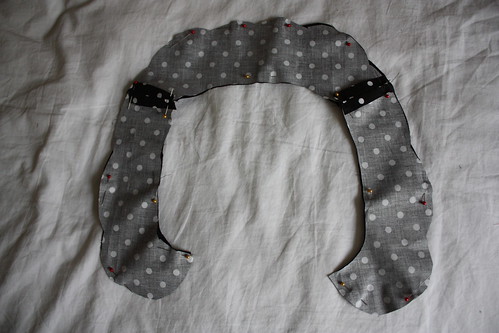
Iron the 4 seams open, as shown. Then, with right-sides facing each other, pin the facing and fabric collars together.

Step 10: Start at a Seam and Sew Around Collar
Step 10a: Start at a Seam and Sew Around Collar

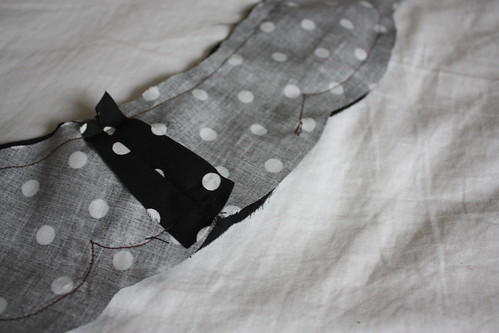
Start at one of the ironed seams, and sew around the collar using a 3/8" seam allowance. DO NOT SEW ALL THE WAY AROUND. Be sure to stop 2 inches early (aas shown).
Step 10b: Sew Around, Stopping 2" Short

You probably don't want to sew the curves as drastically as I did.
Be sure to cut divots out of the seam allowances anywhere there is a point or a curve.

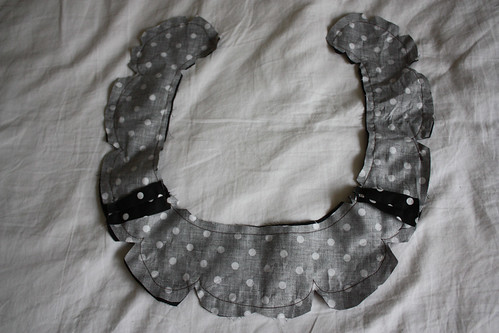
Step 11: Flip Rightsides Out then Sew Closed

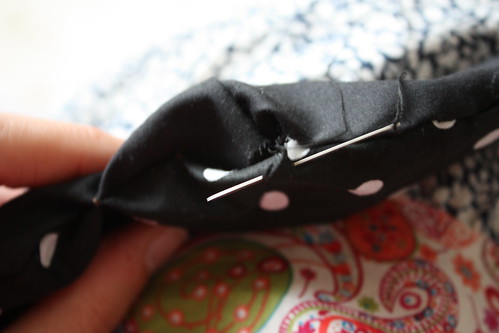
Using the 2 inch hole you left, pull the right sides of the fabric through. Then, sew the hole closed using a slip stitch (tutorial here).

Iron the collar flat.

Step 12: Pin the Collar to the Front & Back of the Tank Top
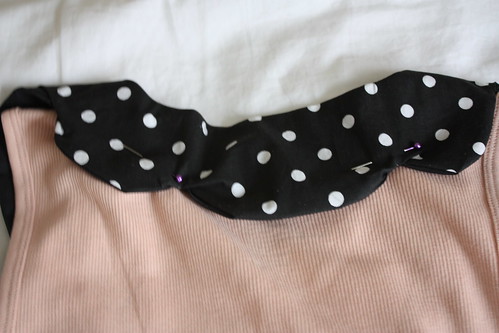
Step 12a: Pin the Collar to the Front of the Tank Top

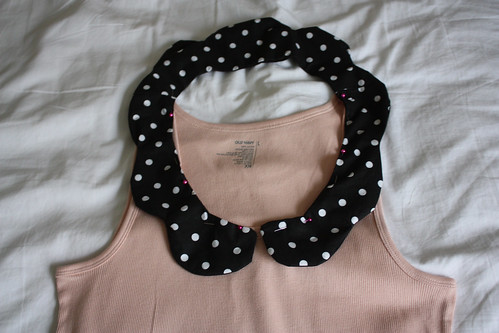
Pin the collar along the front neckline of the tank top. Then, do the back.
Step 12b: Pin the Collar to the Back of the Tank Top


Step 13: Sew Collar to Tank Top and You're Done!

Using the slip stitch (tutorial here), attach the collar to the neckline of the tank top and you're done!

[Edit 5/30/10: The completed Peter Pan Tank Top with Anna Maria Horner's "Garden Party: Social Climber" fabric.]
Peter Pan Collar Tank Top #2 Peter Pan Collar Tank Top #2

Success: Baked Falafel

Monday, May 17, 2010

Baked Falafel from Chow Vegan

To celebrate the beginning of summer, I had a friend over (aka 'Madeleine Clark') and we tried out Chow Vegan's recipe for baked falafel. I may've drained the canned chickpeas too long, for the falafel mixture ended up being a bit too dry to stick together well. I tried the recipe a second time with the food processor (instead of fork-mashing), and added some extra cumin. The mixture came out a bit mushy, but it worked anyways.

Both methods were really simple and really good, especially with some hummus and cucumber slices.
Baked Falafel from Chow Vegan

Penguin Classics: "Alice in Wonderland"

Saturday, May 15, 2010

Penguin Classics "Alice in Wonderland"

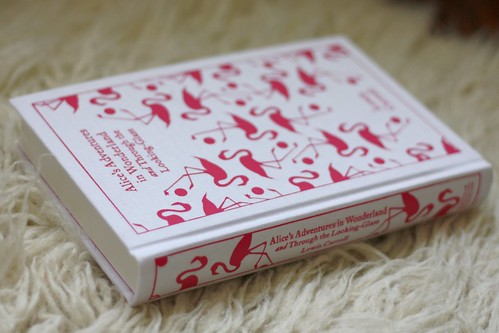
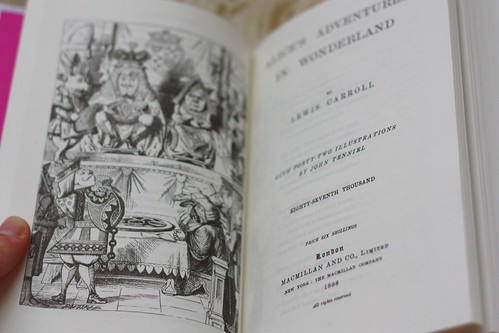
My Penguin Classics Alice in Wonderland book came in the mail the other day. Love the fabric cover with graphic design!
Penguin Classics "Alice in Wonderland"

...and the etched illustrations spread throughout.