

Sunday, May 13, 2012
'Just a warning, this thing takes forever to cut/assemble/sew. Maybe 4-6 hours for a single six inch block, although I was figuring out a lot of things as I went along. A second one would probably take half the amount of time ;) Also, just like the other mini quilt blocks on this blog, this miniature bear claw quilt block would make a stupendous lavender sachet as a gift for Mother's Day.
Another tutorial inspired by Rhonda, but with my annotated photos.
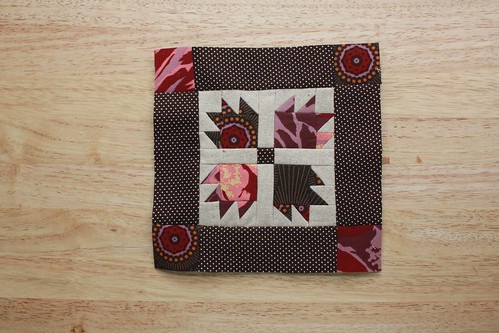
Bear Paw Mini Quilt Block Tutorial
Makes a quilt block approximated 5" square (I added some outer sashing to make it 6" square)
Notes
- All seams are 1/4".
- Iron each seam open.
- Measure/trim to make sure the HSTs are the same size.
- If the fabric is sliding as you sew, use pins or baste.
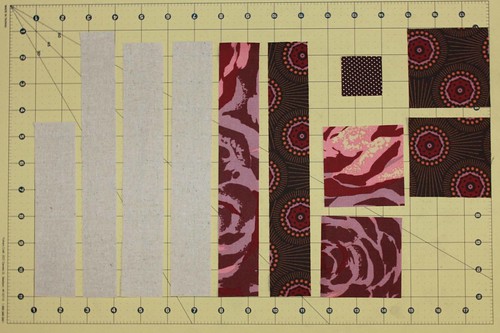
Materials
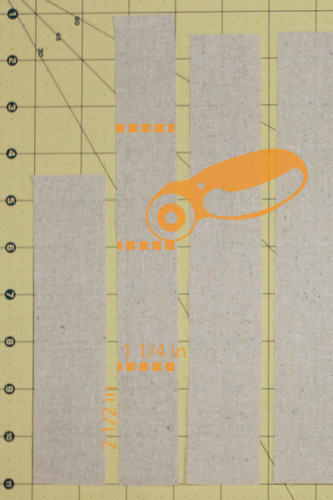
1x strip of fabric color A (light), 1 1/2" X 6 1/2" --> corner squares
1x strip of fabric color A (light), 1 1/4" X 10" --> inner sashing
2x strip of fabric color A (light), 1 1/2" X 9 1/2" --> two sets of claws
1x strip of fabric color B (dark1), 1 1/2" X 9 1/2" --> one set of claws
1x strip of fabric color C (dark2) 1 1/2" X 9 1/2" --> one set of claws
1x strip of fabric color B (dark1) 3" X 6" (or 2" X 4" to conserve fabric) --> two paws
1x strip of fabric color C (dark2) 3" X 6" (or 2" X 4" to conserve fabric) --> two paws
1x square of fabric color B or C (dark) 1 1/2" X 1 1/2" --> center square, will be cut down
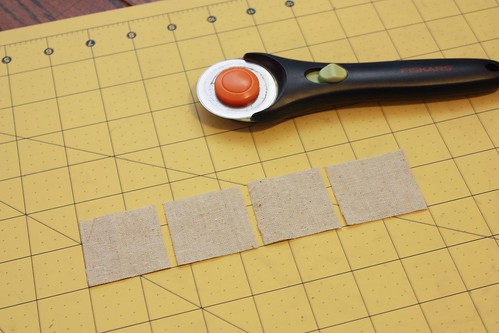
1 1/4" Square Template (I cut this from cardboard, so I wouldn't have to purchase anything)
Rotary cutter, Mat, Ruler, Thread, Sewing Machine, etc.
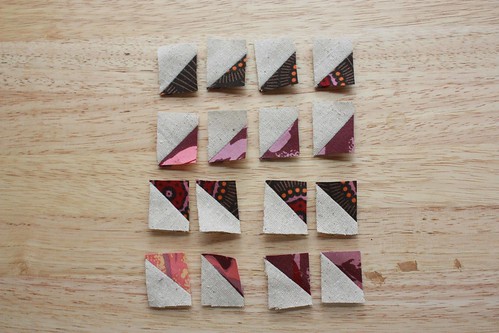
Step 1: Make two sets of 8 Half Square Triangle (HST) Squares
Using a strip of fabric color A/light that is 1 1/2" X 9 1/2" and one strip of fabric color B/dark1 of the same size, produce 8 HST Squares. See the BYOV tutorial for making HST Squares, here. With the remaining strip of fabric color A/light that is 1 1/2" X 9 1/2" and one strip of fabric color C/dark2 of matching size, produce 8 more HST Squares. You will have 16 total HST Squares with all of them made with fabric color A/light, and half with B/dark1 and half with C/dark2. Measure/Trim the HST Squares to ensure they're the same size.
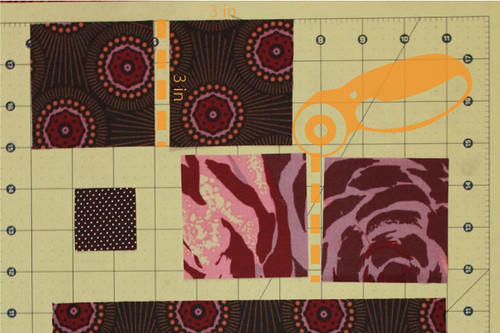
Step 2: Cut the two dark 3" X 6" strips in half
Cut the two dark 3" X 6" strips in half, producing 2x 3" squares in color B/dark1 and 2x 3" squares in color C/dark2.
Step 3: Cut the strip of color A/light 1 1/2" X 6 1/2" into quarters
Cut the strip of color A/light that measures 1 1/2" X 6 1/2" in quarters, producing 4x 1 1/2" X 1 5/8" ~squares. These are the "corner squares."
Step 3b: We're assembling a paw+claw in color B/dark1 first, set aside a 3" square and 4x HST Squares in color B/dark1
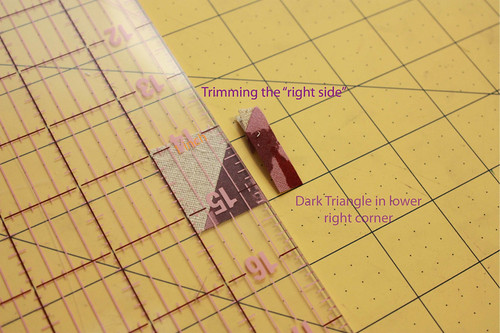
Step 4: Trim the right side of 2 of the HST Squares to 1"
Place a HST Square with the dark triangle in the lower right, as shown. Using the rotary cutter and a ruler, trim the width of the square to 1". Repeat for the second HST Square.
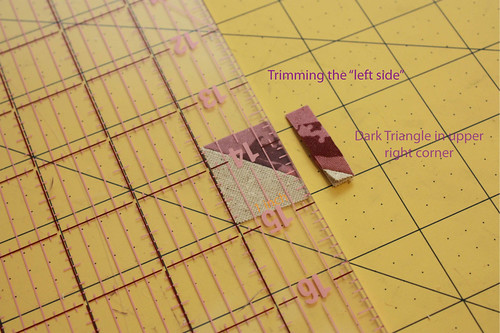
Step 5: Trim the left side of 2 of the HST Squares to 1"
Place a HST Square with the dark triangle in the upper right, as shown. Using the rotary cutter and a ruler, trim the width of the square to 1". Repeat for the second HST Square.

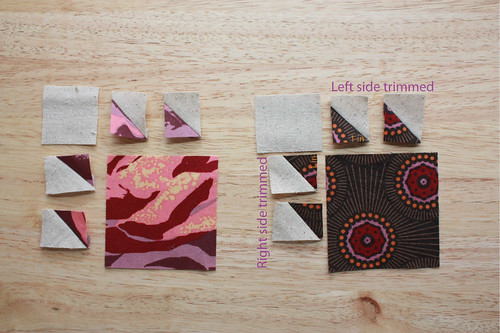
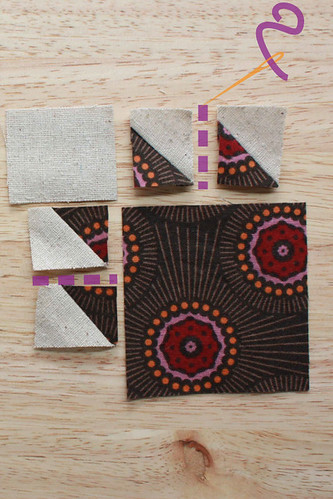
Step 6: Lay out the pieces of the paw+claw
Lay out the pieces of the paw+claw. This consists of: 1x 1 1/2" X 1 5/8" light corner square, 2x right-cut HST Squares, 2x left-cut HST Squares, and 1x 3" X 3" dark paw square.
Step 7: Sew both sets of HST Squares together
Sew both sets of the HST Squares together, according to the lay out, and remember to press the seams open.
Step 8: Sew the left set of HST Squares to the corner square and the right set of HST Squares to the paw square
Sew the left set of HST Squares to the middle of the light corner square (so you can trim to size later). Sew the right set of HST Squares to the top left of the dark 3" paw square, according to the layout.
Step 9: Trim the edges to be sewn together straight
It is a good idea to cut edges to be sewn together straight, so that they match up better. You should do this every time you are about to sew pieces together.
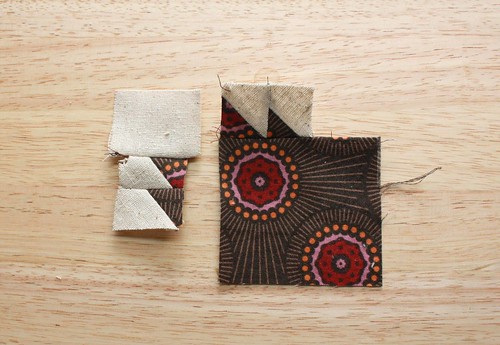
Step 10: Place the two pieces together, making sure that the 4-way center seam is lined up, then sew
Place the two pieces together, right sides facing each other. Make sure that the 4-way center seam is lined up with each other, or else you'll get an out-of-line wonky looking bear paw. Pinning the center together may be necessary. Sew the two pieces together and press the seams open.

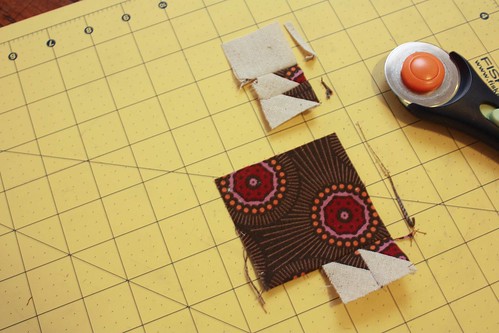
Step 11: Trim the claw pieces to be the same length
Using a rotary cutter and ruler, trim the claw pieces to be both straight and the same size (approximately 1 3/8").
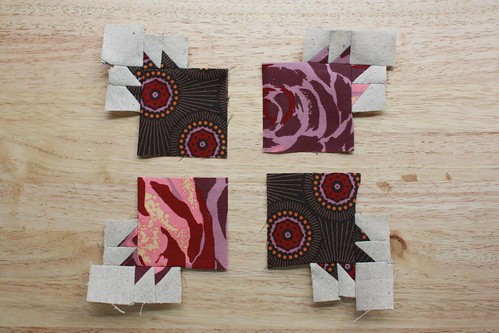
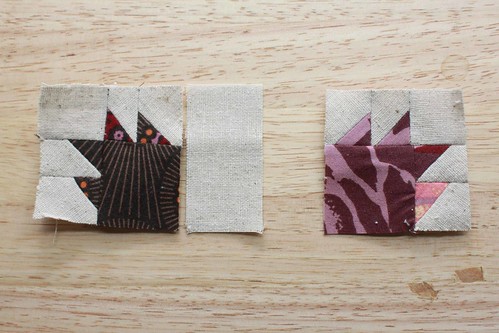
Step 12: Make 3 other paw+claw blocks. Trim blocks to be the same size
Repeat Steps 3-12 to make 3 other paws: 1 more in fabric color B/dark1 and two more in fabric color C/dark2. If you used the 3" dark paw square, it is oversized and you need to use the rotary cutter and ruler to trim it to the appropriate size.
Be careful when cutting the paw+claws to the same size! Try to make the dark paw squares the same in all four blocks.
Step 13: Cut the inner sashing strip into four pieces
Cut the inner sashing strip of fabric color A/light (1 1/4" X 10") into four equal pieces of 1 1/4" X 2.5". This sashing will go between the paw+claw blocks.
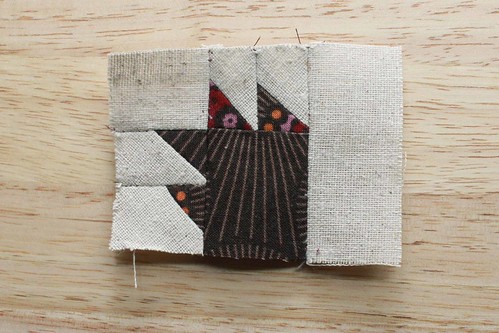
Step 14: Sew a sashing strip to the upper left paw+claw
Sew the sashing strip to the upper left paw+claw block. The strip does not need to be even with the top of the block, as it will be more accurate if you trim it later. As usual, iron seams open.
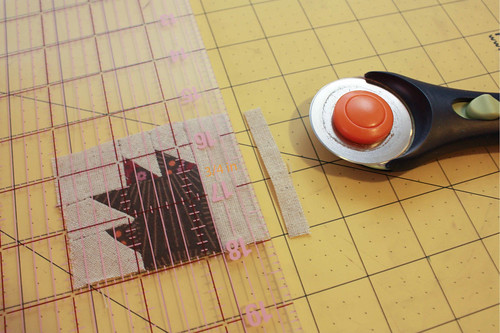
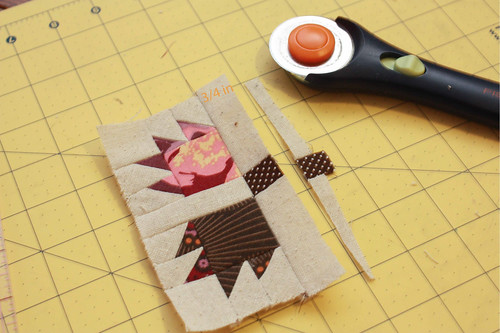
Step 15: Trim sashing from 3/4" of the seam
Measure and trim the sashing to be only 3/4" wide (measured from the seam).
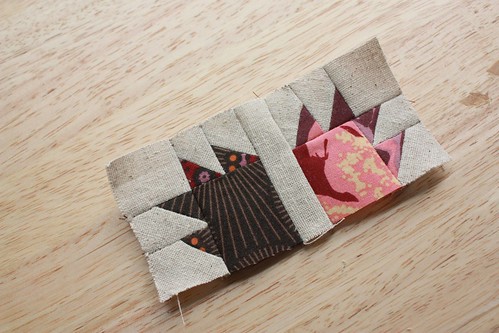
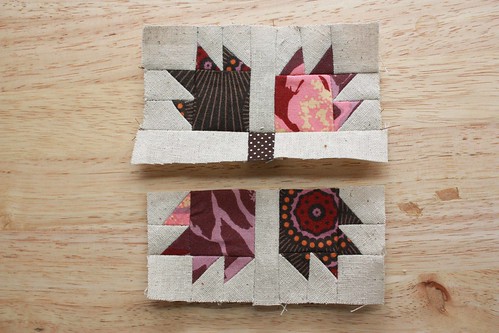
Step 16: Sew the upper left dark1 paw+claw+sashing to the upper right dark2 paw+claw
Sew the upper left dark1 paw+claw+sashing to the upper right dark2 paw+claw (note: two different dark1 & dark2 colors). Iron seams open.
Step 17: Trim the top and bottom of the sashing even with the paw+claw blocks
Trim the sashing strip to be even with the blocks on both the top and bottom. You may also have to trim some of the joined paw+claw blocks to ensure that they're straight.
Step 18: Sew the dark center square to another sashing strip
Sew the dark 1 1/2" X 1 1/2" center square to another sashing strip.
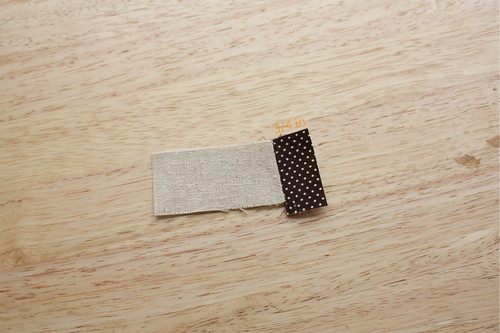
Step 19: Trim the dark center square to be 3/4" from the seam
Trim the dark center square to be 3/4" wide (measured from the seam).
Step 20: Sew another sashing strip to the other side of the dark center square
With a second sashing strip, sew it to the other side of the dark center square.
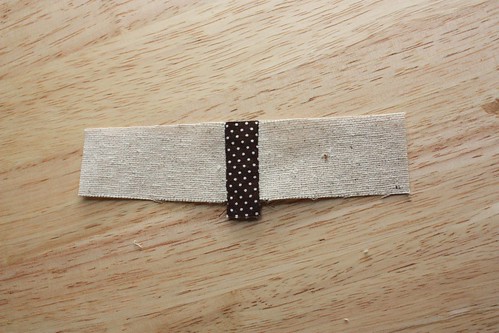
Step 21: Trim one side of the sashing+center strip straight
Before sewing a seam, make sure that the sashing+center strip is straight. This should generally be done for all seams.
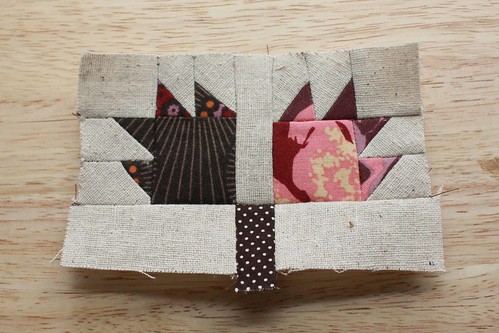
Step 22: Sew the joined paw+claw+sashing piece to the sashing+center strip and trim sashing 3/4" from seam
Sew the joined paw+claw+sashing piece to the sashing+center strip. You may need to use some pins to ensure that the joined sashing meets the dark center square seams appropriately. Trim the sashing+center square strip 3/4" from the seam.
Step 23: Repeat Steps 15-18, in pattern
Repeat Steps 15-18 in pattern (this means the lower left paw+claw block is dark2 and the lower right paw+claw block is dark1).
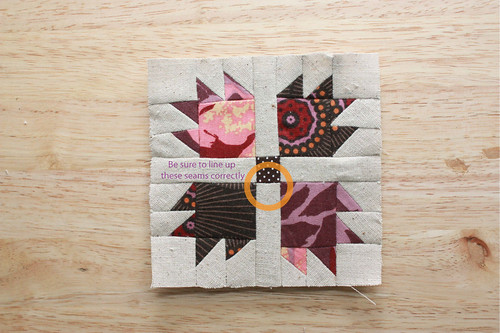
Step 24: Place the two pieces together, right sides facing, pinning where the sashing lines up with the center square, and sew
Place the two pieces you have together with right sides facing. Pin where the sashing lines up with the center square. These seams need to meet correctly, or the block will look wonky. Sew the blocks together and then iron the seams open.
Step 25: Trim the completed block to be square
You're almost done! The block is completed, but it needs to be measured and trimmed to a perfect square. Be careful when cutting to make sure that all the paw squares are cut to the same size. These sorts of differences can be rather noticeable in a finished product (like mine).
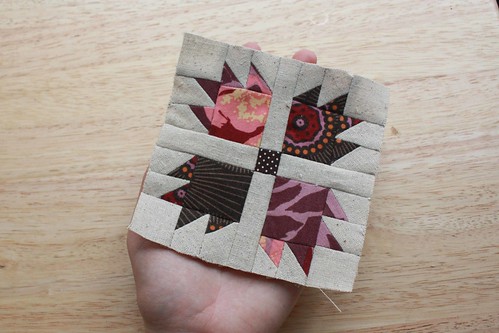
Done!


2 comments:
That looks challenging! Nice contrast with the natural tone and the pinks. Makes me want to finish that quilt I started ten years ago. :)
that is most certainly a labor of love. i often think of quilting and hopefully one day, i'll get the guts to do it. happy sewing!!
Post a Comment