

Friday, June 30, 2017
Follow along as I make Free Spirit Fabric's Double Wedding Ring Quilt.
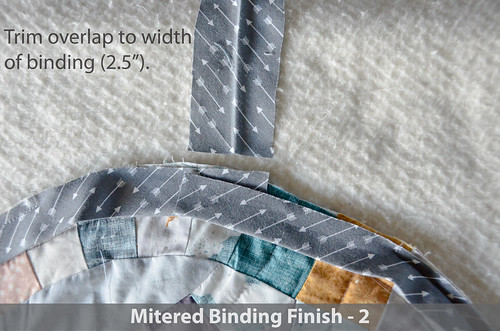
To connect the last 10" of the binding in a pretty mitered edge requires a couple of extra fancy steps.
- Leave 7" binding tails from start and end.

- Trim overlapping binding to the width of the binding (about 2.5").
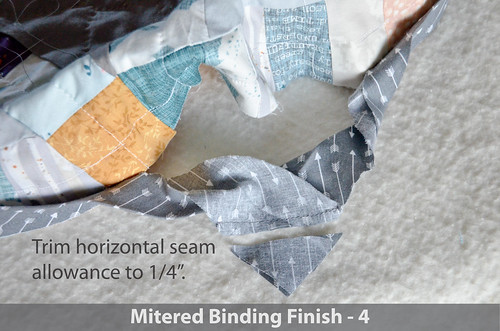
- Pin binding overlap, right sides together at a perpendicular angle and sew horizontal seam across.

- Trim horizontal seam allowance to 1/4".
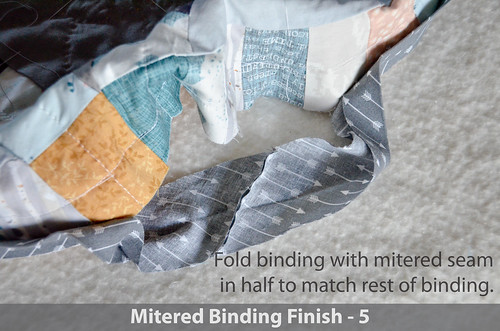
- Fold now mitered-seam binding in half
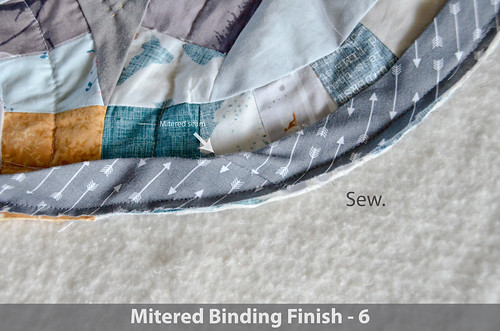
- Sew remaining bias to top of quilt as before.
- Start of the Double Wedding Ring Quilt! Materials!
- Step 1: Cutting the Rectangles
- Step 2: Sewing the Arcs
- Step 3: Removing the Paper Templates & Sewing Corner Squares
- Step 4: Assembling the Melons
- Step 5: Assembling the Circle Units & Rows
- Step 6: Attaching Circle Unit Rows
- Step 7: Quilt Back & Quilt Sandwich
- Step 8: Beginning Machine Quilting - Avoiding Bottom Threads & Backstitching
- Step 9: Hand Quilting
- Step 10: Attaching Binding to Front of Quilt
- Step 11: Mitered Join for the Binding
- Step 12: Attaching Binding to Back of Quilt
- Completed Double Wedding Ring Quilt Throw!


0 comments:
Post a Comment