

Sunday, July 2, 2017
Follow along as I make Free Spirit Fabric's Double Wedding Ring Quilt.
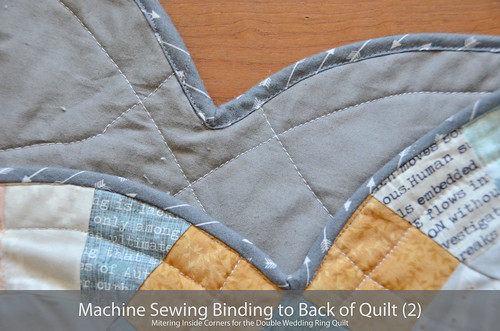
With the binding machine sewn to the top of the quilt, it's time to machine sew it over the edge, to the back of the quilt. This method will give you a seam right along the binding on the quilt top, but I think it looks alright so long as you do it properly. I'm still working on sewing straight, lol.
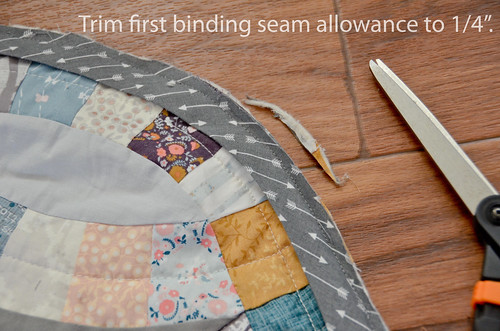
- Trim binding seam allowances to 1/4"
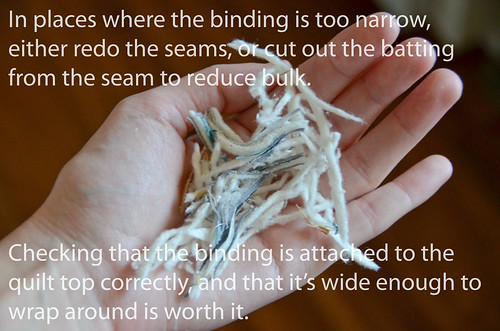
- Check that binding is wide enough to fold over and cover first binding seam. If not, either redo stitching (difficult!) or trim the batting out of the tight seam areas.
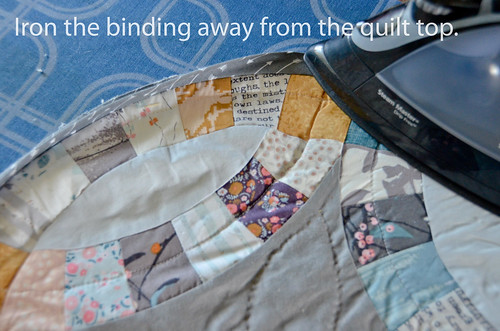
- Iron the binding away from the quilt top.
This is also a good time to check that the first binding seam caught all of the binding edge, with 1/4" seam allowance. This is tricky to fix, so hopefully no issues with this!
- Using pins or magic binder clips, fold binding over quilt edge.

- Pin a miter into the inside corners. Secure on both sides with a couple hand-stitches. Make sure binding will cover first binding seam!
Make sure binding will cover first binding seam!!

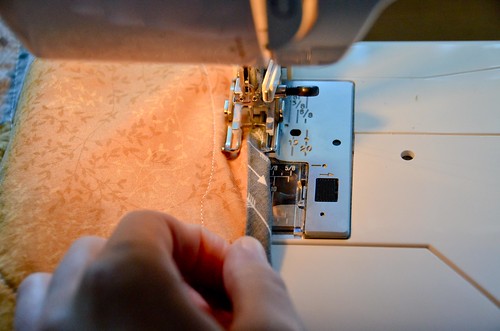
- Sew binding to quilt back, making sure your second seam is to the left of the first binding seam.

- Secure thread with small stitches and sew binding to back of quilt, being sure to sew just to the left of the first binding seam.
- (Optional) Make sure any sew-on labels are properly placed on the back when you sew the binding over them. This should work out alright if you basted the label in the previous stage.
Also note the binding on the top of the quilt not having 1/4" inseam, so it's showing. I had to Fray Check this section. Hopefully it sticks.

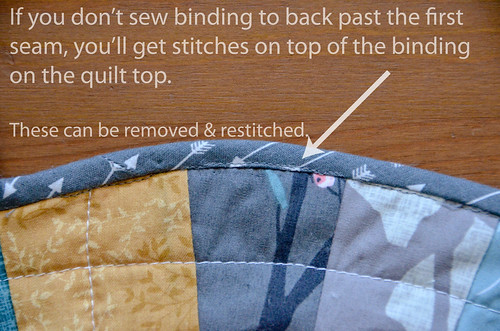
- If you didn't do Step 6 correctly, you'll have some seams showing on the binding on the top of the quilt. These are pretty simple to rip out and redo, starting/stopping with small stitches to secure thread. Check for flaws and fix.
- Start of the Double Wedding Ring Quilt! Materials!
- Step 1: Cutting the Rectangles
- Step 2: Sewing the Arcs
- Step 3: Removing the Paper Templates & Sewing Corner Squares
- Step 4: Assembling the Melons
- Step 5: Assembling the Circle Units & Rows
- Step 6: Attaching Circle Unit Rows
- Step 7: Quilt Back & Quilt Sandwich
- Step 8: Beginning Machine Quilting - Avoiding Bottom Threads & Backstitching
- Step 9: Hand Quilting
- Step 10: Attaching Binding to Front of Quilt
- Step 11: Mitered Join for the Binding
- Step 12: Attaching Binding to Back of Quilt
- Completed Double Wedding Ring Quilt Throw!


1 comments:
In step 8/9: I'm spatially challenged and trying to understand what the photos are showing. I "think" I am supposed to pull the binding to cover the stitches from the front side. What I want is to see is the binding covers the stitches made from attaching the first side, and the visible stitches should be on the binding itself and I should not see stitches on the quilt material.
Thank you for the tutorial as this is the first quilted thing I have made.
Post a Comment